
OPERATING MANUAL
1. DESCRIPTION
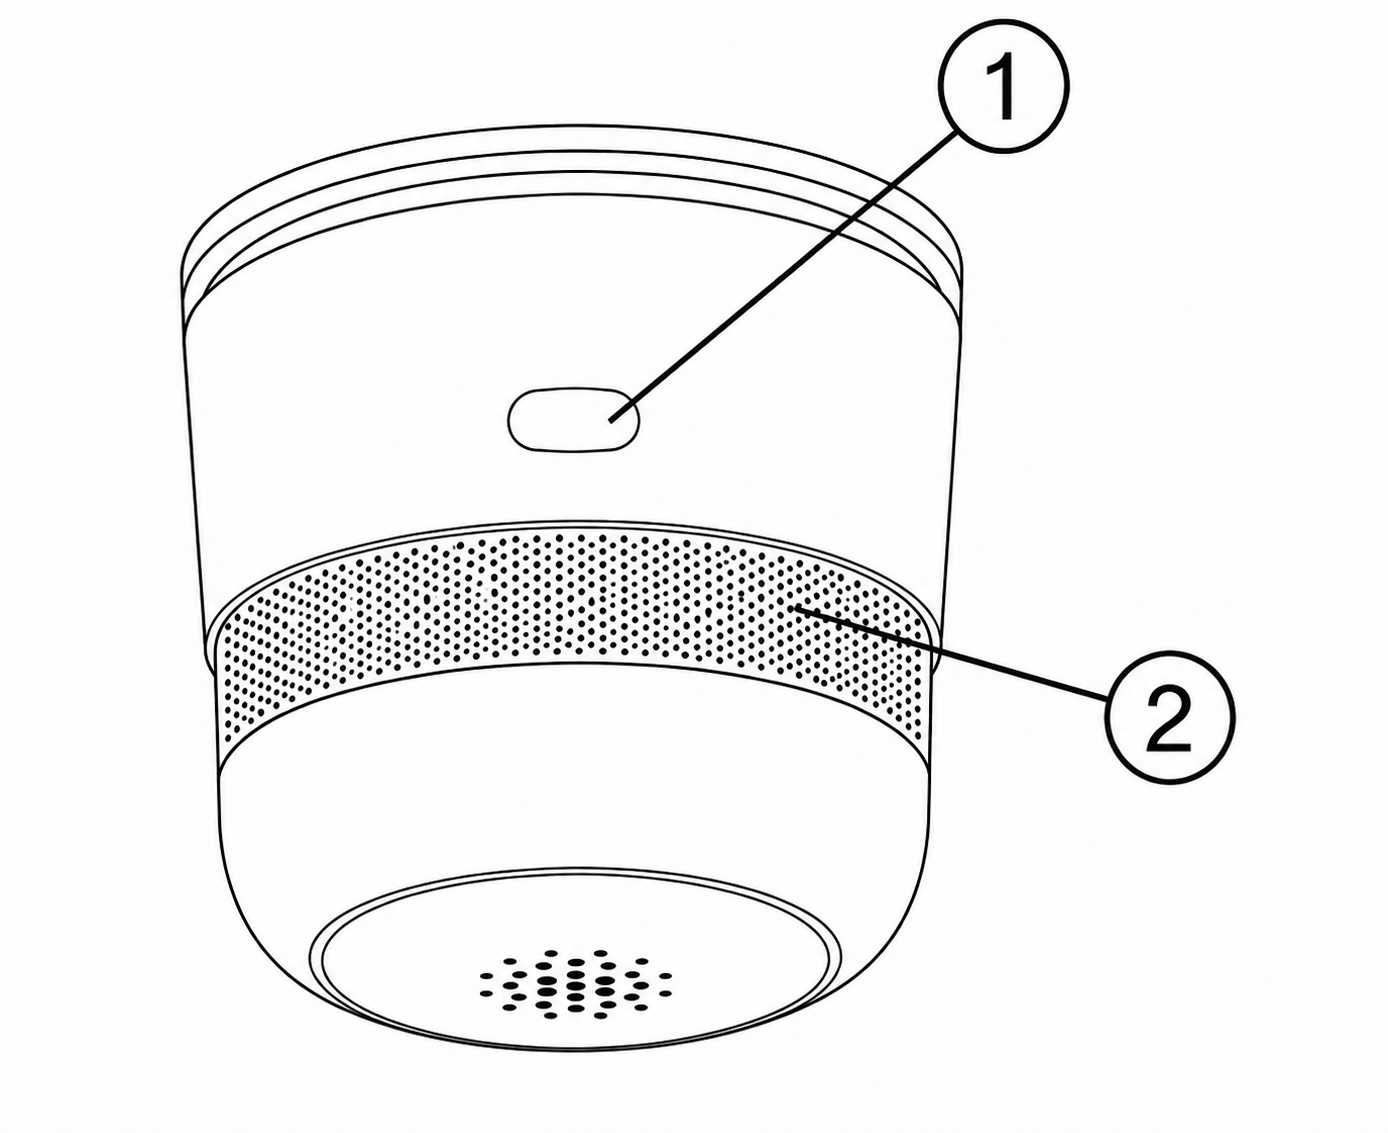 |
| № | Name | Description |
| 1 | Button | A long press of the button (5-7 C) resets the device settings and network connection parameters. |
| 2 | Indicator | Shows the current state of the device |
2. TECHNICAL CHARACTERISTICS
WiFi Frequency: 2.4 GHz (2.412-2.472GHz)
Network Protocol: IEEE802.11 b/g/n
Max.Transmit Power: 11 dBm
Alarm Sound Level: ≥85dB (at 3m)
Alarm Modes: Sound, Light, APP Notification
Battery: CR123A 3V (included)
Battery life: 3-5 years
Product Life: >10 years
Temperature Range:-10℃~+55℃
Humidity Range: < 95%RH
EN 14604:2005/AC:2008
3. SAFETY AND PRECAUTIONARY MEASURES
- Please read this manual carefully.
- Use the product within the temperature and humidity limits specified in the technical data sheet.
- Do not install the product near heat sources such as radiators, etc.
- Do not allow the device to fall or be subject to mechanical stress.
- Do not use chemically active or abrasive detergents to clean the product. Use a damp flannel cloth instead.
- Do not exceed the specified power rating. This may result in a short circuit and electric shock.
- Do not disassemble the product yourself - diagnostics and repairs of the device should only be carried out at a certified service center.
4. CONNECTION
To connect the Nous device, you need a smartphone based on the Android or iOS mobile operating system with the Nous Smart Home application installed. This mobile application is free and available for download from Play Market and App Store. The QR code for the application is given below:
 |
Scan the QR code
Importantly: Make sure that the Wi-Fi network is stable and has a sufficient level in the chosen installation location.
5. INSTALLATION
Installation procedure using a mounting plate
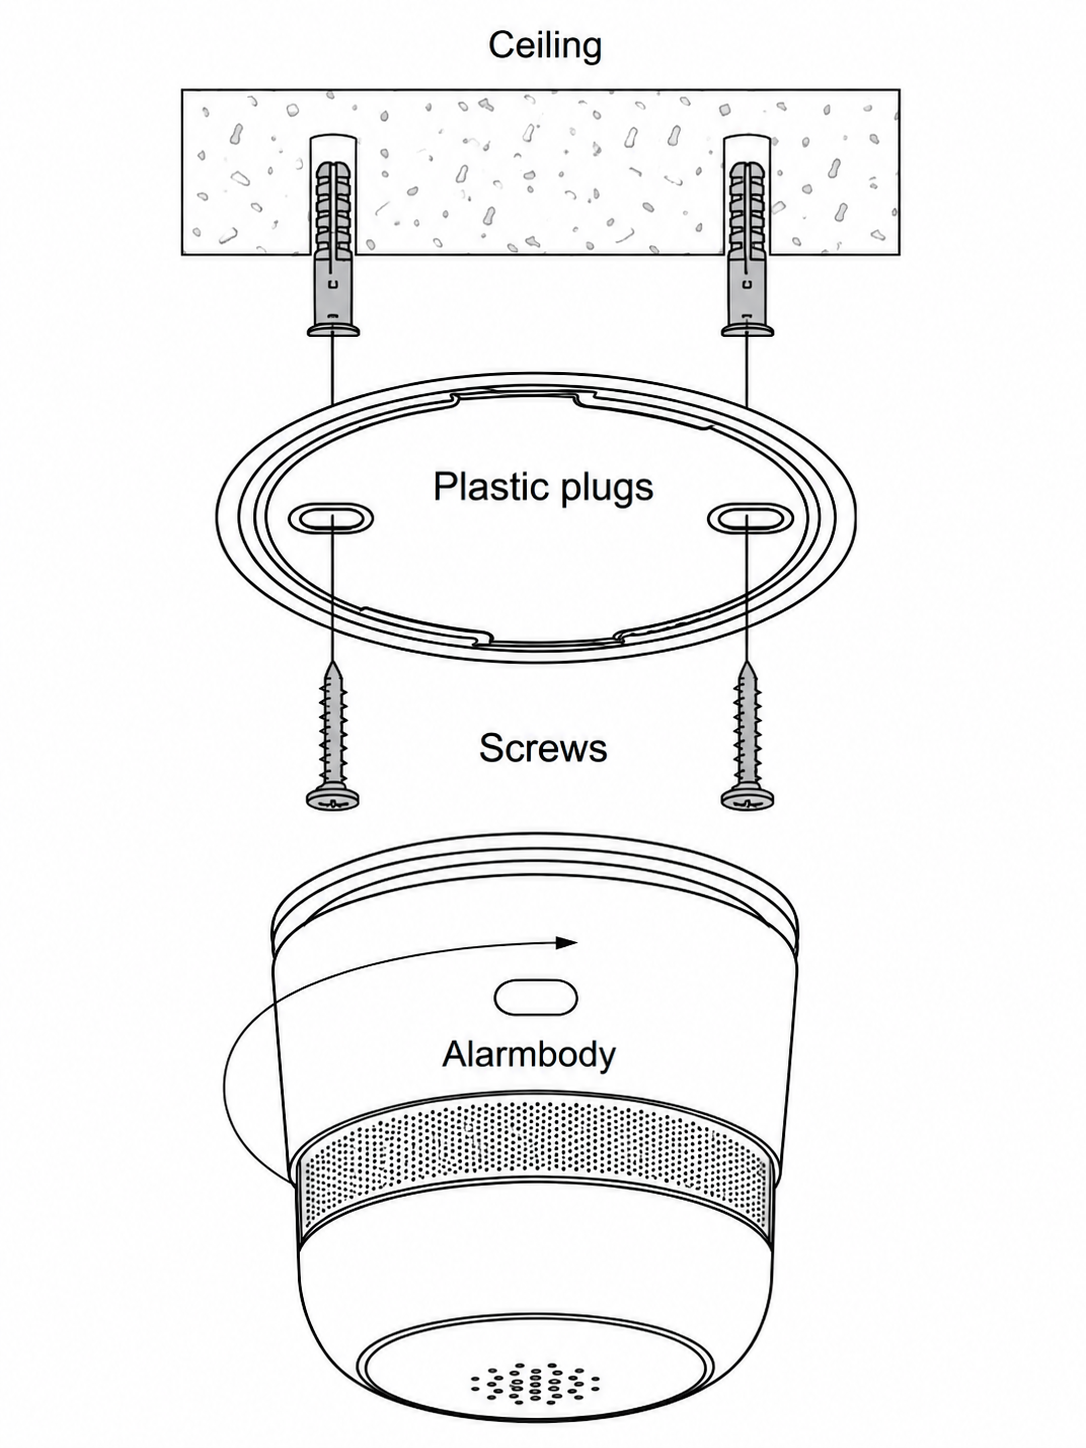 |
1. Place the mounting plate in the desired installation location and mark where the holes should be drilled. |
| 2. Drill two holes with a diameter of 4 millimeters (the distance between them is 32 millimeters). | |
|
3. Insert the plastic plugs into the holes. |
|
|
4.Insert the screws into the mounting plate and tighten them firmly into the plugs. |
|
|
5. Place the smoke alarm on the mounting bracket and turn clockwise to secure. |
|
|
6. The smoke alarm is secured when the holes between the mounting plate and the smoke alarm match. |
|
|
7. Press the test button to check if the smoke alarm is working properly. If there is no sound, the alarm is faulty and cannot be used. |
Installation procedure using 3M
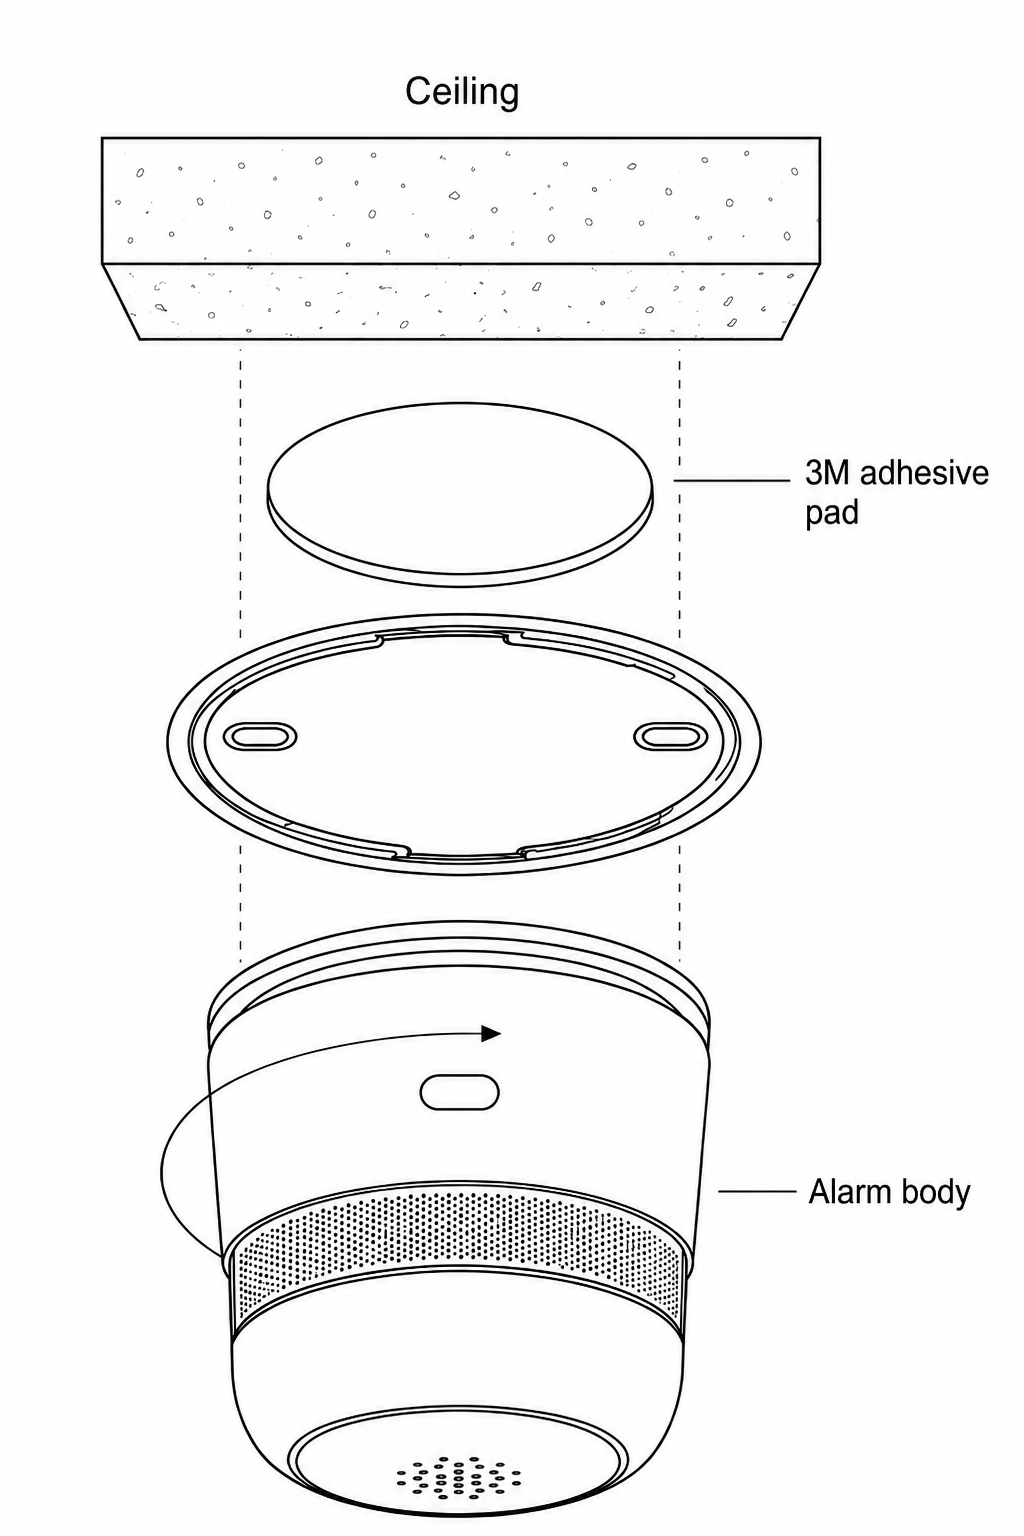 |
1. Clean the desired installation surface and the back of the mounting plate thoroughly. Dry both surfaces completely to ensure strong adhesion of the tape. |
| 2. Peel off the protective film from one side of the 3M tape. Apply the tape firmly onto the flat center surface of the mounting plate. | |
|
3. Remove the remaining protective film from the other side of the 3M tape. Press the mounting plate firmly against the chosen installation location for 30 seconds. |
|
|
4. Wait 24 hours before mounting the alarm to let the adhesive bond properly. |
|
|
5. Place the smoke alarm on the mounting bracket and turn clockwise to secure. |
|
|
6. Press the test button to check if the smoke alarm is working properly. Replace the alarm immediately if there is no sound, as it means the device is faulty. |
Battery replacement
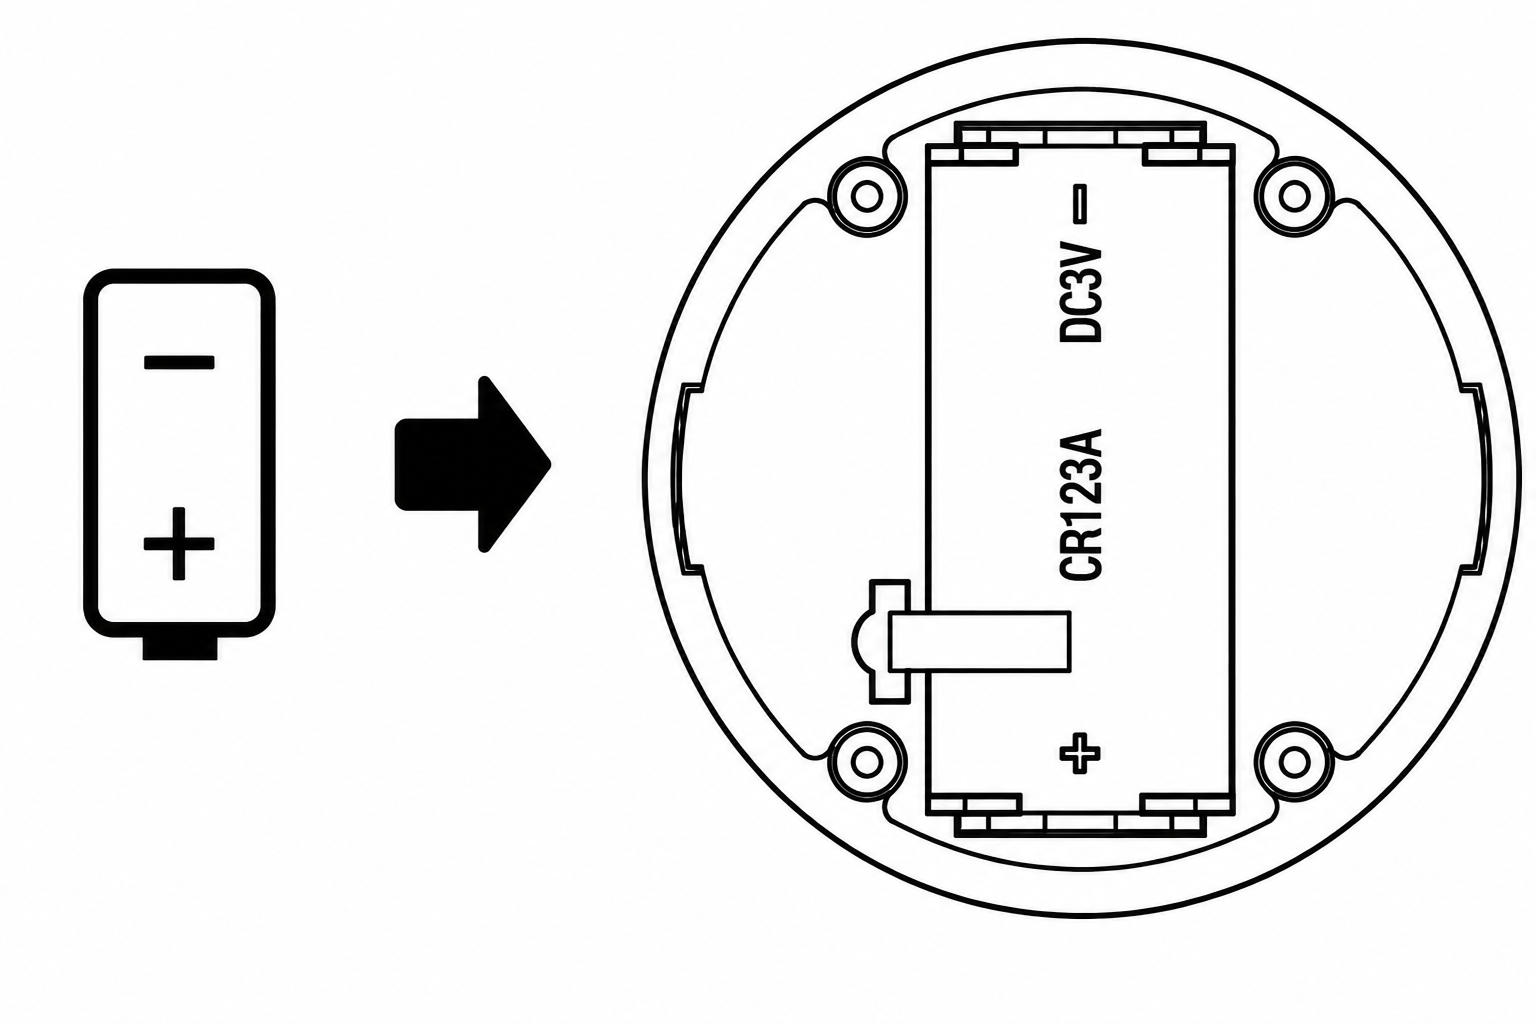 |
1.To replace the battery, disconnect the Detector (Sensor) from the mounting bracket by turning it counterclockwise. |
| 2. Remove the battery and then install a new one, observing the correct polarity. | |
|
3. Install the Detector (Sensor) on the mounting bracket by turning it clockwise to lock it in place.
|