


Introducing the Nous A1T WiFi Smart Socket with Tasmota, a smart home device that lets you control and monitor your electrical appliances from anywhere. Unlike other smart sockets that use Tuya software, the Nous A1T comes with Tasmota installed, a powerful and customizable firmware that gives you more control and security over your smart home devices. With Tasmota, you can connect your smart socket to Home Assistant, a popular open-source platform for smart home automation. From there, you can use voice assistants like Alexa or Google Home to turn on or off your devices, set schedules, timers, scenes and more. You can also monitor the energy consumption of your devices and get real-time feedback on how much power they are using.
The Nous A1T WiFi Smart Socket is the smallest smart plug on the market(two plugs can fit next to each other in one power strip), is easy to set up and use. Just plug it into any standard wall outlet and connect it to your WiFi network using the Tasmota web interface. You can then add it to Home Assistant and start enjoying the benefits of smart home automation. The Nous A1T has a sleek and compact design that blends in with any decor.
Whether you want to create a smart bedroom, a smart kitchen or a smart house, the Nous A1T WiFi Smart Socket with Tasmota is the perfect accessory for your smart home. It works with any device that has a plug, such as lamps, fans, coffee makers, heaters and more. You can use it to save energy, increase security, enhance comfort and convenience in your home.
The Nous A1T WiFi Smart Socket with Tasmota is one of the best smart home products that can work without cloud and protect your privacy. Hope that can enhance your lifestyle and comfort. We also offer free shipping and a 2-year warranty for all our products.
The Nous A1T WiFi Smart Socket with Tasmota is one of the best smart home products on the market. Don't miss this opportunity to upgrade your home with Nous smart technologies.
| Main settings | |
|---|---|
| Brand | Nous |
| Colour | White |
| Material | PC/ABS (V0) |
| Special features | Tasmota preinstalled, free of china cloud, power meter, MQTT support |
| Electric power | 2500W |
| Certificate | CE, RoHS |
| Specifications | |
| Device dimensions | 46x46x72mm |
| Maximum load | 10A |
| Operating voltage range | 110-230V 50/60Hz |
| Level of moisture protection | IP20 |
| Operation range | 45m |
| Standby power consumption: | 0.53W |
| Network | |
| Communication standard | WiFi IEEE 802.11b/g/n |
| Type of wireless transmission | 2,4 GHz |
| Control from a smartphone | Web Interface, Home Assistant, etc |
| Compatibility with voice assistants | Alexa, Google Assistant after connection to Home Assistant or similar software |
How to activate the template and calibrate voltage readings
How to upgrade to latest tasmota version by file upload
How to upgrade to latest tasmota version by OTA
How to downgrade tasmota version
OPERATION MANUAL
 NOTE: Tasmota is not a commercial product and support is limited. You must be willing to independently investigate and resolve potential issues.
Detailed information about connection, changing settings and modifications is presented on the website " https://tasmota.github.io/docs/ "
description
The NOUS A1T smart Wi-Fi socket with Tasmota open software installed (hereinafter – the smart socket) is designed to organize automatic and manual shutdown of electrical appliances in the room, through remote access via a Wi-Fi network, using a smartphone or from a personal computer via the Web interface. Communication with the smart outlet is configured via a Wi-Fi network, for which a wireless Wi-Fi adapter is used. The smart socket is equipped with a mechanical button and a global indication of the device's status. The smart outlet is equipped with an electromechanical relay with a throughput of 16A . The device has the function of energy monitoring and recording of consumer electricity.
ATTENTION: The connection of a smart socket with a Wi-Fi network cannot be guaranteed in all cases, as it depends on many conditions: the quality of the communication channel and intermediate network equipment, the brand and model of the mobile device, the version of the operating system, etc.
PRECAUTIONS
- Read this manual carefully.
- Use the product within the temperature and humidity limits specified in the technical data sheet.
- Do not install the product near heat sources such as radiators, etc.
- Do not allow the device to fall and be subject to mechanical loads.
- Do not use chemically active and abrasive detergents to clean the product. Use a damp flannel cloth for this.
- Do not overload the specified capacity. This may cause short circuit and electric shock.
- Do not disassemble the product yourself - diagnostics and repair of the device must be carried out only in a certified service center.
- Please contact the seller for a replacement if there is damage caused by shipping.
- Please insert the plug into the outlet in proper condition and away from children.
- For safety reasons, insert the plug fully into the outlet when in use.
Design and controls

| No. | Name | description |
| 1 | Indicator | Shows the current state of the device |
| 2 | Button | A short press of the button switches the device "ON" "OFF". |
Connection
A smartphone or personal PC is required to connect the Nous A1T smart socket.
The procedure for connecting a smart socket to a Wi-Fi network:
| 1 | Make sure that the frequency range of the network to which the device will be connected is 2.4 GHz, otherwise the Smart WiFi Socket will not connect, since the smart socket is not designed to work with 5 GHz Wi-Fi networks; | |
| 2 | Turn on the smart socket to the network. On the PC, the access point "tasmota-xxxxxxxx" should appear in the list of networks, if the access point is not detected, you need to perform a "RESET" according to point 11 | |
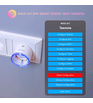
| 3 | Connect to hotspot "tasmota-xxxxxxx" | |
| 4 |
After connecting to the access point, the browser will automatically open and go to the link 192.168.4.1, if this operation was not followed, then you need to open the browser and enter 192.168.4.1 in the address input field |
|
| 5 |
On the open page, you need to select your access point and enter its password in the field below and click "Save" |
|
 |
|
|
| 6 | When the connection is complete, the inscription "Successfully connected to Wi-Fi" and the address of your device on the network will appear | |
| 7 | Connect to your Wi-Fi network and go to the address that was specified in point 6 | |
| 8 | You will need to calibrate the device for the power source. You can find how to do it here: https://tasmota.github.io/docs/Power-Monitoring-Calibration/ | |
| 9 |
The smart socket is ready for use. The template and rules are already activated, but if you need it later, you can find it below |
|
 |
 |
|
| 10 |
{"NAME":"NOUS A1T","GPIO":[17,0,0,0,134,132,0,0,131,56,21,0,0],"FLAG":0,"BASE":49}
|
|
| eleven |
To reset the smart socket to factory settings, you need: Plug and unplug the device 6 times and leave it on for the 7th - the LED should start flashing, this means the socket is ready to be connected again; if there is access to the web interface, then type " reset 1" in the console and press "enter" |
|
|
Tasmota is a highly extensible and flexible application that can be integrated with: Alexa, AWS IoT, Domoticz, Home Assistant, Homebridge, HomeSeer, IP Symcon, KNX, NodeRed, nymea, OctoPrint, openHAB, Otto, IOBroker, Mozilla WebThings Adapter, SmartThings, Tasmohab, Homematic ip тощо. for more information see here: https://tasmota.github.io/docs/Integrations/ |
||


BEDIENUNGSANLEITUNG
HINWEIS: Tasmota ist kein kommerzielles Produkt und der Support ist begrenzt. Sie müssen bereit sein, mögliche Probleme selbstständig zu untersuchen und zu lösen.
Detaillierte Informationen zur Verbindung, zum Ändern von Einstellungen und zu Modifikationen finden Sie auf der Website „ https://tasmota.github.io/docs/ “ .
Beschreibung
Die intelligente Wi-Fi-Steckdose NOUS A1T mit installierter offener Tasmota-Software (im Folgenden „ intelligente Steckdose“ genannt) dient dazu, die automatische und manuelle Abschaltung von Elektrogeräten im Raum durch Fernzugriff über ein Wi-Fi-Netzwerk, mit einem Smartphone oder von zu organisieren einem PC über die Webschnittstelle. Die Kommunikation mit der Smart- Steckdose erfolgt über ein Wi-Fi-Netzwerk, für das ein drahtloser Wi-Fi-Adapter verwendet wird. Die Smart- Steckdose ist mit einem mechanischen Knopf und einer globalen Anzeige des Gerätestatus ausgestattet. Die Smart- Steckdose ist mit einem elektromechanischen Relais mit einem Durchsatz von 16A ausgestattet . Das Gerät verfügt über die Funktion der Energieüberwachung und Erfassung des Verbraucherstroms.
ACHTUNG: Die Verbindung einer Smart-Steckdose mit einem Wi-Fi-Netzwerk kann nicht in allen Fällen garantiert werden, da sie von vielen Bedingungen abhängt: der Qualität des Kommunikationskanals und der zwischengeschalteten Netzwerkausrüstung, der Marke und dem Modell des Mobilgeräts, der Version des Betriebssystems usw.
VORSICHTSMASSNAHMEN
- Lesen Sie dieses Handbuch sorgfältig durch.
- Verwenden Sie das Produkt innerhalb der im technischen Datenblatt angegebenen Temperatur- und Luftfeuchtigkeitsgrenzen.
- Installieren Sie das Produkt nicht in der Nähe von Wärmequellen wie Heizkörpern usw.
- Lassen Sie das Gerät nicht fallen und keiner mechanischen Belastung aussetzen.
- Verwenden Sie zum Reinigen des Produkts keine chemisch aktiven und scheuernden Reinigungsmittel. Benutzen Sie hierfür ein feuchtes Flanelltuch.
- Überlasten Sie nicht die angegebene Kapazität. Dies kann zu Kurzschlüssen und Stromschlägen führen.
- Zerlegen Sie das Produkt nicht selbst – Diagnose und Reparatur des Geräts dürfen nur in einem zertifizierten Servicecenter durchgeführt werden.
- Bei Transportschäden wenden Sie sich bitte an den Verkäufer, um Ersatz zu erhalten.
- Bitte stecken Sie den Stecker in ordnungsgemäßem Zustand und außerhalb der Reichweite von Kindern in die Steckdose.
- Aus Sicherheitsgründen stecken Sie den Stecker während des Gebrauchs vollständig in die Steckdose.
Design und Steuerung
| NEIN. | Name | Beschreibung |
| 1 | Indikator | Zeigt den aktuellen Zustand des Geräts an |
| 2 | Taste | Ein kurzer Tastendruck schaltet das Gerät „AN“ „AUS“. |
Verbindung
Zum Anschließen der Nous A1T-Smart-Steckdose ist ein Smartphone oder ein persönlicher PC erforderlich.
Das Verfahren zum Anschließen einer Smart-Steckdose an ein Wi-Fi-Netzwerk:
| 1 | Stellen Sie sicher, dass der Frequenzbereich des Netzwerks, mit dem das Gerät verbunden wird, 2,4 GHz beträgt, andernfalls stellt die Smart WiFi Socket keine Verbindung her, da die Smart Socket nicht für die Verwendung mit 5-GHz-Wi-Fi-Netzwerken ausgelegt ist; | |
| 2 | Schalten Sie die Smart- Steckdose mit dem Netzwerk ein . Auf dem PC sollte der Access Point „tasmota-xxxxxxxx“ in der Liste der Netzwerke erscheinen, sollte der Access Point nicht erkannt werden, müssen Sie einen „RESET“ gemäß Punkt 11 durchführen | |
| 3 | Mit Hotspot „tasmota-xxxxxxx“ verbinden | |
| 4 |
Nach der Verbindung mit dem Zugangspunkt öffnet sich der Browser automatisch und geht zum Link 192.168.4.1. Wenn dieser Vorgang nicht befolgt wurde, müssen Sie den Browser öffnen und 192.168.4.1 in das Adresseingabefeld eingeben |
|
| 5 |
Auf der geöffneten Seite müssen Sie Ihren Zugangspunkt auswählen, sein Passwort in das Feld unten eingeben und auf „Speichern“ klicken. |
|
|
|
|
| 6 | Wenn die Verbindung hergestellt ist, erscheint die Aufschrift „Erfolgreich mit WLAN verbunden“ und die Adresse Ihres Geräts im Netzwerk | |
| 7 | Stellen Sie eine Verbindung zu Ihrem Wi-Fi-Netzwerk her und rufen Sie die in Punkt 6 angegebene Adresse auf | |
| 8 | Sie müssen das Gerät für die Stromquelle kalibrieren. Wie es geht, finden Sie hier: https://tasmota.github.io/docs/Power-Monitoring-Calibration/ | |
| 9 |
Die Smart-Steckdose ist betriebsbereit. Die Vorlage und die Regeln sind bereits aktiviert. Wenn Sie sie später benötigen, finden Sie sie unten |
|
|
|
|
| 10 |
{"NAME":NOUS A1T,GPIO:[17,0,0,0,134,132,0,0,131,56,21,0,0],"FLAG":0,"BASE":49} |
|
| elf |
Um die Smart-Steckdose auf die Werkseinstellungen zurückzusetzen, benötigen Sie: Stecken Sie das Gerät sechsmal ein und aus und lassen Sie es das siebte Mal eingeschaltet. Die LED sollte zu blinken beginnen. Dies bedeutet, dass die Steckdose wieder angeschlossen werden kann. Wenn Zugriff auf das Webinterface besteht, geben Sie „ reset 1“ in die Konsole ein und drücken Sie die Eingabetaste. |
|
|
Tasmota ist eine hoch erweiterbare und flexible Anwendung, die integriert werden kann mit: Alexa, AWS IoT, Domoticz, Home Assistant, Homebridge, HomeSeer, IP Symcon, KNX, NodeRed, nymea, OctoPrint, openHAB, Otto, IOBroker, Mozilla WebThings Adapter, SmartThings, Tasmohab, Homematic ip usw. Weitere Informationen finden Sie hier: https://tasmota.github.io/docs/Integrations/ |
||