
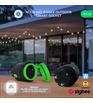


Nous A6Z ZigBee Outdoor Smart Socket

| Main settings | |
|---|---|
| Brand | NOUS |
| Material | Plastic |
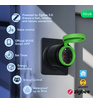
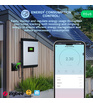
| Special features | Energy Monitoring |
| Electric power | 3840W |
| Certificate | CE, RoHS, RED |
| Specifications | |
| Device dimensions | 58*58*100 mm |
| Body material | Heat resistant plastic |
| Maximum load | 16A peak / 15A continuous |
| Operating temperature | -20 ºC ~ 40 ºC |
| Operating voltage range | 220-240V |
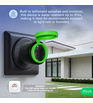
| Level of moisture protection | IP44 |
| Device weight | 109 g |
| Standby power consumption: | 1.3W |
| Network | |
| Communication standard | IEEE802.15.4 |
| Protocol | ZigBee 3.0 |
| System requirements | iOS 8 or Android 4.4 or higher |
| Control from a smartphone | APP: NOUS Smart Home |
| Compatibility with voice assistants | Amazon Alexa, Google Home |
OPERATION MANUAL
description
The smart Zigbee socket NOUS A6Z (hereinafter referred to as the smart socket) is designed to organize automatic and manual shutdown of electrical appliances, through remote access via the Internet, using a smartphone or tablet with the Nous Smart Home application installed. Communication with the smart outlet is configured through a cloud server using the P2P protocol, for which a wireless zigbee adapter is used. The smart socket is equipped with a mechanical button and a global indication of the device's status. The smart outlet is equipped with an electromechanical relay. The device has the function of energy monitoring and recording of consumer electricity.
 NOTE: You will need a Nous E1, Nous E7 or other Tuya compatible ZigBee gateway/hub to connect.
The connection of a smart socket to the Internet cannot be guaranteed in all cases, as it depends on many conditions: the quality of the communication channel and intermediate network equipment, the brand and model of the mobile device, the version of the operating system, etc.
PRECAUTIONS
- Read this manual carefully.
- Use the product within the temperature and humidity limits specified in the technical data sheet.
- Do not install the product near heat sources, such as radiators, etc.
- Do not allow the device to fall and be subject to mechanical loads.
- Do not use chemically active and abrasive detergents to clean the product. Use a damp flannel cloth for this.
- Do not overload the specified capacity. This may cause short circuit and electric shock.
- Do not disassemble the product yourself - diagnostics and repair of the device must be carried out only in a certified service center.
- Please contact the seller for a replacement if there is damage caused by shipping.
- Please insert the plug into the outlet in proper condition and away from children.
- For safety reasons, insert the plug fully into the outlet when in use.
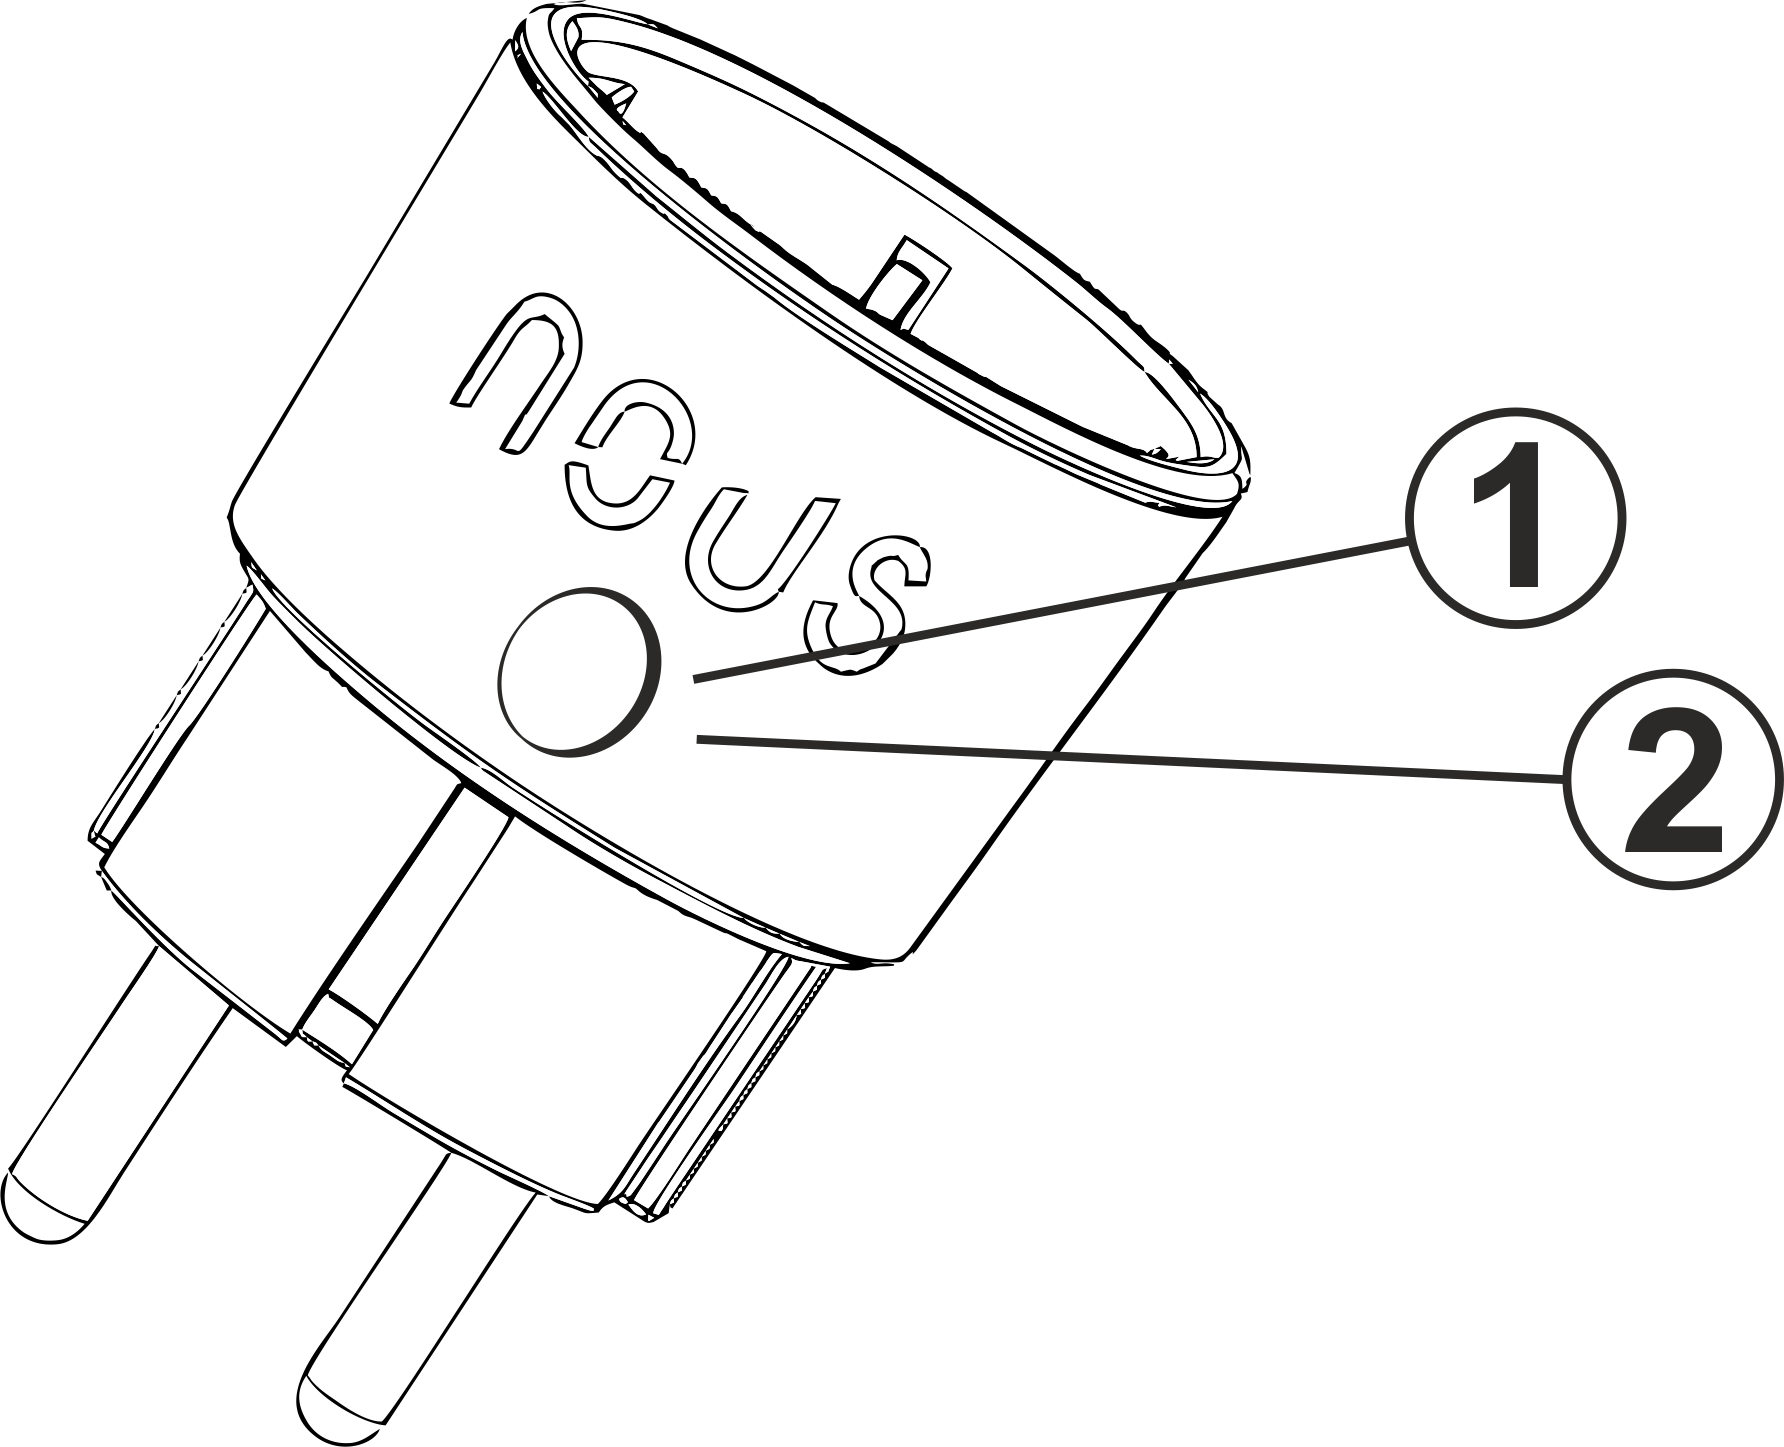
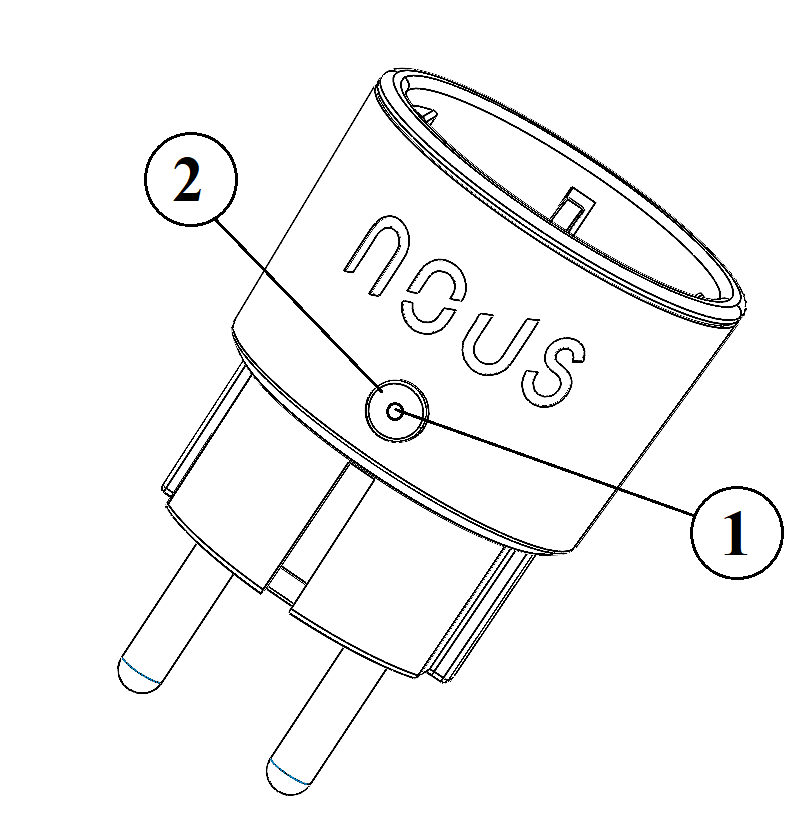
Design and controls
| No. | Name | description |
| 1 | Button | A short press of the button switches the device "ON" "OFF". A long press of the button (5-7 C) resets the settings of the smart socket and the parameters of connection to the Zigbee network . |
| 2 | Socket indicator | Shows the current state of the outlet |
Connection
To connect the Nous A6z smart socket, you need a smartphone based on the Android or iOS mobile operating system with the Nous Smart Home application installed. This mobile application is free and available for download from Play Market and App Store. The QR code for the application is given below:

After installing the program, for its correct operation, it is necessary to grant it all permissions in the corresponding section of the smartphone settings. Then you need to register a new user of this program.
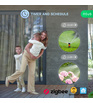
The procedure for connecting a smart socket to the Zigbee network:
| 1 | Connect the smartphone to the access point that will be used to connect the smart socket. Make sure the network frequency range is 2.4 GHz, otherwise the smart socket will not connect, because Zigbee Habs are not designed to work with 5 GHz Wi-Fi networks; (your ZigBee hub should already be connected to the app) | |
| 2 | Turn on the smart socket to the network. If the global indication does not flash quickly, then press the button for 5-7 seconds to reset the smart outlet settings to factory values. | |
| 3 | Open the Nous Smart Home app and click the button to add a new device | |
| 4 |
An autoscan will appear, prompting you to add a new device. Confirm the connection and start pairing. |
|
| 5 |
If autoscan doesn't see your device, you can select it manually from the list of devices |
|
 |
.jpg) |
|
| 6 | In the "Add manually" tab, select the "Smart sockets" category, and in it the "A6Z socket" model, as shown in the figure above; | |
| 7 | In the window that opens, select "next step" and click the "Next" button; | |
| 8 | connection to the Zigbee hub | |
 |
 |
|
| 8 | A window will appear indicating the degree of network connection and adding the current user of the program to the list of devices: | |
| 9 | After the procedure, a window will appear in which you can set the name of the device and choose the room in which it is located. The device name will also be used by Amazon Alexa and Google Home. | |
| 10 | To delete all data from the smart socket, in the device menu, you need "Delete device", "disabled and delete all data" | |
| When the device is removed from the device list of the application user, the settings of the smart socket will be reset to factory values and it will be necessary to shorten the procedure of connecting to the Wi-Fi network again. If the password for the Wi-Fi access point was entered incorrectly, then after the timer expires, the application will show a "failed to connect to Wi-Fi" window with step-by-step instructions to fix the problem. | ||
How to connect your device to Alexa
| 1 |
Sign in with your Alexa account and password (if you're not already signed in, sign up first); After logging in, click the menu in the upper left corner, then click "Settings" and select "Set up a new device"; |
|
| 2 |
Select "Skills" in the options bar, then search for |
|
| 3 |
Enter the username and password you previously registered (the account is only supported in the United States); When you see the correct page, it means that your Alexa account is linked to your NOUS Smart Home account. |
|
 |
 |
|
| 4 |
Device discovery: Users must tell Echo, |
|
| 5 |
List of support skills |
|
| Attention: the name of the device must match the NOUS Smart Home APP. | ||
BEDIENUNGSANLEITUNG
Beschreibung
Die intelligente Zigbee-Steckdose NOUS A6Z (im Folgenden als intelligente Steckdose bezeichnet ) ist für die Organisation der automatischen und manuellen Abschaltung von Elektrogeräten im Raum durch Fernzugriff über das Internet mithilfe eines Smartphones oder Tablets mit installierter Nous Smart Home-Anwendung konzipiert. Die Kommunikation mit der Smart Outlet wird über einen Cloud-Server mithilfe des P2P-Protokolls konfiguriert, für das ein drahtloser ZigBee-Adapter verwendet wird. Die Smart -Steckdose ist mit einem mechanischen Knopf und einer globalen Anzeige des Gerätestatus ausgestattet. Die intelligente Steckdose ist mit einem elektromechanischen Relais ausgestattet. Das Gerät verfügt über die Funktion der Energieüberwachung und Erfassung des Verbraucherstroms.
HINWEIS: Für die Verbindung benötigen Sie ein Nous E1, Nous E7 oder ein anderes Tuya-kompatibles ZigBee-Gateway/Hub.
Die Verbindung einer Smart-Steckdose mit dem Internet kann nicht in allen Fällen garantiert werden, da sie von vielen Bedingungen abhängt: der Qualität des Kommunikationskanals und der zwischengeschalteten Netzwerkausrüstung, der Marke und dem Modell des Mobilgeräts, der Version des Betriebssystems, usw.
VORSICHTSMASSNAHMEN
- Lesen Sie dieses Handbuch sorgfältig durch.
- Verwenden Sie das Produkt innerhalb der im technischen Datenblatt angegebenen Temperatur- und Luftfeuchtigkeitsgrenzen.
- Installieren Sie das Produkt nicht in der Nähe von Wärmequellen wie Heizkörpern usw.
- Lassen Sie das Gerät nicht fallen und keiner mechanischen Belastung aussetzen.
- Verwenden Sie zum Reinigen des Produkts keine chemisch aktiven und scheuernden Reinigungsmittel. Benutzen Sie hierfür ein feuchtes Flanelltuch.
- Überlasten Sie nicht die angegebene Kapazität. Dies kann zu Kurzschlüssen und Stromschlägen führen.
- Zerlegen Sie das Produkt nicht selbst – Diagnose und Reparatur des Geräts dürfen nur in einem zertifizierten Servicecenter durchgeführt werden.
Design und Steuerung
| Nr. | Name | Beschreibung |
| 1 | Indikator | Zeigt den aktuellen Zustand des Geräts an |
| 2 | Taste | Ein kurzer Tastendruck schaltet das Gerät „AN“ „AUS“. Ein langer Tastendruck (5-7 C) setzt die Einstellungen der Smart-Steckdose und die WLAN-Netzwerkverbindungsparameter zurück. |
Verbindung
Um die Smart-Steckdose Nous A6Z anzuschließen, benötigen Sie ein Smartphone, das auf dem mobilen Betriebssystem Android oder iOS basiert und auf dem die Nous Smart Home-Anwendung installiert ist. Diese mobile Anwendung ist kostenlos und kann im Play Market und im App Store heruntergeladen werden. Der QR-Code für die Anwendung ist unten angegeben:
Nach der Installation des Programms ist es für den ordnungsgemäßen Betrieb erforderlich, ihm alle Berechtigungen im entsprechenden Abschnitt der Smartphone-Einstellungen zu erteilen. Dann müssen Sie einen neuen Benutzer dieses Programms registrieren.
Das Verfahren zum Anschließen einer Smart-Steckdose an das Zigbee-Netzwerk:
| 1 | Verbinden Sie das Smartphone mit dem Zugangspunkt, über den die Smart-Steckdose verbunden wird. Stellen Sie sicher, dass der Netzwerkfrequenzbereich 2,4 GHz beträgt. Andernfalls stellt die Smart-Steckdose keine Verbindung her, da Zigbee Habs nicht für die Verwendung mit 5-GHz-WLAN-Netzwerken ausgelegt sind. (Ihr ZigBee-Hub sollte bereits mit der App verbunden sein) | |
| 2 | Schalten Sie die Smart- Steckdose mit dem Netzwerk ein. Wenn die globale Anzeige nicht schnell blinkt, drücken Sie die Taste 5–7 Sekunden lang, um die Smart -Outlet-Einstellungen auf die Werkseinstellungen zurückzusetzen. | |
| 3 | Öffnen Sie die Nous Smart Home-App und klicken Sie auf die Schaltfläche, um ein neues Gerät hinzuzufügen | |
| 4 |
Es erscheint ein automatischer Scan, der Sie auffordert, ein neues Gerät hinzuzufügen. Bestätigen Sie die Verbindung und beginnen Sie mit der Kopplung. |
|
| 5 |
Wenn der Autoscan Ihr Gerät nicht erkennt, können Sie es manuell aus der Geräteliste auswählen |
|
|
|
|
| 6 | Wählen Sie im Reiter „Manuell hinzufügen“ die Kategorie „Intelligente Steckdosen“ und darin das Modell „A6Z-Steckdose“, wie in der Abbildung oben gezeigt; | |
| 7 | Wählen Sie im sich öffnenden Fenster „Nächster Schritt“ und klicken Sie auf die Schaltfläche „Weiter“; | |
| 8 | Verbindung zum Zigbee-Hub | |
|
|
|
| 8 | Es erscheint ein Fenster, das den Grad der Netzwerkverbindung anzeigt und den aktuellen Benutzer des Programms zur Geräteliste hinzufügt: | |
| 9 | Nach dem Vorgang erscheint ein Fenster, in dem Sie den Namen des Geräts angeben und den Raum auswählen können, in dem es sich befindet. Der Gerätename wird auch von Amazon Alexa und Google Home verwendet. | |
| 10 | Um alle Daten von der Smart-Steckdose zu löschen, müssen Sie im Gerätemenü „Gerät löschen“, „deaktivieren und alle Daten löschen“ wählen. | |
| Wenn das Gerät aus der Geräteliste des Anwendungsbenutzers entfernt wird, werden die Einstellungen der Smart -Steckdose auf die Werkseinstellungen zurückgesetzt und der Verbindungsvorgang zum WLAN-Netzwerk muss erneut verkürzt werden. Wenn das Passwort für den WLAN-Zugangspunkt falsch eingegeben wurde, erscheint nach Ablauf des Timers in der Anwendung ein Fenster mit der Meldung „Verbindung zum WLAN fehlgeschlagen“ mit schrittweisen Anweisungen zur Behebung des Problems. | ||
So verbinden Sie Ihr Gerät mit Alexa
| 1 |
Melden Sie sich mit Ihrem Alexa-Konto und Passwort an (wenn Sie noch nicht angemeldet sind, registrieren Sie sich zuerst); Klicken Sie nach der Anmeldung auf das Menü in der oberen linken Ecke, dann auf „Einstellungen“ und wählen Sie „Neues Gerät einrichten“; |
|
| 2 |
Wählen Sie in der Optionsleiste „Fähigkeiten“ aus und suchen Sie dann |
|
| 3 |
Geben Sie den Benutzernamen und das Passwort ein, die Sie zuvor registriert haben (das Konto wird nur in den Vereinigten Staaten unterstützt). Wenn Sie die richtige Seite sehen, bedeutet das, dass Ihr Alexa-Konto mit Ihrem NOUS Smart Home-Konto verknüpft ist. |
|
|
|
|
| 4 |
Geräteerkennung: Benutzer müssen Echo sagen: |
|
| 5 |
Liste der Supportfähigkeiten |
|
| Achtung: Der Name des Geräts muss mit der NOUS Smart Home APP übereinstimmen. | ||
INSTRUKCJA OBSŁUGI
opis
Inteligentne gniazdo Zigbee NOUS A6Z (zwane dalej inteligentnym gniazdem) przeznaczone jest do organizowania automatycznego i ręcznego wyłączania urządzeń elektrycznych w pomieszczeniu, poprzez zdalny dostęp przez Internet, za pomocą smartfona lub tabletu z zainstalowaną aplikacją Nous Smart Home. Komunikacja ze smart outletem konfigurowana jest poprzez serwer chmurowy z wykorzystaniem protokołu P2P, do obsługi którego wykorzystywany jest bezprzewodowy adapter Zigbee. Inteligentne gniazdo wyposażone jest w mechaniczny przycisk oraz globalną sygnalizację stanu urządzenia. Inteligentne gniazdko wyposażone jest w przekaźnik elektromechaniczny. Urządzenie posiada funkcję monitorowania energii i rejestracji energii elektrycznej odbiorców.
UWAGA: Do połączenia potrzebna będzie bramka/hub ZigBee Nous E1, Nous E7 lub inna kompatybilna z Tuya.
Nie w każdym przypadku można zagwarantować podłączenia inteligentnego gniazdka do Internetu, gdyż zależy to od wielu warunków: jakości kanału komunikacyjnego i wyposażenia sieci pośredniczącej, marki i modelu urządzenia mobilnego, wersji systemu operacyjnego, itp.
ŚRODKI OSTROŻNOŚCI
- Przeczytaj uważnie niniejszą instrukcję.
- Używaj produktu w zakresie temperatur i wilgotności podanych w karcie technicznej.
- Nie instaluj produktu w pobliżu źródeł ciepła, takich jak grzejniki itp.
- Nie dopuścić do upadku urządzenia i narażania go na obciążenia mechaniczne.
- Do czyszczenia produktu nie należy używać chemicznie aktywnych i ściernych detergentów. Użyj do tego wilgotnej szmatki flanelowej.
- Nie przeciążaj określonej pojemności. Może to spowodować zwarcie i porażenie prądem.
- Nie demontuj produktu samodzielnie – diagnostykę i naprawę urządzenia należy przeprowadzać wyłącznie w certyfikowanym serwisie.
Projektowanie i sterowanie
| Numer | Nazwa | opis |
| 1 | Wskaźnik | Pokazuje aktualny stan urządzenia |
| 2 | Przycisk | Krótkie naciśnięcie przycisku powoduje załączenie urządzenia „ON” i „OFF”. Długie naciśnięcie przycisku (5-7 C) resetuje ustawienia inteligentnego gniazdka i parametry połączenia z siecią Wi-Fi. |
Połączenie
Do podłączenia inteligentnego gniazdka Nous A6Z potrzebny jest smartfon oparty na mobilnym systemie operacyjnym Android lub iOS z zainstalowaną aplikacją Nous Smart Home. Ta aplikacja mobilna jest bezpłatna i można ją pobrać z Play Market i App Store. Poniżej znajduje się kod QR aplikacji:
Po zainstalowaniu programu, do jego poprawnego działania konieczne jest nadanie mu wszelkich uprawnień w odpowiedniej sekcji ustawień smartfona. Następnie musisz zarejestrować nowego użytkownika tego programu.
Procedura podłączenia inteligentnego gniazdka do sieci Zigbee:
| 1 | Podłącz smartfon do punktu dostępowego, który będzie używany do podłączenia inteligentnego gniazdka. Upewnij się, że zakres częstotliwości sieci wynosi 2,4 GHz, w przeciwnym razie inteligentne gniazdo nie połączy się, ponieważ Zigbee Habs nie są zaprojektowane do pracy z sieciami Wi-Fi 5 GHz; (Twój koncentrator ZigBee powinien być już połączony z aplikacją) | |
| 2 | Włącz inteligentne gniazdo do sieci. Jeśli wskazanie globalne nie miga szybko, naciśnij przycisk na 5-7 sekund, aby zresetować ustawienia inteligentnego gniazdka do wartości fabrycznych. | |
| 3 | Otwórz aplikację Nous Smart Home i kliknij przycisk, aby dodać nowe urządzenie | |
| 4 |
Pojawi się automatyczne skanowanie z monitem o dodanie nowego urządzenia. Potwierdź połączenie i rozpocznij parowanie. |
|
| 5 |
Jeśli automatyczne skanowanie nie wykryje Twojego urządzenia, możesz wybrać je ręcznie z listy urządzeń |
|
|
|
|
| 6 | W zakładce „Dodaj ręcznie” wybierz kategorię „Inteligentne gniazda”, a w niej model „Gniazdo A6Z”, jak pokazano na powyższym rysunku; | |
| 7 | W oknie, które zostanie otwarte, wybierz „następny krok” i kliknij przycisk „Dalej”; | |
| 8 | połączenie z koncentratorem Zigbee | |
|
|
|
| 8 | Pojawi się okno wskazujące stopień połączenia sieciowego i dodania aktualnego użytkownika programu do listy urządzeń: | |
| 9 | Po zakończeniu procedury pojawi się okno, w którym możesz podać nazwę urządzenia i wybrać pomieszczenie, w którym się ono znajduje. Nazwa urządzenia będzie także używana przez Amazon Alexa i Google Home. | |
| 10 | Aby usunąć wszystkie dane z inteligentnego gniazdka, w menu urządzenia potrzebujesz „Usuń urządzenie”, „wyłącz i usuń wszystkie dane” | |
| Gdy urządzenie zostanie usunięte z listy urządzeń użytkownika aplikacji, ustawienia inteligentnego gniazda zostaną zresetowane do wartości fabrycznych i konieczne będzie ponowne skrócenie procedury łączenia się z siecią Wi-Fi. Jeśli hasło do punktu dostępu Wi-Fi zostało wprowadzone niepoprawnie, po upływie czasu w aplikacji pojawi się okno „nie udało się połączyć z Wi-Fi” zawierające instrukcje krok po kroku dotyczące rozwiązania problemu. | ||
Jak podłączyć urządzenie do Alexy
| 1 |
Zaloguj się przy użyciu swojego konta Alexa i hasła (jeśli jeszcze nie jesteś zalogowany, zarejestruj się najpierw); Po zalogowaniu kliknij menu w lewym górnym rogu, następnie kliknij „Ustawienia” i wybierz „Skonfiguruj nowe urządzenie”; |
|
| 2 |
Wybierz „Umiejętności” na pasku opcji, a następnie wyszukaj |
|
| 3 |
Wprowadź nazwę użytkownika i hasło, które wcześniej zarejestrowałeś (konto jest obsługiwane tylko w Stanach Zjednoczonych); Gdy zobaczysz właściwą stronę, oznacza to, że Twoje konto Alexa jest połączone z kontem NOUS Smart Home. |
|
|
|
|
| 4 |
Wykrywanie urządzenia: użytkownicy muszą powiedzieć Echo: |
|
| 5 |
Lista umiejętności wsparcia |
|
| Uwaga: nazwa urządzenia musi odpowiadać aplikacji NOUS Smart Home. | ||
ПОСІБНИК З ЕКСПЛУАТАЦІЇ
опис
Розумна Zigbee розетка NOUS A6Z (далі – смарт розетка) призначена для організації автоматичного та ручного вимкнення електроприладів в приміщенні, шляхом віддаленого доступу через мережу Інтернет, за допомогою смартфона або планшета з встановленим додатком Nous Smart Home. Зв'язок зі смарт розеткою налаштований через хмарний сервер за протоколом P2P, для чого використовується бездротовий zigbee адаптер. Смарт розетка обладнана механічною кнопкою та світовою індикацією стану пристрою. Смарт розетка обладнана електромеханічним реле. Пристрій має функцію енергомоніторингу та запису споживчої електроенергії.
УВАГА: Для підключення вам знадобиться Nous E1, Nous E7 або інший сумісний з Tuya шлюз/концентратор ZigBee.
З'єднання смарт розети з інтернетом не може бути гарантоване в всіх випадках, оскільки воно залежить від багатьох умов: якості каналу зв'язку та проміжного мережевого обладнання, марки та моделі мобільного пристрою, версії операційної системи тощо.
ЗАПОБІЖНІ ЗАХОДИ
- Уважно прочитайте цю інструкцію.
- Використовувати продукт у межах температури та вологості, зазначених у технічному паспорті.
- Не встановлюйте виріб поблизу джерел тепла, наприклад, радіаторів опалення тощо.
- Не допускати падіння пристрою і впливу на нього механічних навантажень.
- Не використовуйте для чищення виробу хімічно активні та абразивні миючі засоби. Використовуйте для цього вологу фланелеву ганчірку.
- Не призводьте до перенавантаження зазначеної потужності. Це може призвести до короткого замикання та ураження електричним струмом.
- Не розбирайте виріб самостійно - діагностику і ремонт пристрою необхідно проводити тільки в сертифікованому сервісному центрі.
Дизайн і елементи керування
| № | Ім'я | опис |
| 1 | Індикатор | Показує поточний стан пристрою |
| 2 | Кнопка | Короткотривале натискання кнопки перемикає пристрій "ON" "OFF".Тривале натискання кнопки (5-7 С) скидає налаштування смарт розетки та параметри підключення до мережі Wi-Fi. |
Підключення
Для підключення смарт розетки Nous А6Z необхідний смартфон на базі мобільної операційної системи Android або iOS з встановленим додатком Nous Smart Home. Цей мобільний додаток безкоштовний і доступний для завантаження з Play Market і App Store. Qr-код до додатку наведено нижче:
Після встановлення програми для її коректної роботи необхідно надати йому всі дозволи у відповідному розділі налаштувань смартфона. Тоді необхідно зареєструвати нового користувача цієї програми.
Порядок підключення смарт розетки до мережі Zigbee:
| 1 | Під'єднайте смартфон до точки доступу, яка буде використовуватися для підключення смарт розетки. Переконайтеся, що діапазон частот мережі 2,4 ГГц, інакше смарт розетка не під'єднається, оскільки Zigbee Hab не призначени для роботи з мережами Wi-Fi 5 ГГц;(ваш концентратор ZigBee уже має бути підключений до програми) | |
| 2 | Увімкніть смарт розетку до мережі. Якщо світова індикація блимає не швидко, то натиснути кнопку 5-7 с для скидання налаштувань смарт розетки до заводських значень. | |
| 3 | Відкрийте програму Nous Smart Home і натисніть кнопку додавання нового пристрою | |
| 4 |
З’явиться автосканування, яке запропонує вам додати новий пристрій.Підтвердьте підключення та почніть сполучення. |
|
| 5 |
Якщо автосканування не бачить ваш пристрій, ви можете вибрати його вручну зі списку пристроїв |
|
|
|
|
| 6 | У вкладці «Додати вручну» виберіть категорію «Смарт розетки», а в ній модель «Розетка А6Z», як показано на малюнку вище; | |
| 7 | У вікні, що відкрилося, виберіть «наступний крок» і натисніть кнопку «Вперед»; | |
| 8 | з'еднання з хабом Zigbee | |
|
|
|
| 8 | З'явиться вікно із зазначенням ступеня підключення до мережі та додаванням до списку пристроїв поточного користувача програми: | |
| 9 | Після закінчення процедури з'явиться вікно, в якому можна буде задати назву пристрою і вибрати кімнату, в якій він знаходиться. Назва пристрою також використовуватиметься Amazon Alexa та Google Home. | |
| 10 | Щоб видалити всі дані зі смарт розетки, потрібно в меню пристрою "Видалити пристрій", "вимкнута та видалити всі дані" | |
| Коли пристрій видаляється зі списку пристроїв користувача додатків, налаштування смарт розетки до заводських значень і потрібно буде знову скоротити процедуру підключення до мережі Wi-Fi. Якщо пароль для точки доступу Wi-Fi був вказаний неправильно, то в додатку після часу таймера з'являється вікно «не вдалося під'єднати до Wi-Fi» з пропозицією покрокових дій, щоб усунути проблему. | ||
Як підключити свій пристрій до Alexa
| 1 |
Увійдіть, використовуючи свій обліковий запис Alexa та пароль (якщо ви ще не зареєстровані, спочатку зареєструйтеся); Після входу натисніть меню у верхньому лівому куті, потім натисніть «Налаштування» та виберіть «Налаштувати новий пристрій»; |
|
| 2 |
Виберіть «Навички» на панелі параметрів, а потім знайдіть |
|
| 3 |
Введіть ім’я користувача та пароль, які ви раніше зареєстрували (обліковий запис підтримується лише в Сполучених Штатах); Коли ви бачите правильну сторінку, це означає, що обліковий запис Alexa пов’язано з обліковим записом NOUS Smart Home. |
|
|
|
|
| 4 |
Виявлення пристроїв: користувачі повинні сказати Echo: |
|
| 5 |
Список навичок підтримки |
|
| Увага: назва пристрою має відповідати додатку NOUS Smart Home APP. | ||