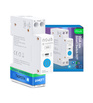
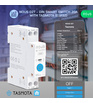
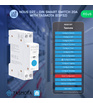
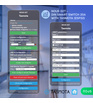
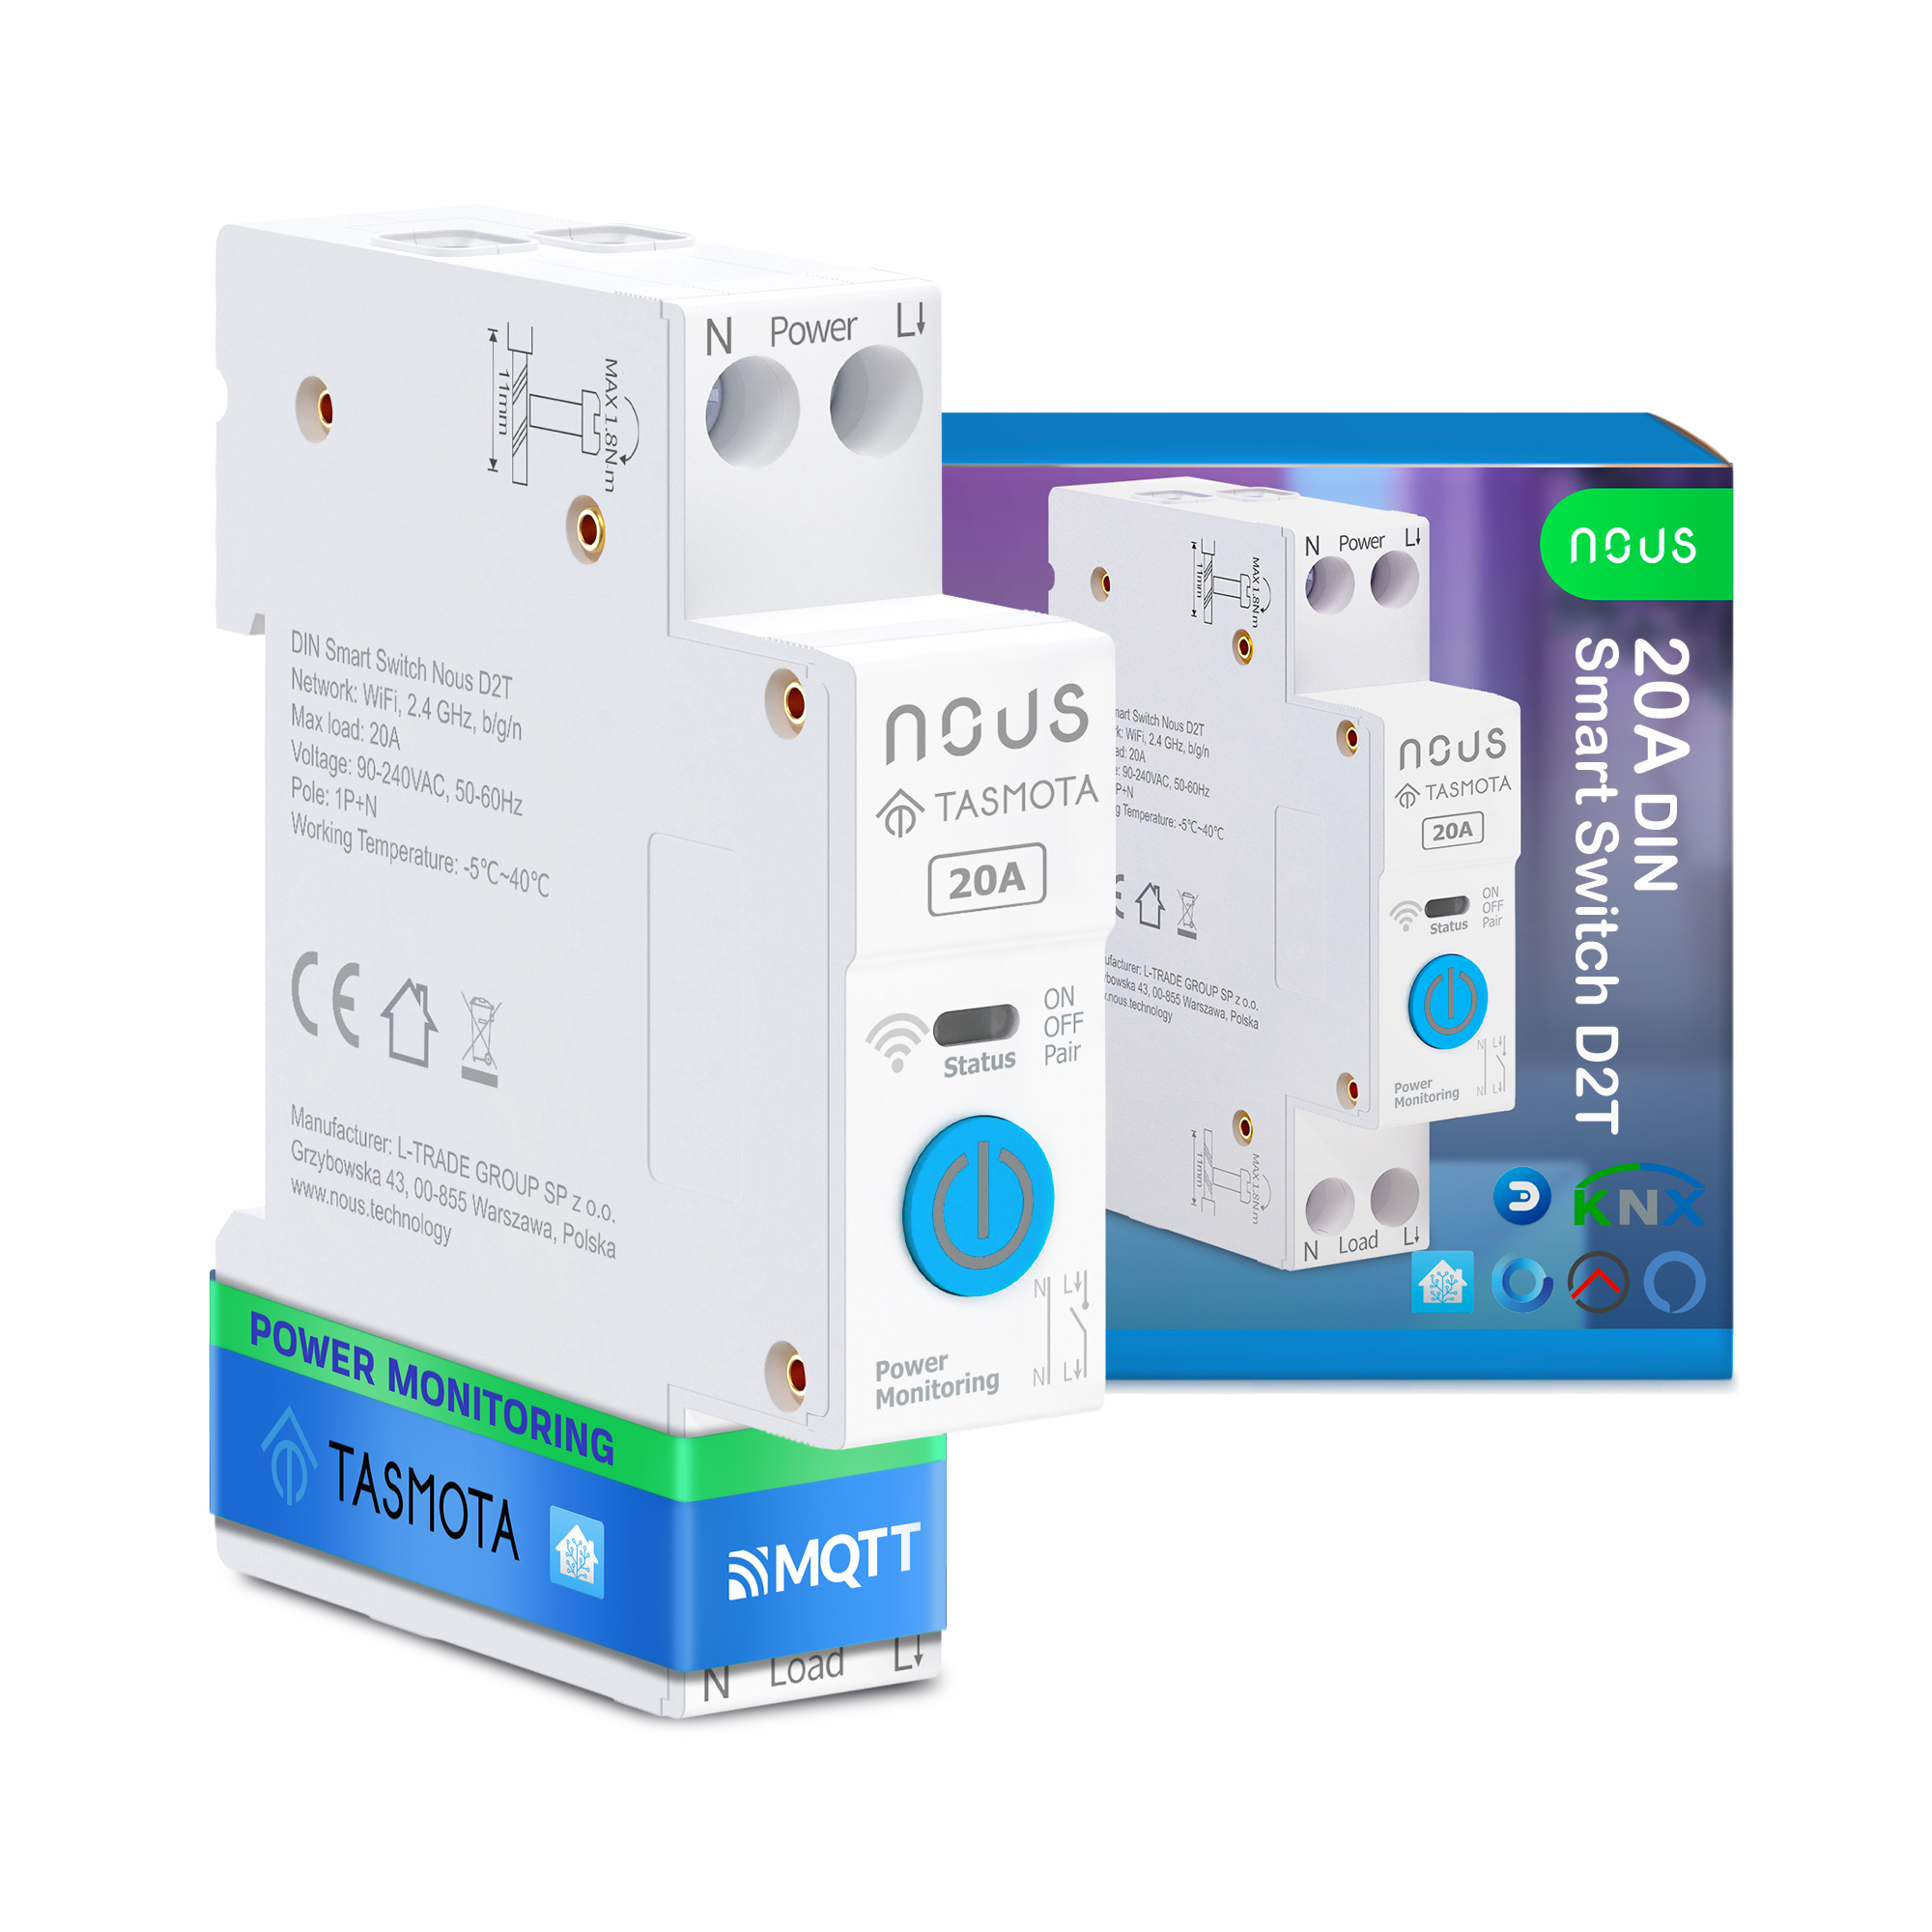
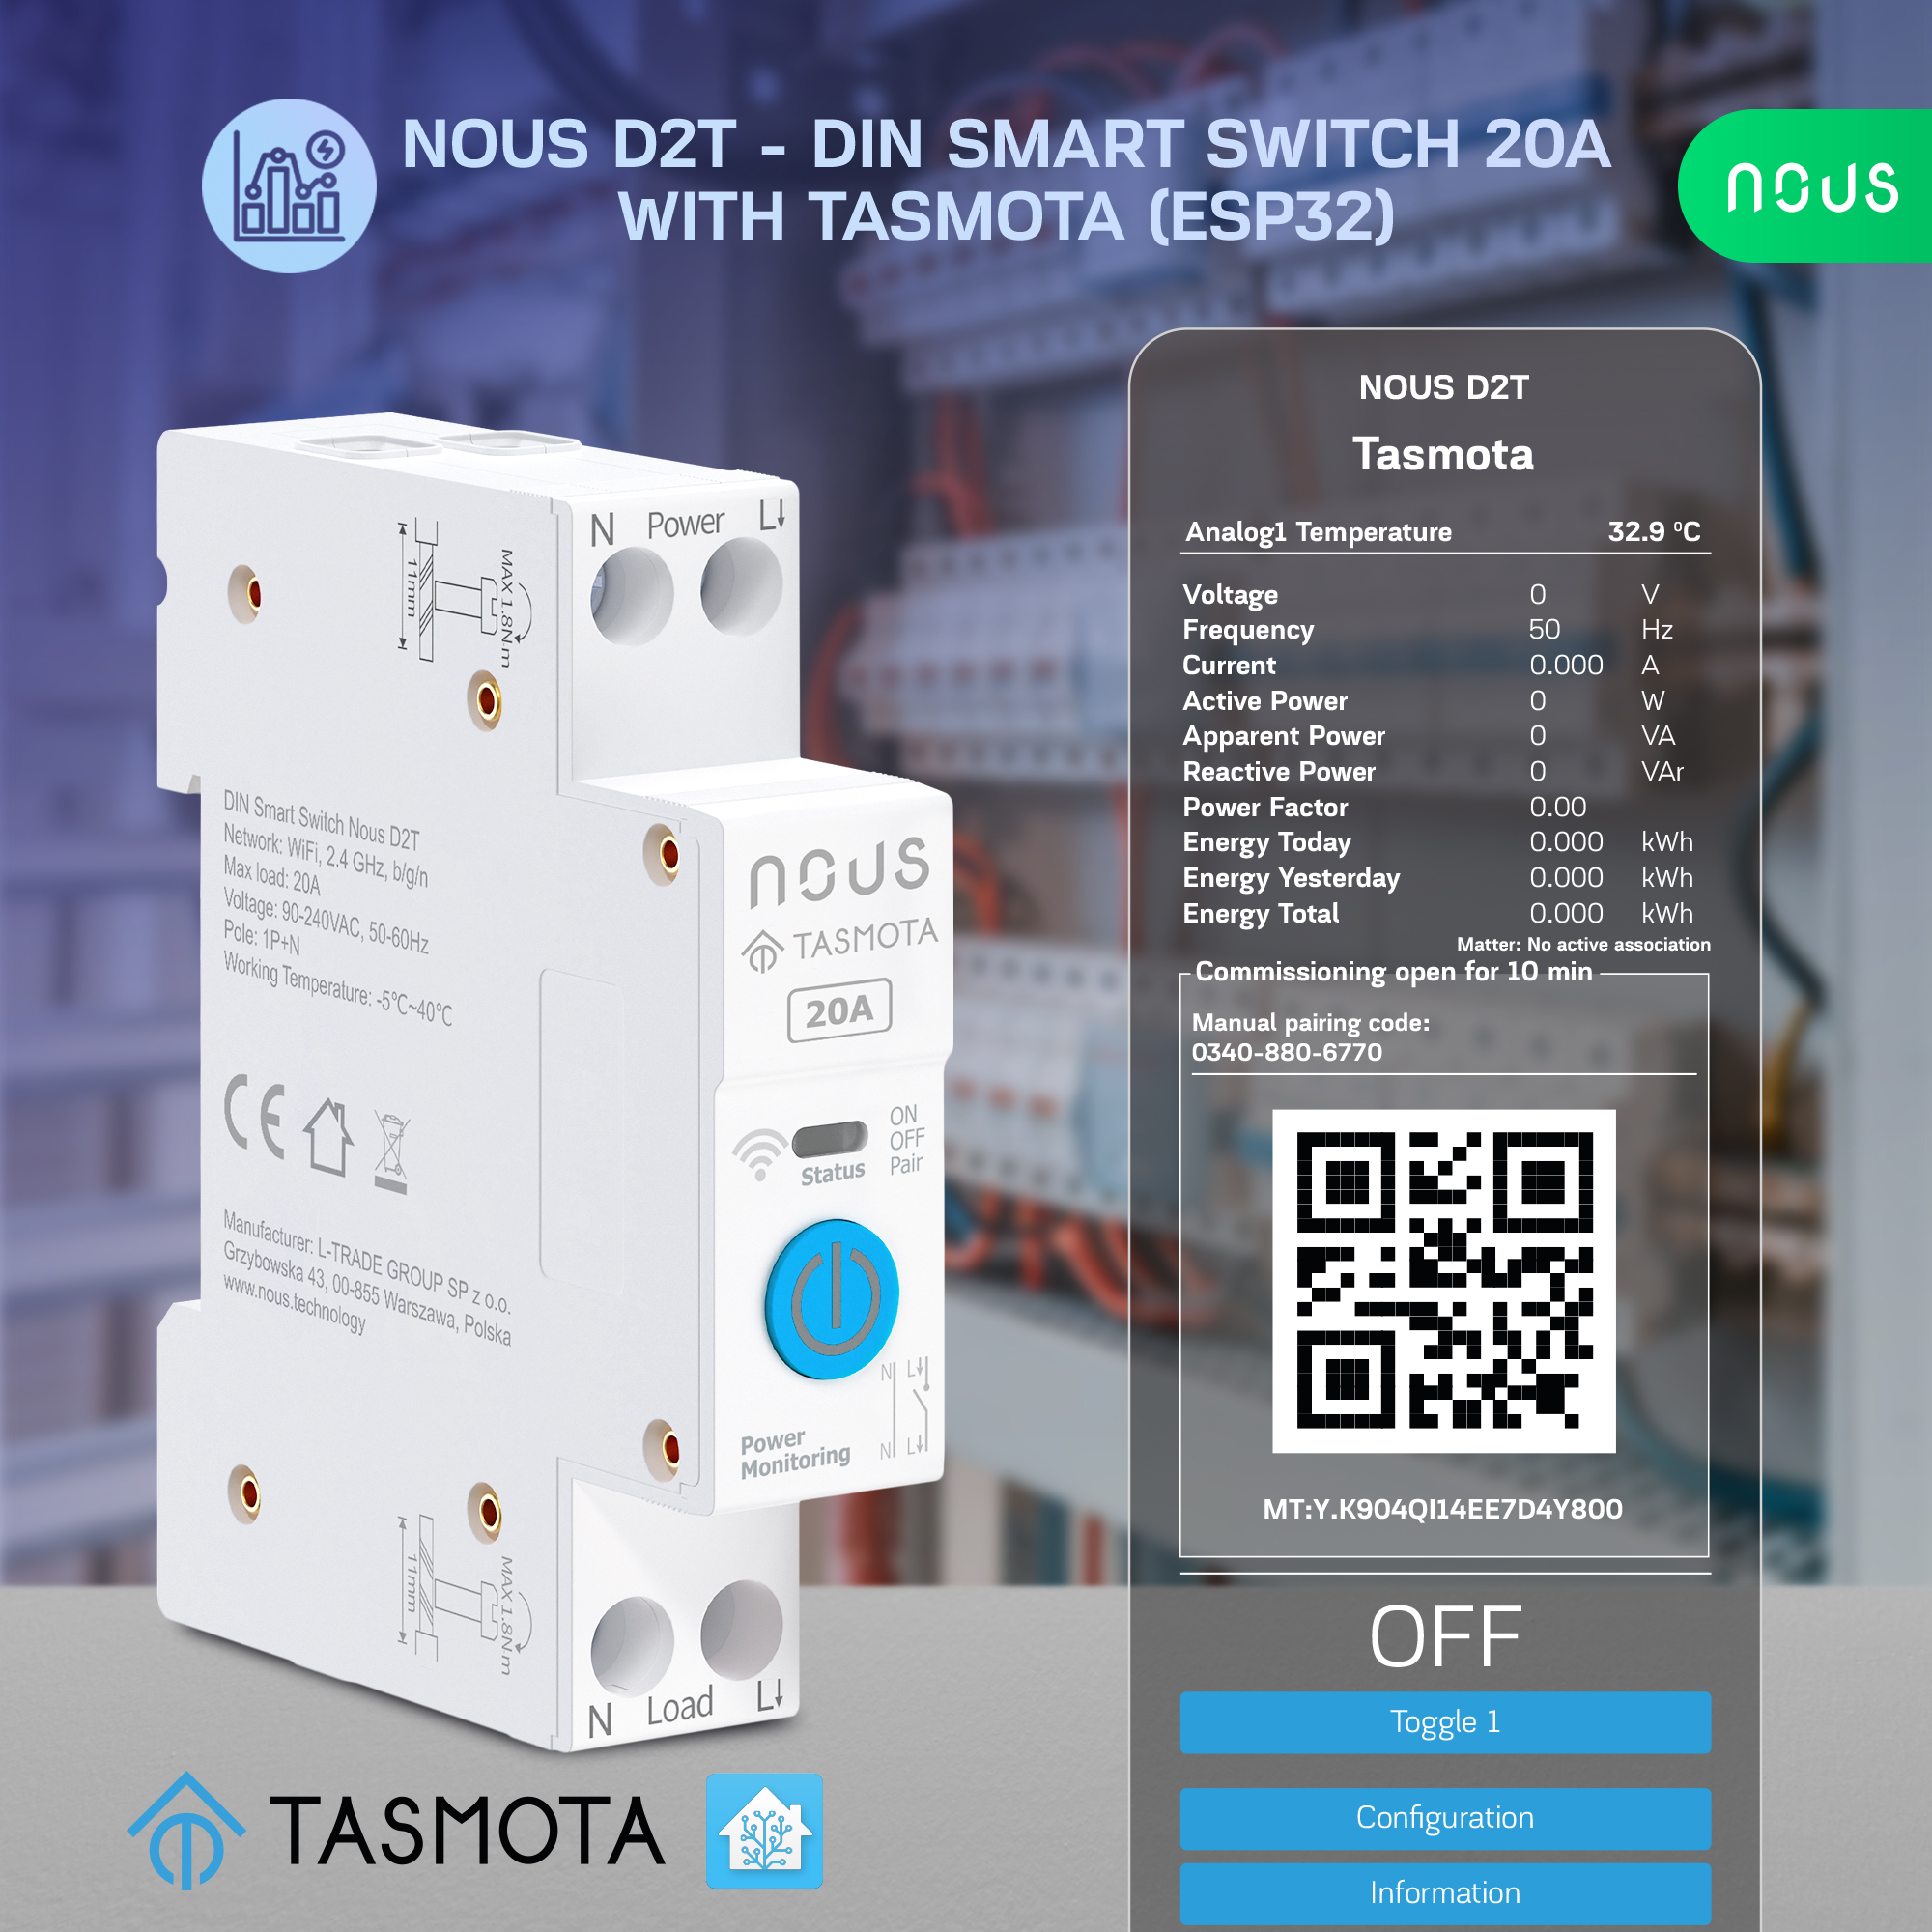
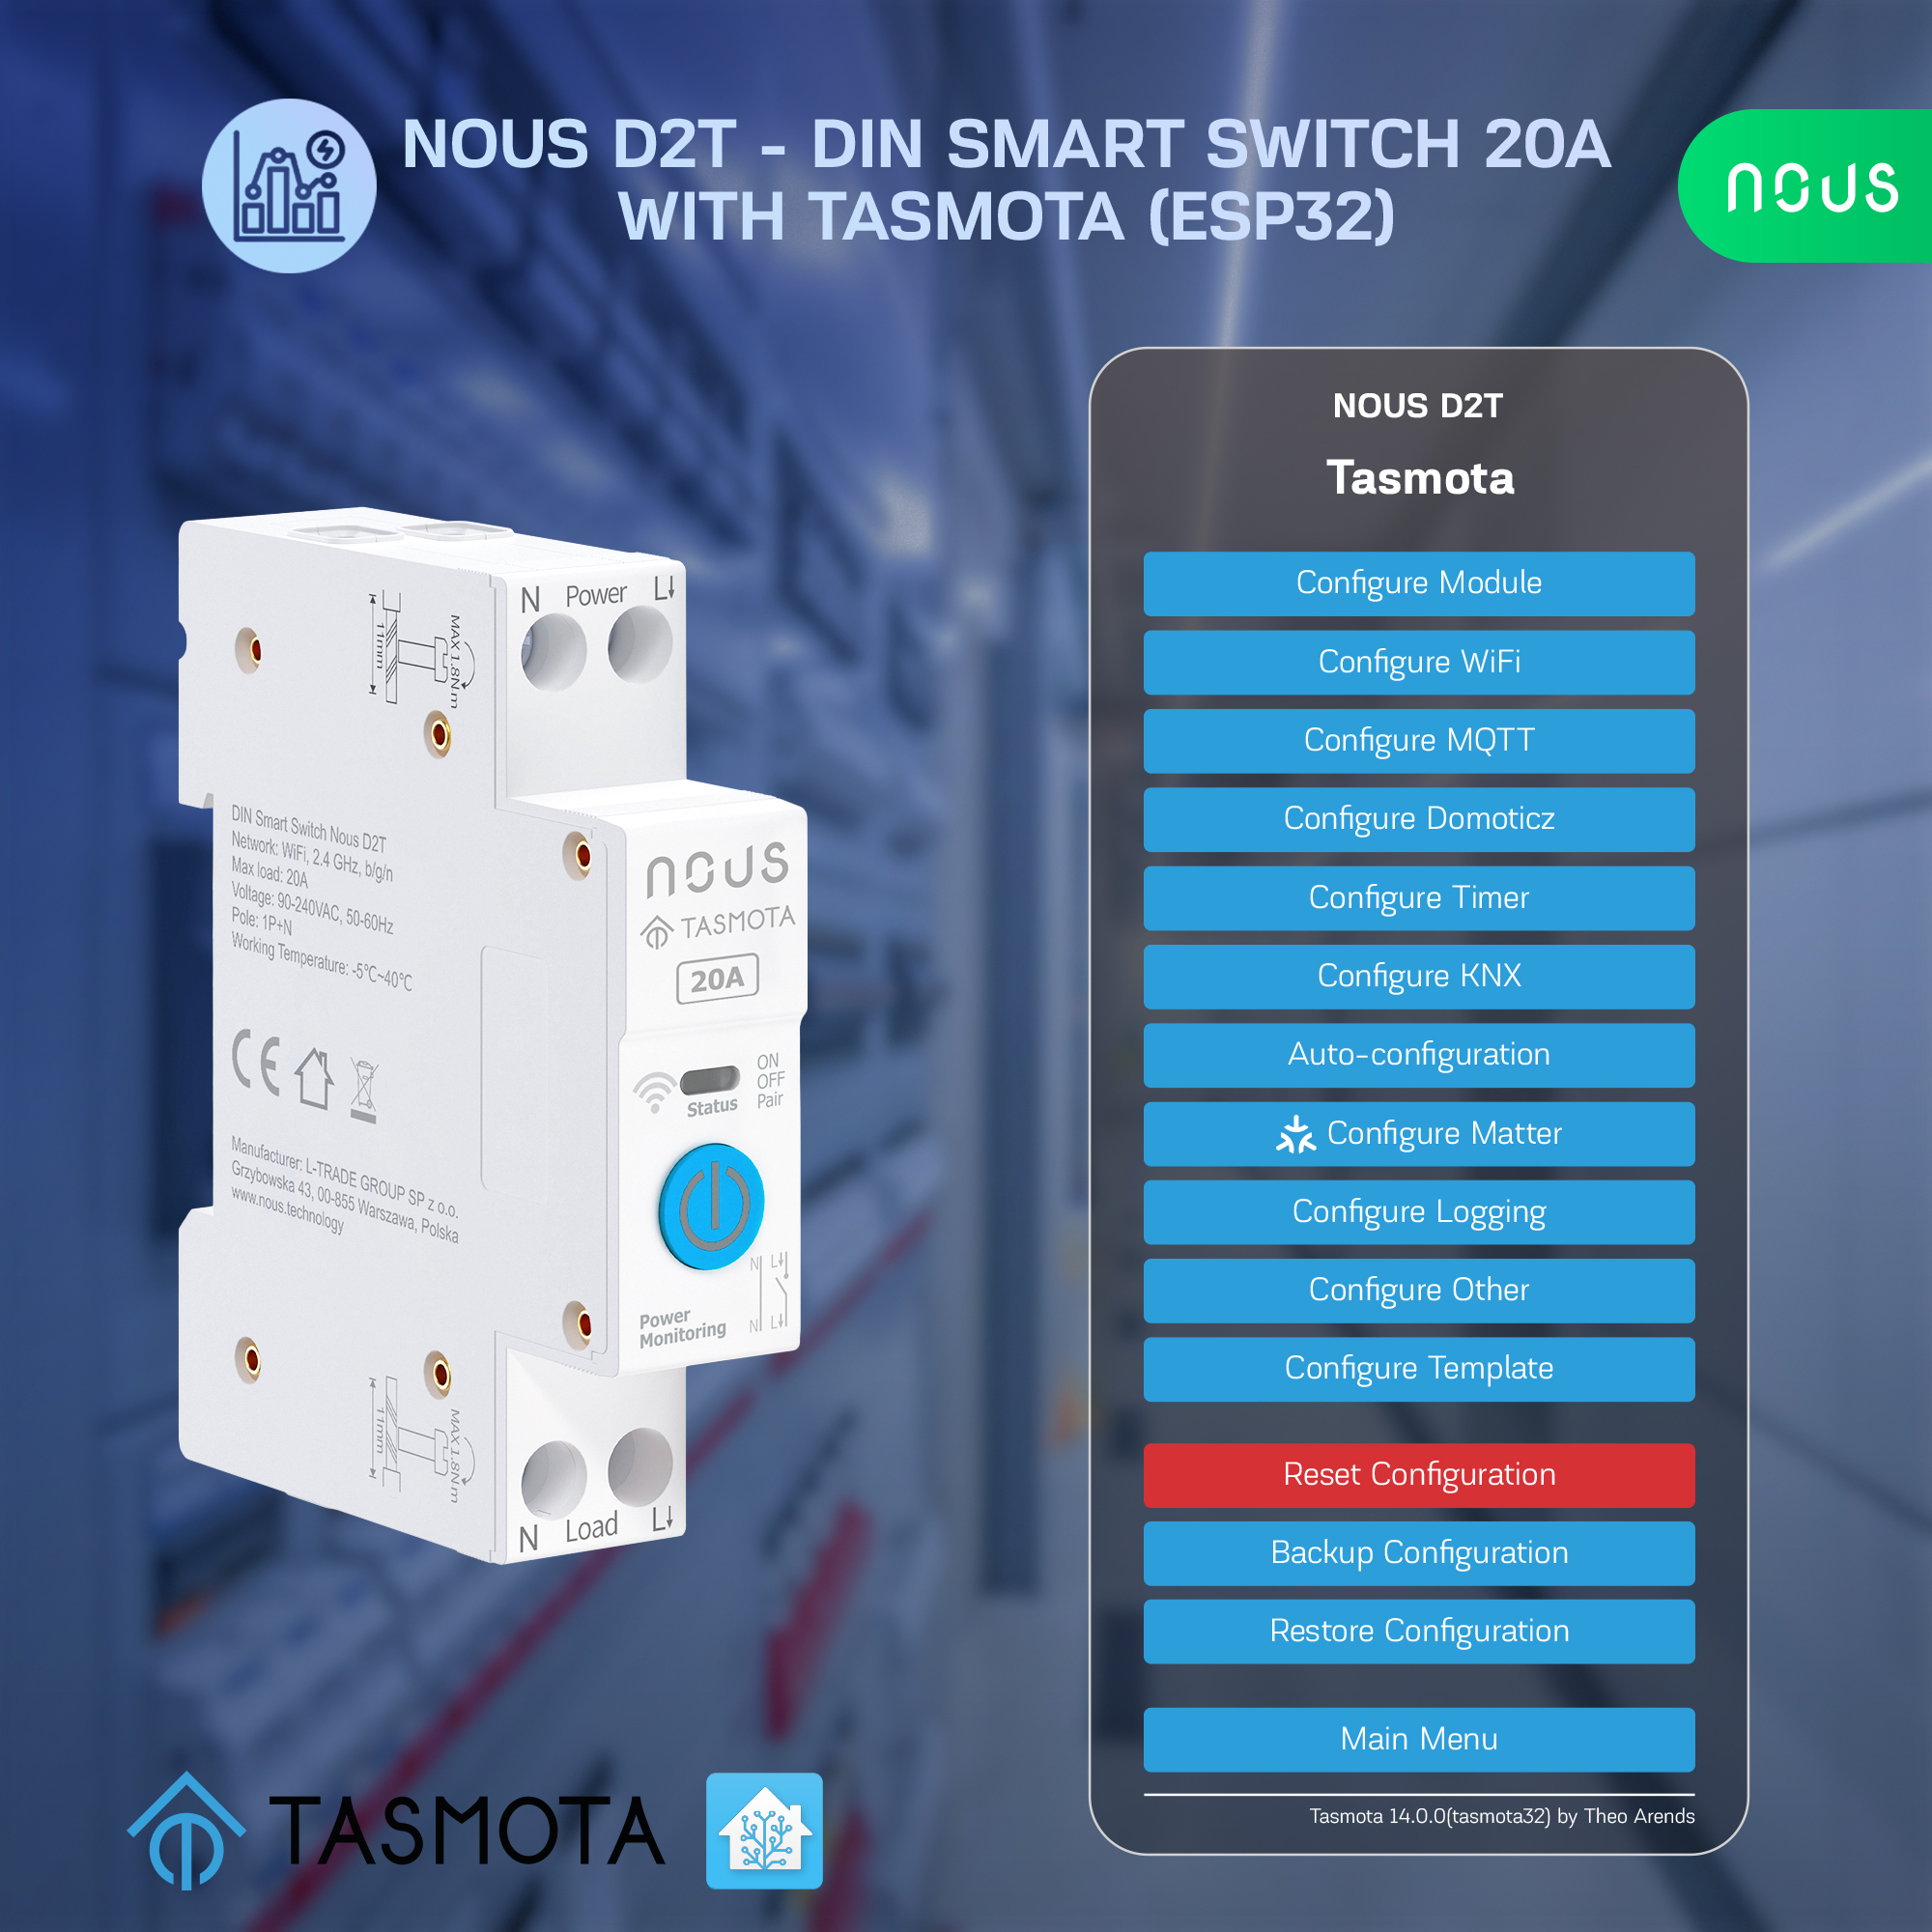

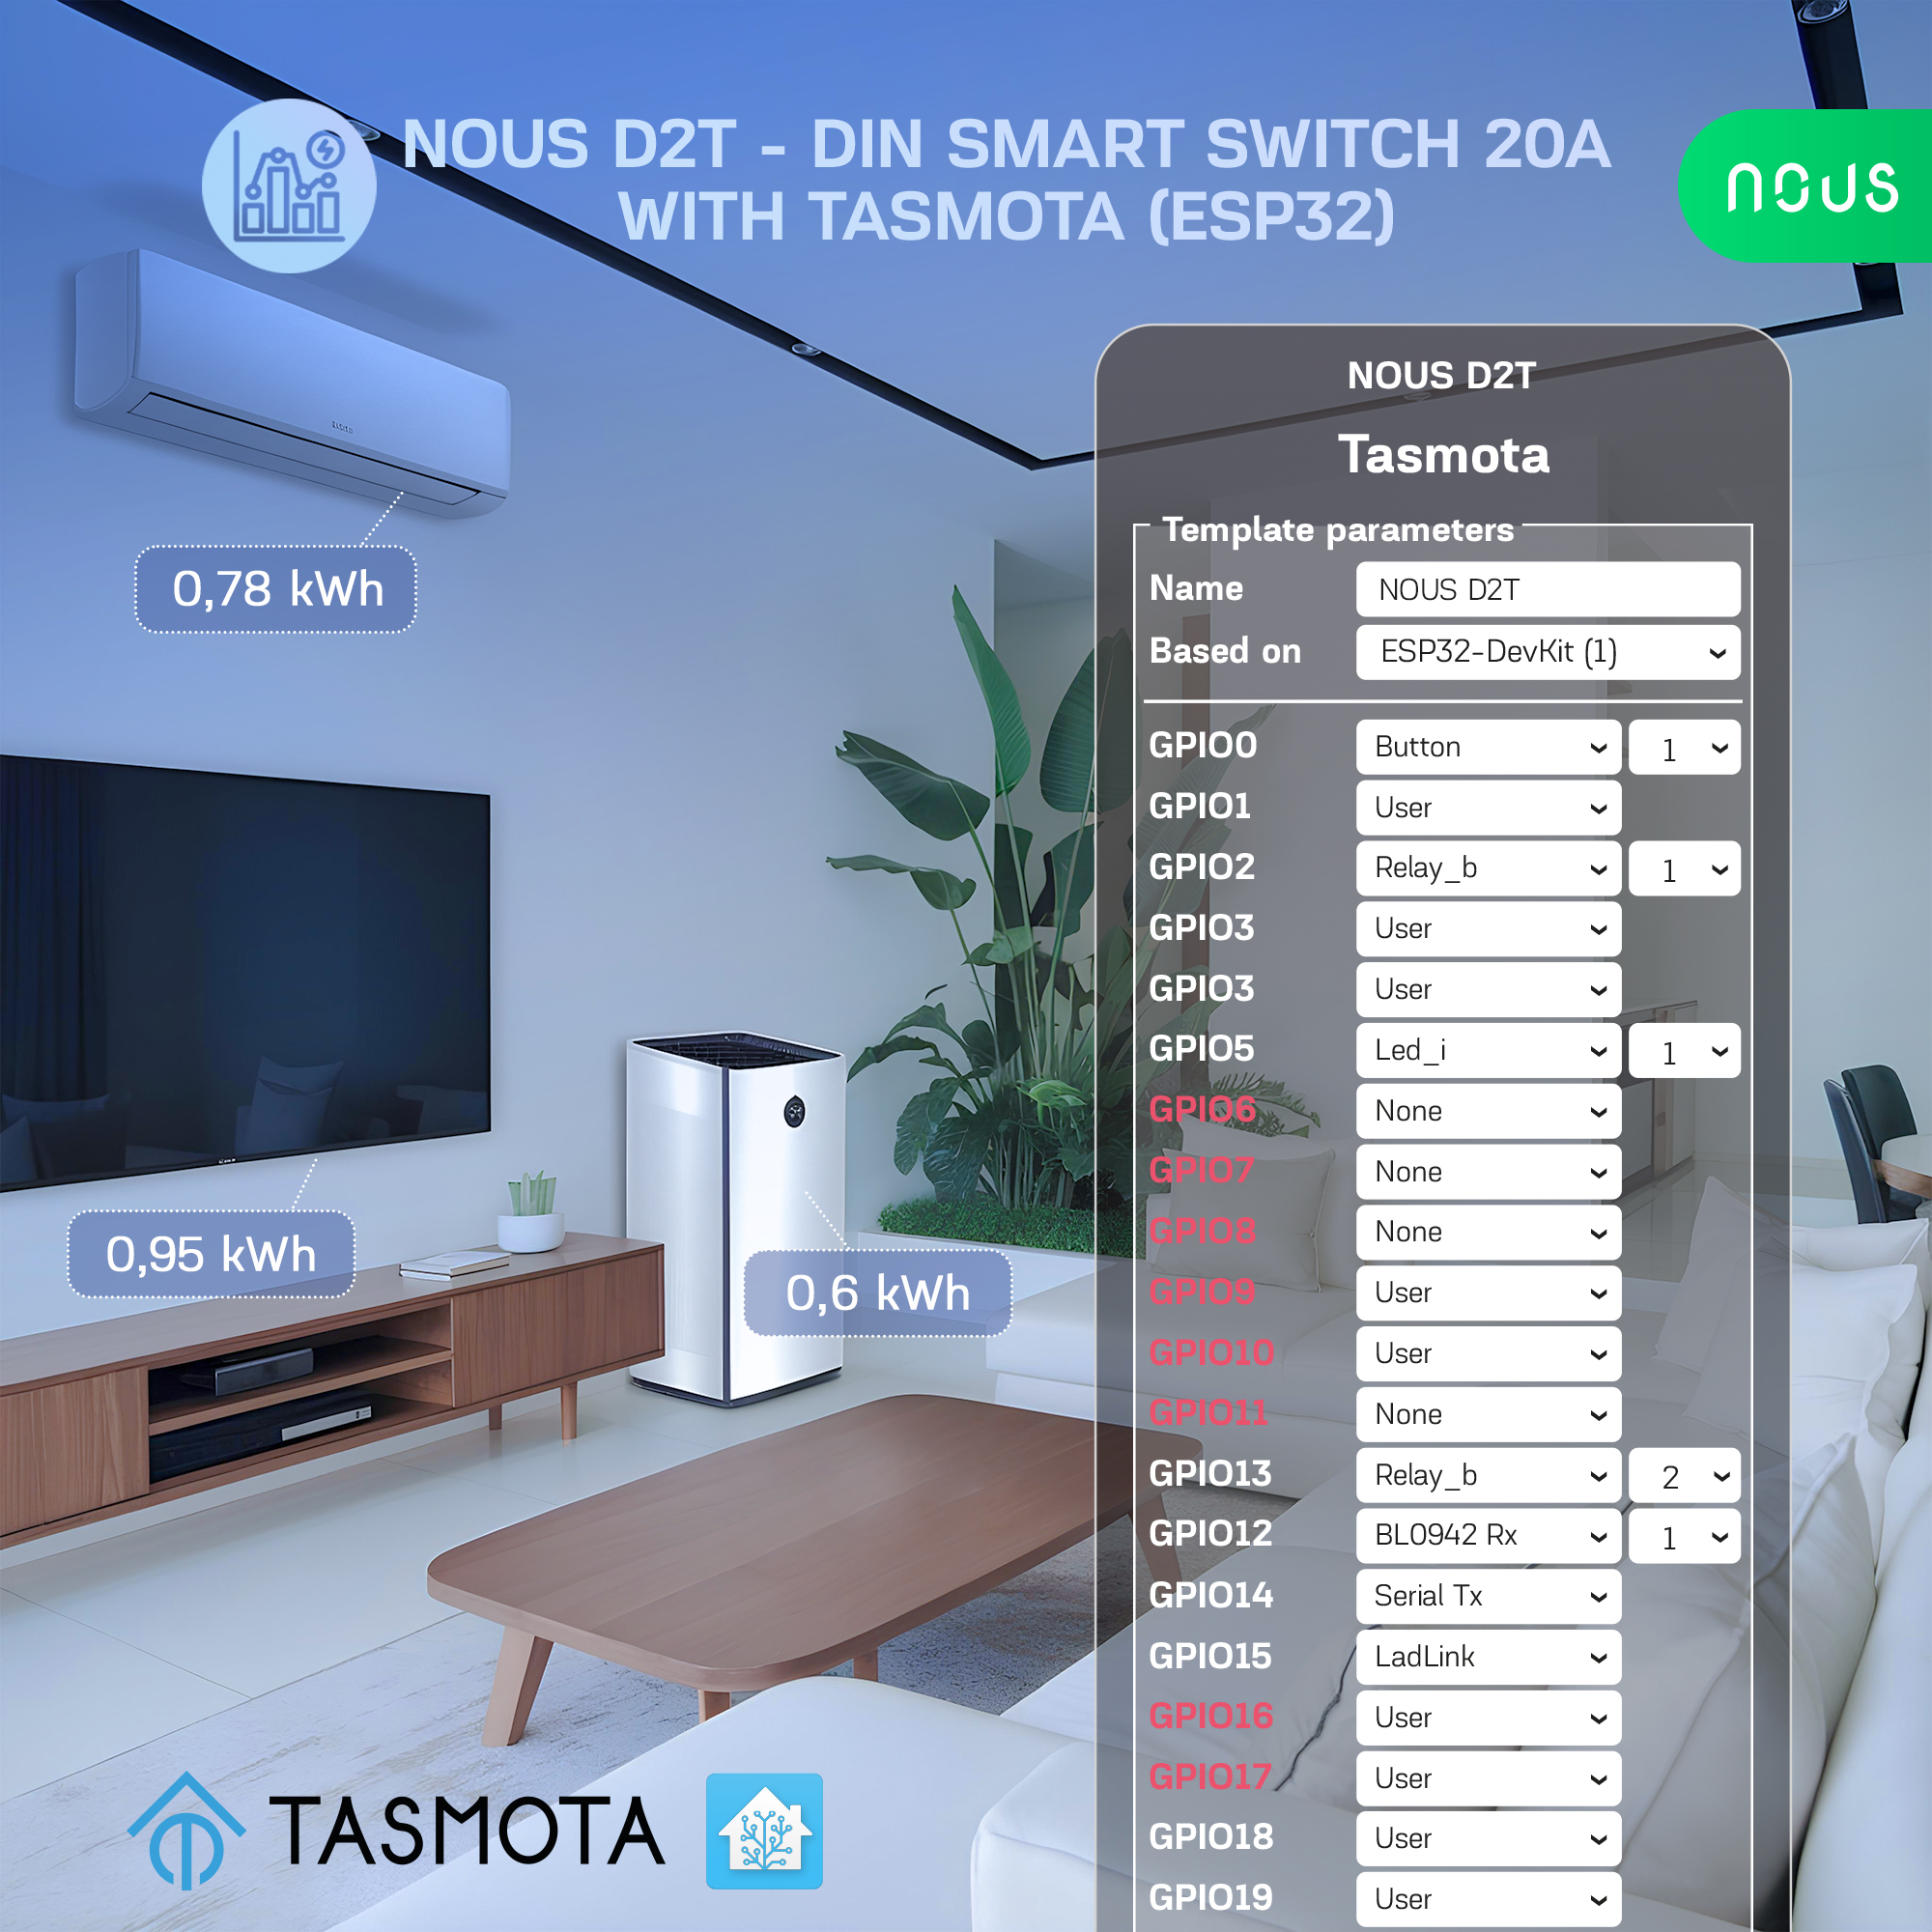

Nous D2T - DIN Smart Switch 20A with Tasmota (ESP32)

| Main settings | |
|---|---|
| Compatibility | Locking Clip for DIN rail mounting |
| Brand | NOUS |
| Colour | White |
| Material | PC/ABS (V0) |
| Special features | Energy monitoring |
| Certificate | CE, RoHS |
| Specifications | |
| Device dimensions | 82x50x15 mm |
| Maximum load | 20 A |
| Operating temperature | -25~70 ℃ |
| Operating voltage range | 90-240V |
| Level of moisture protection | IP20 |
| Network | |
| Communication standard | WiFi IEEE 802.11b/g/n |
| Protocol | MQTT, Matter |
| Type of wireless transmission | 2.4GHz |
| Control from a smartphone | Web Interface, Home Assistant, with Matter connection: Google Home, Alexa, Apple Home kit, etc |
| Compatibility with voice assistants | Alexa, Google Assistant, Siri after connection to Home Assistant or with Matter connection |
| Frequency range: | 2412 - 2484 MHz |
OPERATING MANUAL
 NOTE: Tasmota is not a commercial product and support is limited. You should be prepared to research and resolve potential issues on your own.
Detailed information about connecting, changing settings and modifications is presented on the website " https://tasmota.github.io/docs/ "
description
The NOUS D2T smart switch with Tasmota open source software installed (hereinafter referred to as the switch) is designed to organize automatic and manual switching off of electrical appliances in the room, by remote access via a Wi-Fi network, using a smartphone or from a personal computer via the Web interface. Communication with the switch is configured via a Wi-Fi network, for which a wireless Wi-Fi adapter is used. The switch is equipped with a mechanical button and a light indicator of the device status. The device is equipped with an electromechanical relay and supports the Matter protocol .
ATTENTION: The connection of the smart socket to the Wi-Fi network cannot be guaranteed in all cases, as it depends on many conditions: the quality of the communication channel and intermediate network equipment, the make and model of the mobile device, the version of the operating system, etc.
PREVENTIVE MEASURES
- Read these instructions carefully.
- Use the product within the temperature and humidity limits specified in the technical data sheet.
- Do not install the product near heat sources, such as radiators, etc.
- Do not allow the device to fall or be subjected to mechanical stress.
- Do not use chemically active or abrasive cleaning agents to clean the product. Use a damp flannel cloth.
- Do not overload the specified capacity. This may cause a short circuit and electric shock.
- Do not disassemble the product yourself - diagnostics and repair of the device should only be carried out at a certified service center.
- Please contact the seller for a replacement if there is damage caused by transportation.
- Please insert the plug into the socket in proper condition and keep it away from children.
- For safety reasons, fully insert the plug into the socket during use.
Design and controls
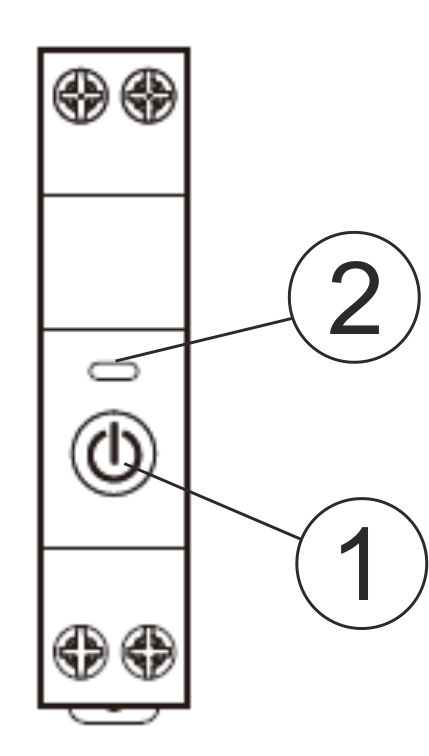
| № | Name | description |
| 1 | Button | A short press of the button switches the device "ON" "OFF". |
| 2 | Indicator | Shows the current status of the device |
Installation
| Installation procedure: | ||
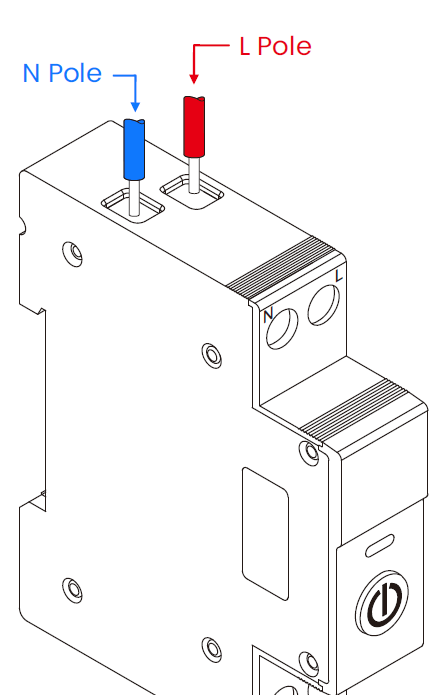
| 1 | Connect the switch as shown in one of the electrical diagrams. |
|
| 2 |
Marking:
|
|
| 3 | When the installation is complete, the device is ready for use. | |
| Importantly: | Make sure that the Wi-Fi network in the selected installation location is stable and has a sufficient level. | |
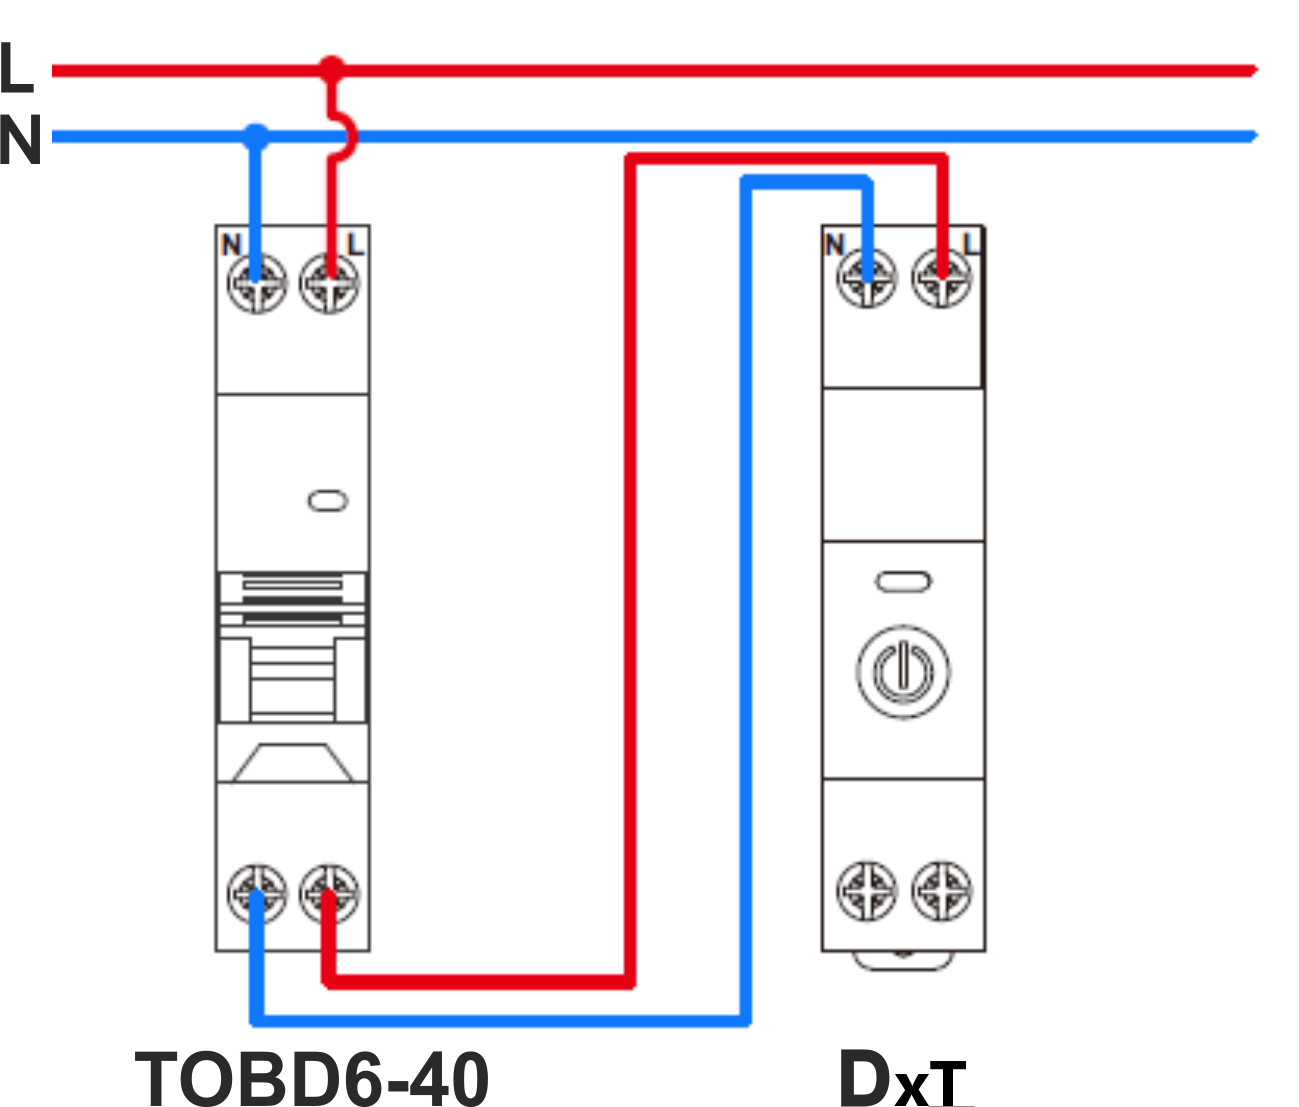
Connection
To connect the Nous D2T switch, you need a smartphone or personal PC.
How to connect the switch to a Wi-Fi network:
| 1 | Make sure that the frequency range of the network to which the device will be connected is 2.4 GHz, otherwise the switch will not connect, since the device is not designed to work with 5 GHz Wi-Fi networks; | |
| 2 | Connect the device to the network. On the PC, the access point "tasmota-xxxxxxx" should appear in the list of networks, if the access point is not detected, you need to do a "RESET" according to point 11 | |
| 3 | Connect to access point "tasmota-xxxxxxx" | |
| 4 |
After connecting to the access point, the browser will automatically open and go to the link 192.168.4.1, if this operation did not follow, then you need to open the browser and enter 192.168.4.1 in the address input field |
|
| 5 |
On the opened page, you need to select your access point and enter its password in the field below and click "Save" |
|
 |
|
|
| 6 | When the connection is complete, an inscription will appear stating "Successful connection to Wi-Fi" and the address of your device on the network. | |
| 7 | Connect to your Wi-Fi network and go to the address that was specified in point 6. | |
| 8 | You will need to calibrate the device for the power source. You can find how to do this here: https://tasmota.github.io/docs/Power-Monitoring-Calibration/ | |
| 9 |
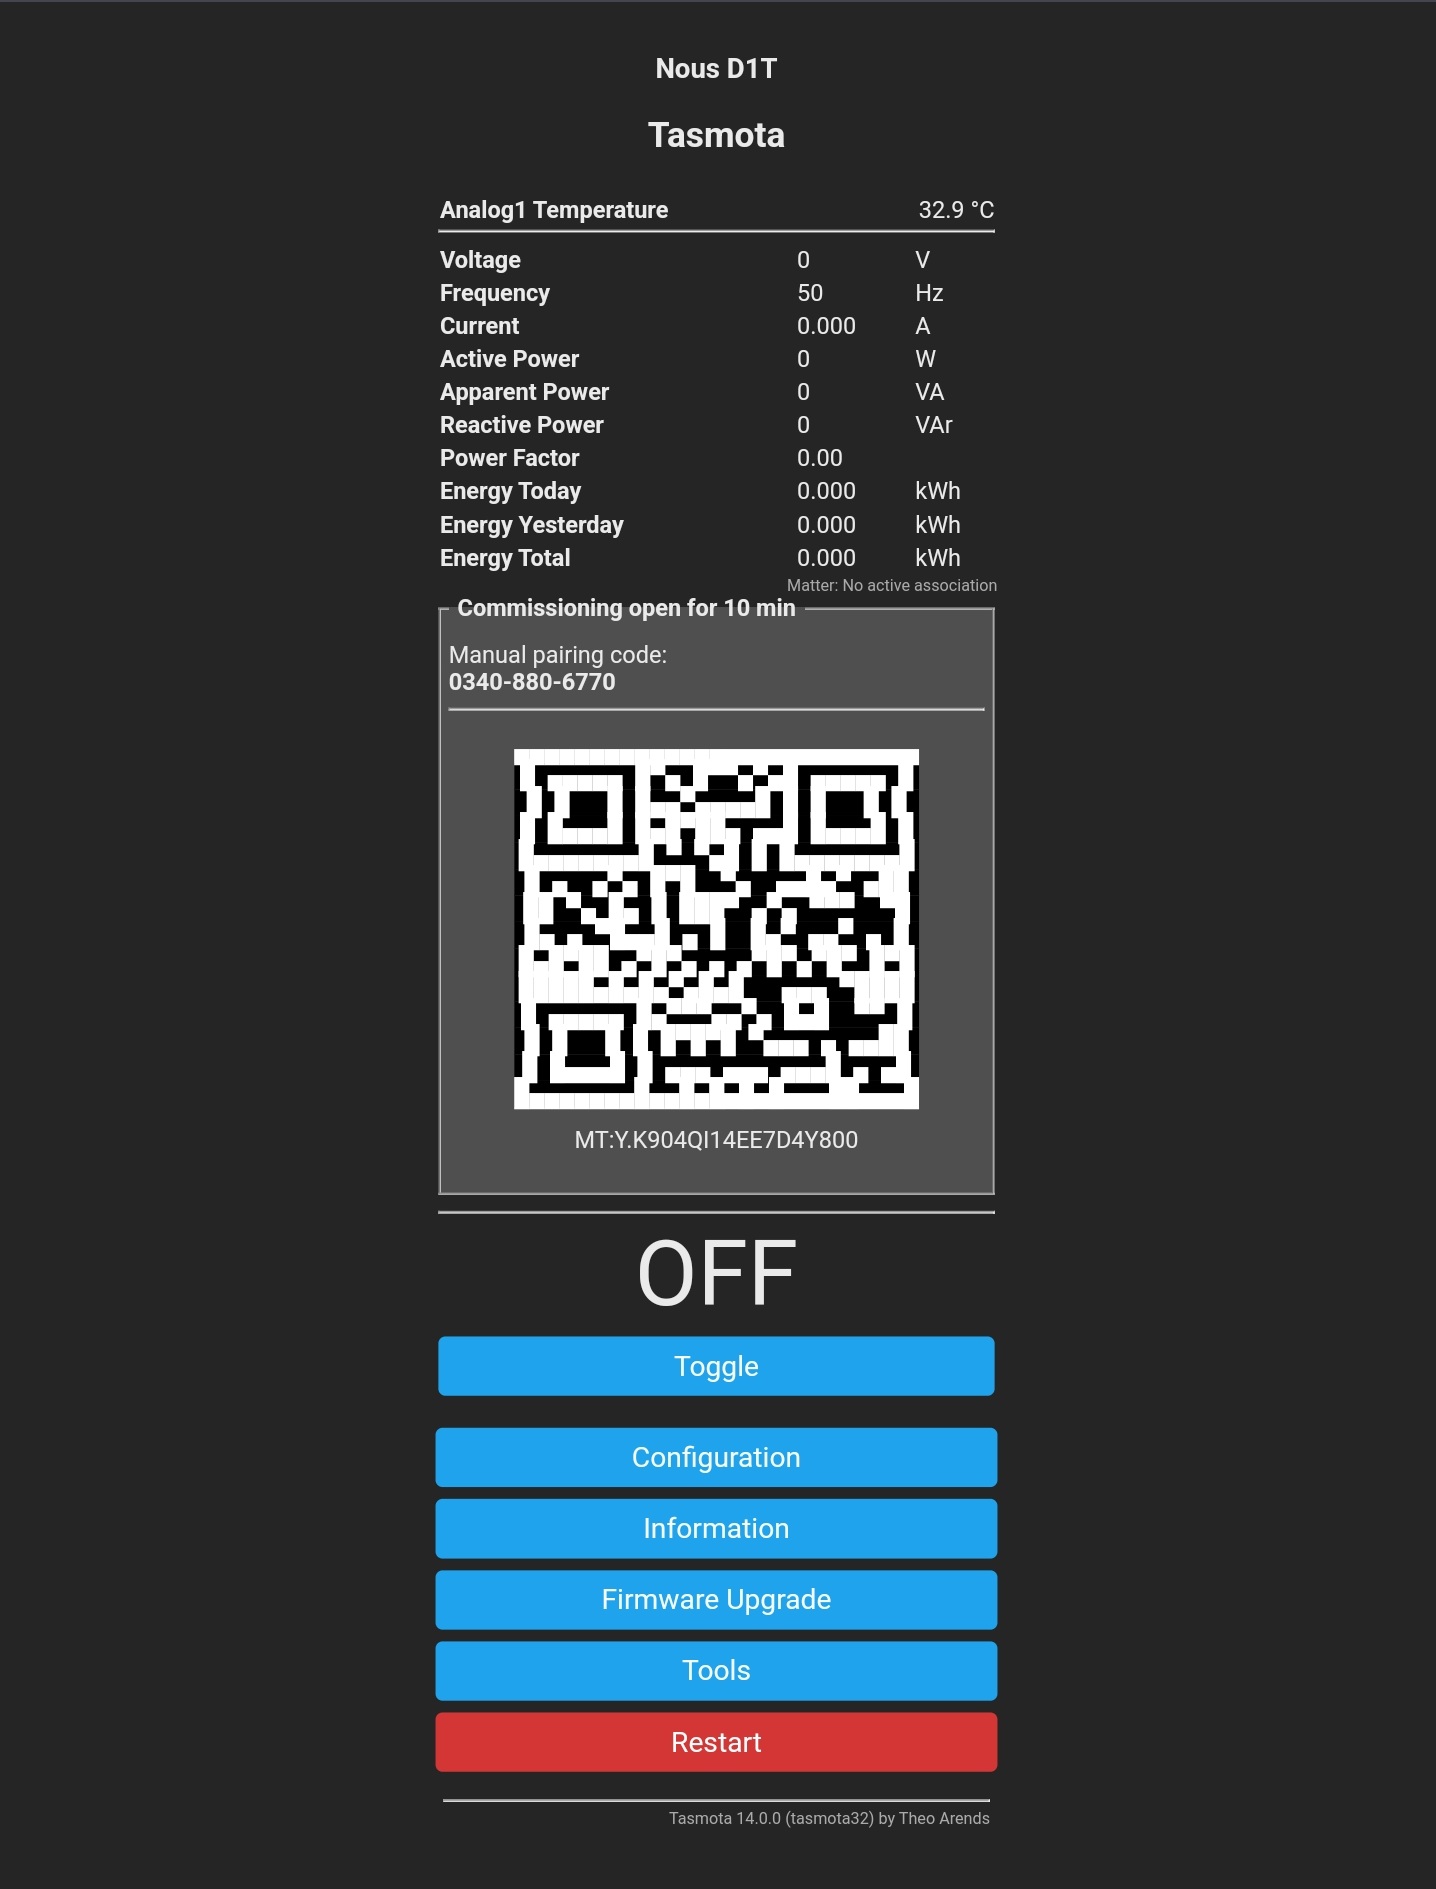
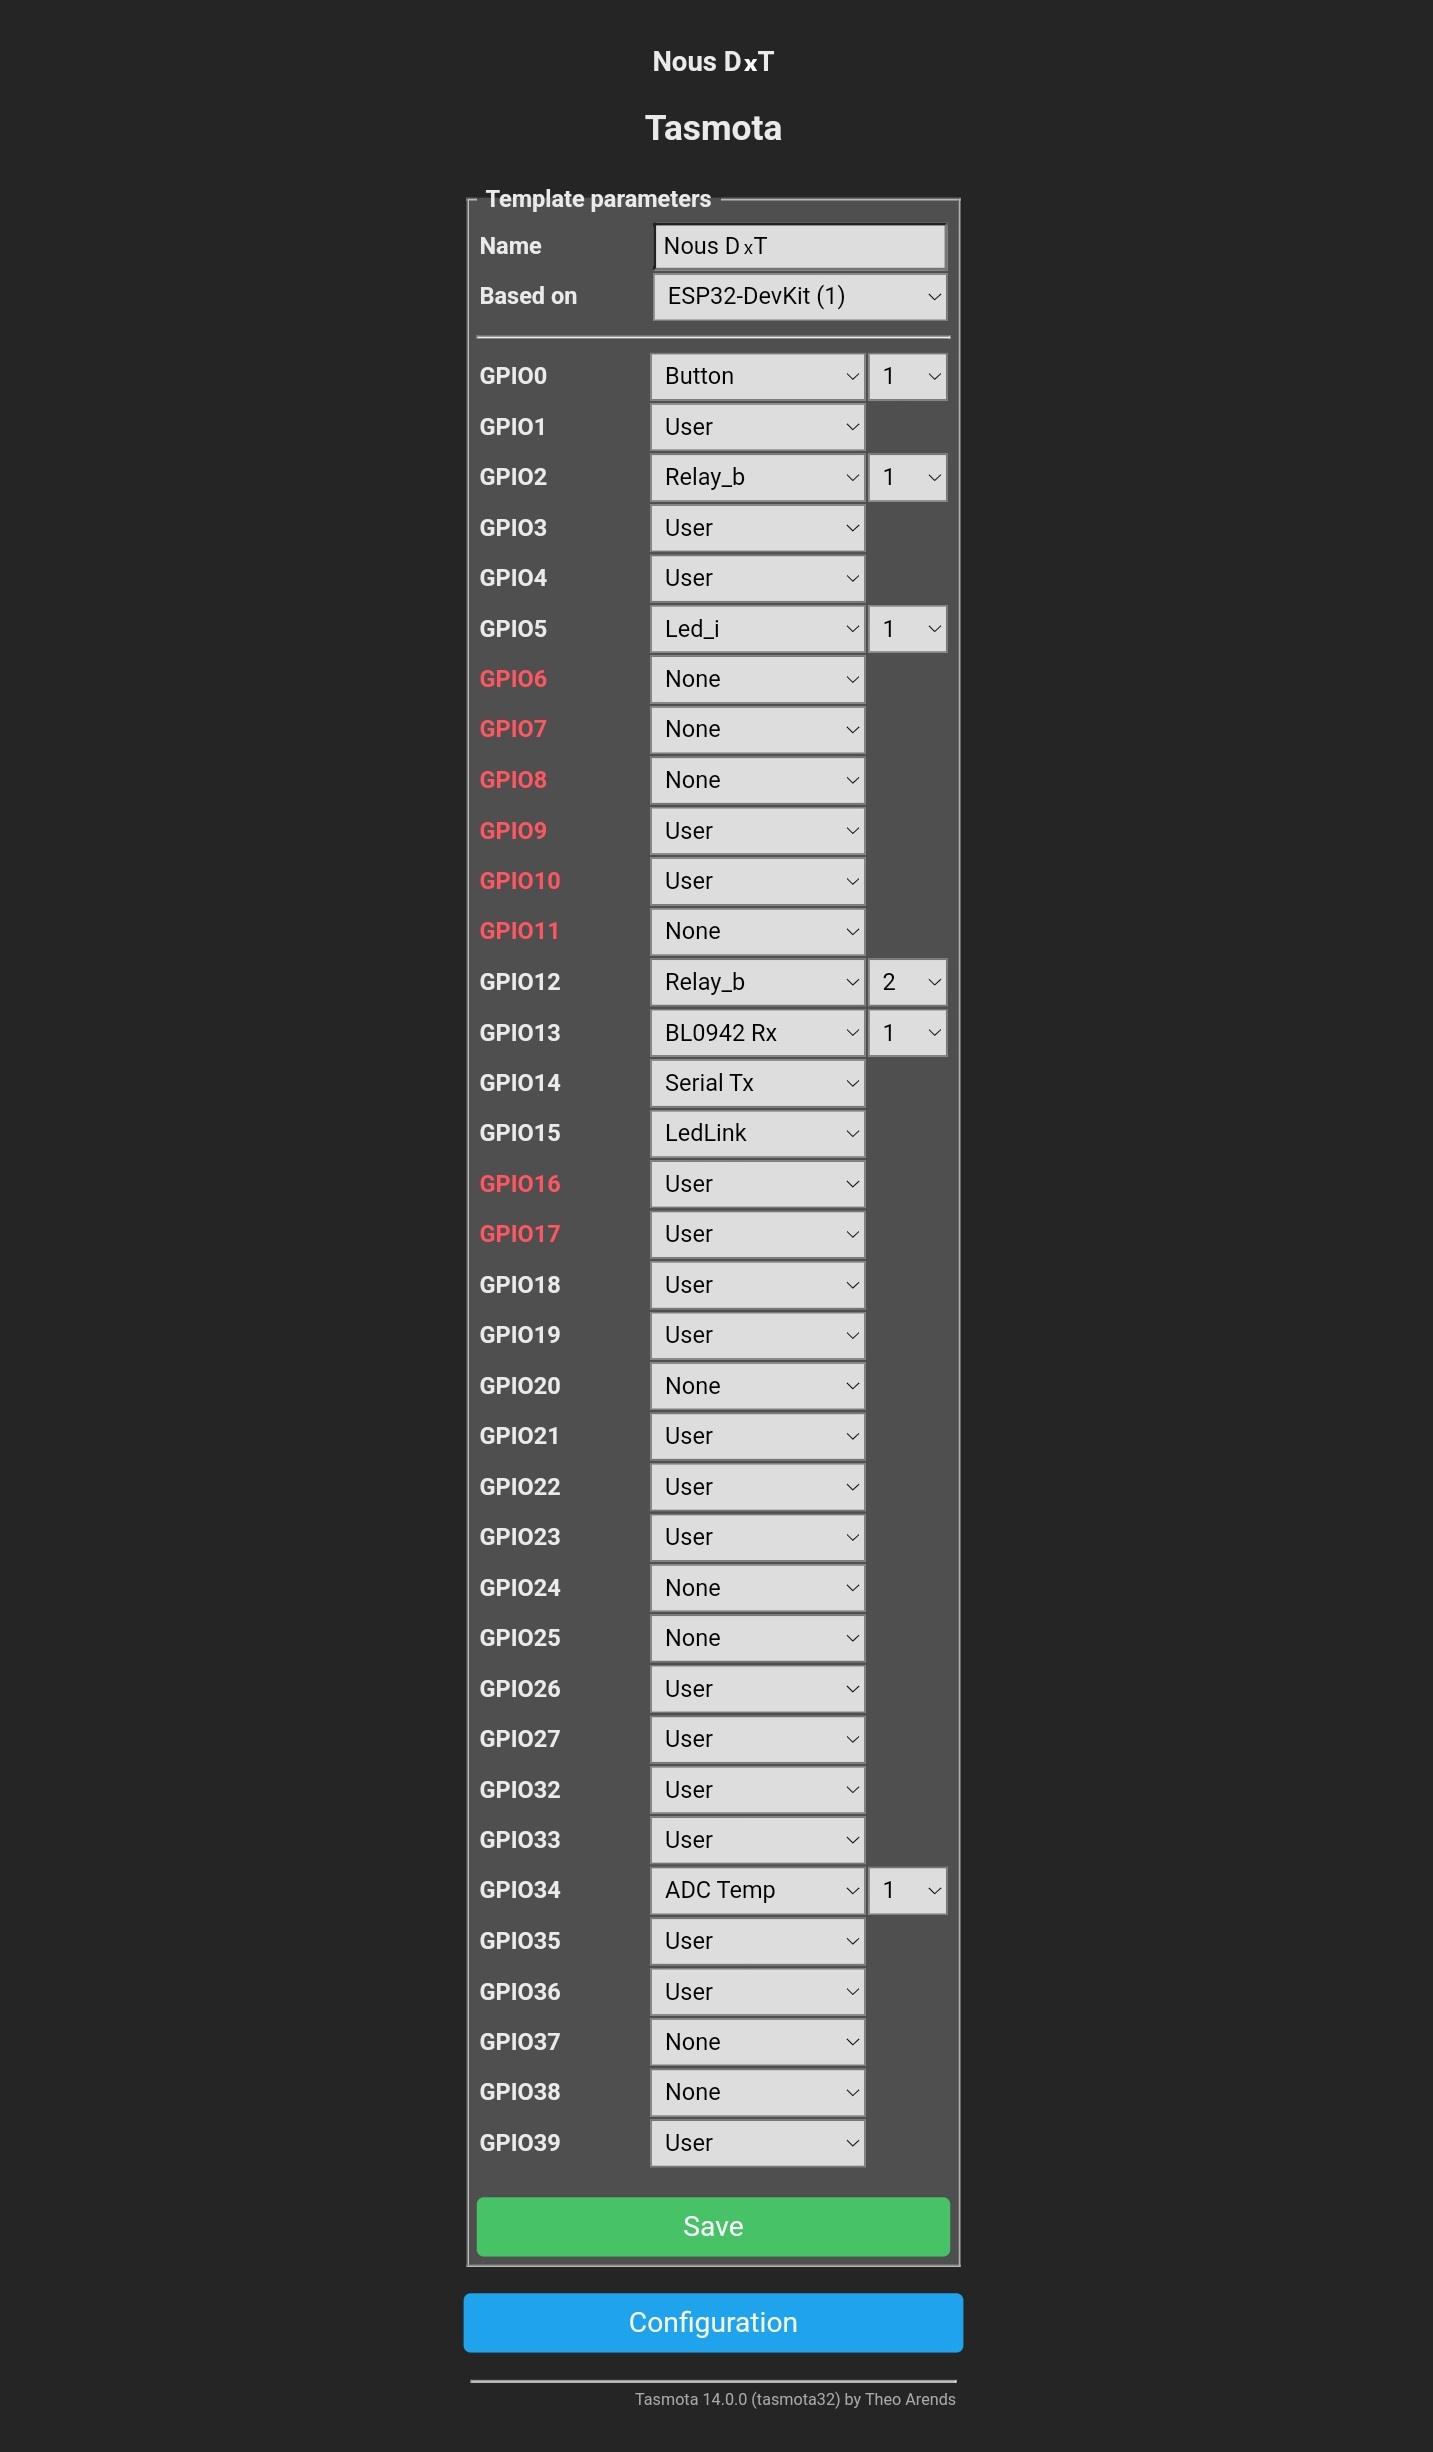
The device is ready to use. The template and rules are already activated, but if you need it later - you can find it below |
|
 |
 |
|
| 10 |
{"NAME":"Nous D1T","GPIO":[32,1,9312,1,1,320,1,1,9313,8160,3200,544,1,1,1,1,0,1,1,1,0,0,1,1,0,0,0,0,1,1,4736,1,1,0,0,1],"FLAG":0,"BASE":1}The template must be entered in the "Template" field, check the "Activate" box and save the changes:
|
|
| 11 |
To reset the device to factory settings you need to: Plug and unplug the device 6 times and leave it on for the 7th time - the LED should start flashing, meaning it is ready to be plugged in again; if you have access to the web interface, type " reset 1" in the console and press "enter" |
|
| 12 |
To connect the device to smart home systems using the Matter protocol, please read the following information: |
|
|
Tasmota is a highly extensible and flexible program that can be integrated with: Alexa, AWS IoT, Domoticz, Home Assistant, Homebridge, HomeSeer, IP Symcon, KNX, NodeRed, nymea, OctoPrint, openHAB, Otto, IOBroker, Mozilla WebThings Adapter, SmartThings, Tasmohab, Homematic ip тощо. for more information see here: https://tasmota.github.io/docs/Integrations/ |
||


OPERATING MANUAL
NOTE: Tasmota is not a commercial product and support is limited. You should be prepared to research and resolve potential issues on your own.
Detailed information about connecting, changing settings and modifications is presented on the website " https://tasmota.github.io/docs/ "
description
The NOUS D1T smart switch with Tasmota open source software installed (hereinafter referred to as the switch) is designed to organize automatic and manual switching off of electrical appliances in the room, by remote access via a Wi-Fi network, using a smartphone or from a personal computer via the Web interface. Communication with the switch is configured via a Wi-Fi network, for which a wireless Wi-Fi adapter is used. The switch is equipped with a mechanical button and a light indicator of the device status. The device is equipped with an electromechanical relay and supports the Matter protocol .
ATTENTION: The connection of the smart socket to the Wi-Fi network cannot be guaranteed in all cases, as it depends on many conditions: the quality of the communication channel and intermediate network equipment, the make and model of the mobile device, the version of the operating system, etc.
PREVENTIVE MEASURES
- Read these instructions carefully.
- Use the product within the temperature and humidity limits specified in the technical data sheet.
- Do not install the product near heat sources, such as radiators, etc.
- Do not allow the device to fall or be subjected to mechanical stress.
- Do not use chemically active or abrasive cleaning agents to clean the product. Use a damp flannel cloth.
- Do not overload the specified capacity. This may cause a short circuit and electric shock.
- Do not disassemble the product yourself - diagnostics and repair of the device should only be carried out at a certified service center.
- Please contact the seller for a replacement if there is damage caused by transportation.
- Please insert the plug into the socket in proper condition and keep it away from children.
- For safety reasons, fully insert the plug into the socket during use.
Design and controls
| № | Name | description |
| 1 | Button | A short press of the button switches the device "ON" "OFF". |
| 2 | Indicator | Shows the current status of the device |
Installation
| Installation procedure: | ||
| 1 | Connect the switch as shown in one of the electrical diagrams. |
|
| 2 |
Marking:
|
|
| 3 | When the installation is complete, the device is ready for use. | |
| Importantly: | Make sure that the Wi-Fi network in the selected installation location is stable and has a sufficient level. | |
Connection
To connect the Nous D1T switch, you need a smartphone or personal PC.
How to connect the switch to a Wi-Fi network:
| 1 | Make sure that the frequency range of the network to which the device will be connected is 2.4 GHz, otherwise the switch will not connect, since the device is not designed to work with 5 GHz Wi-Fi networks; | |
| 2 | Connect the device to the network. On the PC, the access point "tasmota-xxxxxxx" should appear in the list of networks, if the access point is not detected, you need to do a "RESET" according to point 11 | |
| 3 | Connect to access point "tasmota-xxxxxxx" | |
| 4 |
After connecting to the access point, the browser will automatically open and go to the link 192.168.4.1, if this operation did not follow, then you need to open the browser and enter 192.168.4.1 in the address input field |
|
| 5 |
On the opened page, you need to select your access point and enter its password in the field below and click "Save" |
|
|
|
|
| 6 | When the connection is complete, an inscription will appear stating "Successful connection to Wi-Fi" and the address of your device on the network. | |
| 7 | Connect to your Wi-Fi network and go to the address that was specified in point 6. | |
| 8 | You will need to calibrate the device for the power source. You can find how to do this here: https://tasmota.github.io/docs/Power-Monitoring-Calibration/ | |
| 9 |
The device is ready to use. The template and rules are already activated, but if you need it later - you can find it below |
|
|
|
|
| 10 |
{"NAME":"Nous D1T","GPIO":[32,1,9312,1,1,320,1,1,9313,8160,3200,544,1,1,1,1,0,1,1,1,0,0,1,1,0,0,0,0,1,1,4736,1,1,0,0,1],"FLAG":0,"BASE":1}The template must be entered in the "Template" field, check the "Activate" box and save the changes:
|
|
| 11 |
To reset the device to factory settings you need to: Plug and unplug the device 6 times and leave it on for the 7th time - the LED should start flashing, meaning it is ready to be plugged in again; if you have access to the web interface, type " reset 1" in the console and press "enter" |
|
| 12 |
To connect the device to smart home systems using the Matter protocol, please read the following information: |
|
|
Tasmota is a highly extensible and flexible program that can be integrated with: Alexa, AWS IoT, Domoticz, Home Assistant, Homebridge, HomeSeer, IP Symcon, KNX, NodeRed, nymea, OctoPrint, openHAB, Otto, IOBroker, Mozilla WebThings Adapter, SmartThings, Tasmohab, Homematic ip тощо. for more information see here: https://tasmota.github.io/docs/Integrations/ |
||
MANUALE OPERATIVO
NOTA: Tasmota non è un prodotto commerciale e il supporto è limitato. Dovresti essere pronto a ricercare e risolvere i potenziali problemi da solo.
Informazioni dettagliate sulla connessione, la modifica delle impostazioni e le modifiche sono presentate sul sito web " https://tasmota.github.io/docs/ "
descrizione
L'interruttore intelligente NOUS D2T con software open source Tasmota installato (di seguito denominato interruttore) è progettato per organizzare lo spegnimento automatico e manuale degli apparecchi elettrici nella stanza, tramite accesso remoto tramite una rete Wi-Fi, utilizzando uno smartphone o da un personal computer tramite l'interfaccia Web. La comunicazione con l'interruttore è configurata tramite una rete Wi-Fi, per la quale viene utilizzato un adattatore Wi-Fi wireless. L'interruttore è dotato di un pulsante meccanico e di un indicatore luminoso dello stato del dispositivo. Il dispositivo è dotato di un relè elettromeccanico e supporta il protocollo Matter .
ATTENZIONE: La connessione della presa intelligente alla rete Wi-Fi non può essere garantita in tutti i casi, poiché dipende da molte condizioni: la qualità del canale di comunicazione e delle apparecchiature di rete intermedie, la marca e il modello del dispositivo mobile, la versione del sistema operativo, ecc.
MISURE PREVENTIVE
- Leggere attentamente queste istruzioni.
- Utilizzare il prodotto entro i limiti di temperatura e umidità specificati nella scheda tecnica.
- Non installare il prodotto vicino a fonti di calore, come termosifoni, ecc.
- Non lasciare che il dispositivo cada o sia sottoposto a sollecitazioni meccaniche.
- Non utilizzare detergenti chimicamente attivi o abrasivi per pulire il prodotto. Utilizzare un panno di flanella umido.
- Non sovraccaricare la capacità specificata. Ciò potrebbe causare un cortocircuito e una scossa elettrica.
- Non smontare il prodotto da soli: la diagnosi e la riparazione del dispositivo devono essere eseguite solo presso un centro di assistenza certificato.
- In caso di danni causati dal trasporto, contattare il venditore per una sostituzione.
- Inserire la spina nella presa in modo corretto e tenerla lontano dalla portata dei bambini.
- Per motivi di sicurezza, durante l'uso, inserire completamente la spina nella presa.
Progettazione e controlli
| Numero | Nome | descrizione |
| 1 | Pulsante | Una breve pressione del pulsante accende e spegne il dispositivo. |
| 2 | Indicatore | Mostra lo stato attuale del dispositivo |
Installazione
| Procedura di installazione: | ||
| 1 | Collegare l'interruttore come mostrato in uno degli schemi elettrici. |
|
| 2 |
Marcatura:
|
|
| 3 | Una volta completata l'installazione, il dispositivo è pronto per l'uso. | |
| Importante: | Assicurarsi che la rete Wi-Fi nel luogo di installazione selezionato sia stabile e abbia un livello sufficiente. | |
Connessione
Per collegare lo switch Nous D2T è necessario uno smartphone o un PC personale.
Come collegare lo switch a una rete Wi-Fi:
| 1 | Assicurarsi che la gamma di frequenza della rete a cui verrà connesso il dispositivo sia di 2,4 GHz, altrimenti lo switch non si connetterà, poiché il dispositivo non è progettato per funzionare con reti Wi-Fi a 5 GHz; | |
| 2 | Collegare il dispositivo alla rete. Sul PC, il punto di accesso "tasmota-xxxxxxx" dovrebbe apparire nell'elenco delle reti, se il punto di accesso non viene rilevato, è necessario effettuare un "RESET" secondo il punto 11 | |
| 3 | Connettiti al punto di accesso "tasmota-xxxxxxx" | |
| 4 |
Dopo la connessione al punto di accesso, il browser si aprirà automaticamente e andrà al collegamento 192.168.4.1, se questa operazione non è avvenuta, è necessario aprire il browser e immettere 192.168.4.1 nel campo di immissione dell'indirizzo |
|
| 5 |
Nella pagina aperta, è necessario selezionare il punto di accesso e inserire la relativa password nel campo sottostante e fare clic su "Salva" |
|
|
|
|
| 6 | Una volta completata la connessione, apparirà la scritta "Connessione al Wi-Fi riuscita" e l'indirizzo del tuo dispositivo sulla rete. | |
| 7 | Connettiti alla tua rete Wi-Fi e vai all'indirizzo specificato al punto 6. | |
| 8 | Dovrai calibrare il dispositivo per la fonte di alimentazione. Puoi trovare come farlo qui: https://tasmota.github.io/docs/Power-Monitoring-Calibration/ | |
| 9 |
Il dispositivo è pronto per l'uso. Il modello e le regole sono già attivati, ma se ti servono in seguito, puoi trovarli qui sotto |
|
|
|
|
| 10 |
{"NAME":"Noi D1T","GPIO":[32,1,9312,1,1,320,1,1,9313,8160,3200,544,1,1,1,1,0,1,1,1,0,0,1,1,0,0,0,0,1,1,4736,1,1,0,0,1],"FLAG":0,"BASE":1}Bisogna inserire il modello nel campo "Modello", spuntare la casella "Attiva" e salvare le modifiche:
|
|
| 11 |
Per ripristinare il dispositivo alle impostazioni di fabbrica è necessario: Collegare e scollegare il dispositivo 6 volte e lasciarlo acceso per la settima volta: il LED dovrebbe iniziare a lampeggiare, il che significa che è pronto per essere ricollegato; se hai accesso all'interfaccia web, digita " reset 1" nella console e premi "invio" |
|
| 12 |
Per connettere il dispositivo ai sistemi smart home tramite il protocollo Matter , leggere le seguenti informazioni: |
|
|
Tasmota è un programma altamente estensibile e flessibile che può essere integrato con: Alexa, AWS IoT, Domoticz, Home Assistant, Homebridge, HomeSeer, IP Symcon, KNX, NodeRed, nymea, OctoPrint, openHAB, Otto, IOBroker, Mozilla WebThings Adapter, SmartThings, Tasmohab, Homematic ip anche. per maggiori informazioni vedere qui: https://tasmota.github.io/docs/Integrations/ |
||
MANUAL DE OPERACIÓN
NOTA: Tasmota no es un producto comercial y el soporte es limitado. Debe estar preparado para investigar y resolver los posibles problemas por su cuenta.
La información detallada sobre la conexión, el cambio de configuraciones y las modificaciones se presenta en el sitio web " https://tasmota.github.io/docs/ "
descripción
El interruptor inteligente NOUS D2T con software de código abierto Tasmota instalado (en adelante, el interruptor) está diseñado para organizar el apagado automático y manual de los aparatos eléctricos en la habitación, mediante acceso remoto a través de una red Wi-Fi, utilizando un teléfono inteligente o desde un ordenador personal a través de la interfaz web. La comunicación con el interruptor se configura a través de una red Wi-Fi, para lo cual se utiliza un adaptador Wi-Fi inalámbrico. El interruptor está equipado con un botón mecánico y un indicador luminoso del estado del dispositivo. El dispositivo está equipado con un relé electromecánico y es compatible con el protocolo Matter .
ATENCIÓN: La conexión del enchufe inteligente a la red Wi-Fi no se puede garantizar en todos los casos, ya que depende de muchas condiciones: la calidad del canal de comunicación y del equipo de red intermedio, la marca y el modelo del dispositivo móvil, la versión del sistema operativo, etc.
MEDIDAS PREVENTIVAS
- Lea atentamente estas instrucciones.
- Utilice el producto dentro de los límites de temperatura y humedad especificados en la hoja de datos técnicos.
- No instale el producto cerca de fuentes de calor, como radiadores, etc.
- No permita que el dispositivo se caiga ni se someta a esfuerzos mecánicos.
- No utilice agentes de limpieza abrasivos ni químicamente activos para limpiar el producto. Utilice un paño de franela húmedo.
- No sobrecargue la capacidad especificada. Esto puede provocar un cortocircuito y una descarga eléctrica.
- No desmonte el producto usted mismo: el diagnóstico y la reparación del dispositivo solo deben realizarse en un centro de servicio certificado.
- Comuníquese con el vendedor para obtener un reemplazo si hay daños causados por el transporte.
- Inserte el enchufe en la toma de corriente en condiciones adecuadas y manténgalo fuera del alcance de los niños.
- Por razones de seguridad, inserte completamente el enchufe en la toma durante el uso.
Diseño y controles
| No. | Nombre | descripción |
| 1 | Botón | Al presionar brevemente el botón, el dispositivo se enciende o se apaga. |
| 2 | Indicador | Muestra el estado actual del dispositivo. |
Instalación
| Procedimiento de instalación: | ||
| 1 | Conecte el interruptor como se muestra en uno de los diagramas eléctricos. |
|
| 2 |
Calificación:
|
|
| 3 | Una vez finalizada la instalación, el dispositivo estará listo para usarse. | |
| En tono rimbombante: | Asegúrese de que la red Wi-Fi en la ubicación de instalación seleccionada sea estable y tenga un nivel suficiente. | |
Conexión
Para conectar el interruptor Nous D2T, necesitará un teléfono inteligente o una PC personal.
Cómo conectar el conmutador a una red Wi-Fi:
| 1 | Asegúrese de que el rango de frecuencia de la red a la que se conectará el dispositivo sea de 2,4 GHz, de lo contrario, el conmutador no se conectará, ya que el dispositivo no está diseñado para funcionar con redes Wi-Fi de 5 GHz; | |
| 2 | Conecte el dispositivo a la red. En la PC debería aparecer en la lista de redes el punto de acceso “tasmota-xxxxxxx”, si no se detecta el punto de acceso, deberá realizar un “RESET” según el punto 11 | |
| 3 | Conectarse al punto de acceso "tasmota-xxxxxxx" | |
| 4 |
Después de conectarse al punto de acceso, el navegador se abrirá automáticamente y accederá al enlace 192.168.4.1. Si no se realizó esta operación, deberá abrir el navegador e ingresar 192.168.4.1 en el campo de entrada de dirección. |
|
| 5 |
En la página que se abre, debe seleccionar su punto de acceso e ingresar su contraseña en el campo a continuación y hacer clic en "Guardar". |
|
|
|
|
| 6 | Cuando se complete la conexión, aparecerá una inscripción que indicará "Conexión exitosa a Wi-Fi" y la dirección de su dispositivo en la red. | |
| 7 | Conéctese a su red WiFi y vaya a la dirección que se especificó en el punto 6. | |
| 8 | Necesitará calibrar el dispositivo para la fuente de alimentación. Puede encontrar cómo hacerlo aquí: https://tasmota.github.io/docs/Power-Monitoring-Calibration/ | |
| 9 |
El dispositivo está listo para usar. La plantilla y las reglas ya están activadas, pero si las necesita más adelante, puede encontrarlas a continuación. |
|
|
|
|
| 10 |
{"NOMBRE": "Somos D1T", "GPIO": [32, 1, 9312, 1, 1, 320, 1, 1, 9313, 8160, 3200, 544, 1, 1, 1, 1, 0, 1, 1, 0, 0, 1, 1, 0, 0, 0, 1, 1, 4736, 1, 1, 0, 0, 1],"BANDERA": 0,"BASE": 1}La plantilla debe ingresarse en el campo “Plantilla”, marcar la casilla “Activar” y guardar los cambios:
|
|
| 11 |
Para restablecer el dispositivo a la configuración de fábrica es necesario: Conecte y desconecte el dispositivo 6 veces y déjelo encendido por séptima vez: el LED debería comenzar a parpadear, lo que significa que está listo para ser enchufado nuevamente; Si tienes acceso a la interfaz web, escribe " reset 1" en la consola y presiona "enter" |
|
| 12 |
Para conectar el dispositivo a sistemas domésticos inteligentes mediante el protocolo Matter , lea la siguiente información: |
|
|
Tasmota es un programa altamente extensible y flexible que se puede integrar con: Alexa, AWS IoT, Domoticz, Home Assistant, Homebridge, HomeSeer, IP Symcon, KNX, NodeRed, nymea, OctoPrint, openHAB, Otto, IOBroker, Mozilla WebThings Adapter, SmartThings, Tasmohab, Homematic ip también. Para obtener más información, consulte aquí: https://tasmota.github.io/docs/Integrations/ |
||
EKSPLUATĀCIJAS ROKASGRĀMATA
PIEZĪME: Tasmota nav komerciāls produkts, un atbalsts ir ierobežots. Jums jābūt gatavam patstāvīgi izpētīt un atrisināt iespējamās problēmas.
Detalizēta informācija par savienošanu, iestatījumu maiņu un modifikācijām ir sniegta vietnē " https://tasmota.github.io/docs/ "
apraksts
Viedais slēdzis NOUS D2T ar instalētu Tasmota atvērtā pirmkoda programmatūru (turpmāk tekstā slēdzis) paredzēts automātiskai un manuālai elektroierīču izslēgšanai telpā, attālināti piekļūstot caur Wi-Fi tīklu, izmantojot viedtālruni vai no plkst. personālo datoru, izmantojot tīmekļa saskarni. Saziņa ar slēdzi tiek konfigurēta, izmantojot Wi-Fi tīklu, kuram tiek izmantots bezvadu Wi-Fi adapteris. Slēdzis ir aprīkots ar mehānisku pogu un gaismas indikatoru, kas norāda ierīces stāvokli. Ierīce ir aprīkota ar elektromehānisko releju un atbalsta Matter protokolu.
UZMANĪBU: Viedligzdas savienojumu ar Wi-Fi tīklu nevar garantēt visos gadījumos, jo tas ir atkarīgs no daudziem apstākļiem: sakaru kanāla un starpposma tīkla aprīkojuma kvalitātes, mobilās ierīces markas un modeļa, versijas. operētājsistēmas utt.
PREVENTĪVIE PASĀKUMI
- Uzmanīgi izlasiet šos norādījumus.
- Lietojiet produktu tehniskajā datu lapā norādītajās temperatūras un mitruma robežās.
- Neuzstādiet izstrādājumu siltuma avotu tuvumā, piemēram, radiatoriem utt.
- Neļaujiet ierīcei nokrist vai tikt pakļauta mehāniskai slodzei.
- Produkta tīrīšanai neizmantojiet ķīmiski aktīvus vai abrazīvus tīrīšanas līdzekļus. Izmantojiet mitru flaneļa drānu.
- Nepārslogojiet norādīto jaudu. Tas var izraisīt īssavienojumu un elektriskās strāvas triecienu.
- Neizjauciet izstrādājumu paši – ierīces diagnostiku un remontu drīkst veikt tikai sertificētā servisa centrā.
- Ja transportēšanas rezultātā radušies bojājumi, lūdzu, sazinieties ar pārdevēju, lai saņemtu nomaiņu.
- Lūdzu, ievietojiet kontaktdakšu kontaktligzdā pareizā stāvoklī un glabājiet to bērniem nepieejamā vietā.
- Drošības apsvērumu dēļ lietošanas laikā pilnībā ievietojiet kontaktdakšu kontaktligzdā.
Dizains un vadības ierīces
| № | Vārds | apraksts |
| 1 | Poga | Īsi nospiežot pogu, ierīce tiek "IESLĒGTA" "IZSLĒGTA". |
| 2 | Indikators | Parāda pašreizējo ierīces statusu |
Uzstādīšana
| Uzstādīšanas procedūra: | ||
| 1 | Pievienojiet slēdzi, kā parādīts vienā no elektriskajām shēmām. |
|
| 2 |
Marķējums:
|
|
| 3 | Kad instalēšana ir pabeigta, ierīce ir gatava lietošanai. | |
| Svarīgi: | Pārliecinieties, vai Wi-Fi tīkls izvēlētajā instalēšanas vietā ir stabils un tam ir pietiekams līmenis. | |
Savienojums
Lai pievienotu Nous D2T slēdzi, nepieciešams viedtālrunis vai personālais dators.
Kā savienot slēdzi ar Wi-Fi tīklu:
| 1 | Pārliecinieties, vai tīkla, kuram ierīce tiks pievienota, frekvenču diapazons ir 2,4 GHz, pretējā gadījumā slēdzis netiks izveidots, jo ierīce nav paredzēta darbam ar 5 GHz Wi-Fi tīkliem; | |
| 2 | Pievienojiet ierīci tīklam. Datorā piekļuves punktam "tasmota-xxxxxxx" jāparādās tīklu sarakstā, ja piekļuves punkts netiek atklāts, jums ir jāveic "RESET" saskaņā ar 11. punktu. | |
| 3 | Izveidojiet savienojumu ar piekļuves punktu "tasmota-xxxxxxxx" | |
| 4 |
Pēc savienojuma izveides ar piekļuves punktu pārlūkprogramma automātiski atvērsies un pāries uz saiti 192.168.4.1, ja šī darbība nesekoja, tad jāatver pārlūkprogramma un adreses ievades laukā jāievada 192.168.4.1. |
|
| 5 |
Atvērtajā lapā jums jāizvēlas piekļuves punkts un jāievada tā parole zemāk esošajā laukā un noklikšķiniet uz "Saglabāt". |
|
|
|
|
| 6 | Kad savienojums būs pabeigts, tiks parādīts uzraksts “Veiksmīgs savienojums ar Wi-Fi” un jūsu ierīces adrese tīklā. | |
| 7 | Izveidojiet savienojumu ar savu Wi-Fi tīklu un dodieties uz adresi, kas norādīta 6. punktā. | |
| 8 | Jums būs jākalibrē ierīce strāvas avotam. Kā to izdarīt, varat uzzināt šeit: https://tasmota.github.io/docs/Power-Monitoring-Calibration/ | |
| 9 |
Ierīce ir gatava lietošanai. Veidne un noteikumi jau ir aktivizēti, bet, ja jums tas būs nepieciešams vēlāk, varat to atrast zemāk |
|
|
|
|
| 10 |
{"NAME":"Nav D1T","GPIO":[32,1,9312,1,1,320,1,1,9313,8160,3200,544,1,1,1,1,0,1,1,1,0,0, 1,1,0,0,0,0,1,1,4736,1,1,0,0,1]"FAG":0"BASE":1}Veidne jāievada laukā "Veidne", atzīmējiet lodziņu "Aktivizēt" un saglabājiet izmaiņas:
|
|
| 11 |
Lai ierīcē atiestatītu rūpnīcas iestatījumus, jums ir nepieciešams: Iespraudiet un atvienojiet ierīci 6 reizes un atstājiet to ieslēgtu 7. reizi — gaismas diodei jāsāk mirgot, kas nozīmē, ka ierīce ir gatava atkal pievienot; ja jums ir piekļuve tīmekļa saskarnei, konsolē ierakstiet " reset 1" un nospiediet "enter" |
|
| 12 |
Lai savienotu ierīci ar viedās mājas sistēmām, izmantojot Matter protokolu, lūdzu, izlasiet šādu informāciju: |
|
|
Tasmota ir ļoti paplašināma un elastīga programma, ko var integrēt ar: Alexa, AWS IoT, Domoticz, Home Assistant, Homebridge, HomeSeer, IP Symcon, KNX, NodeRed, nymea, OctoPrint, openHAB, Otto, IOBroker, Mozilla WebThings adapteris, SmartThings, Tasmohab, Homematic ip тощо. Plašāku informāciju skatiet šeit: https://tasmota.github.io/docs/Integrations/ |
||
MANUEL D'UTILISATION
REMARQUE : Tasmota n'est pas un produit commercial et l'assistance est limitée. Vous devez être prêt à rechercher et à résoudre les problèmes potentiels par vous-même.
Des informations détaillées sur la connexion, la modification des paramètres et les modifications sont présentées sur le site Web « https://tasmota.github.io/docs/ »
description
L'interrupteur intelligent NOUS D2T avec logiciel open source Tasmota installé (ci-après dénommé l'interrupteur) est conçu pour organiser l'arrêt automatique et manuel des appareils électriques de la pièce, par accès à distance via un réseau Wi-Fi, à l'aide d'un smartphone ou depuis un ordinateur personnel via l'interface Web. La communication avec l'interrupteur est configurée via un réseau Wi-Fi, pour lequel un adaptateur Wi-Fi sans fil est utilisé. L'interrupteur est équipé d'un bouton mécanique et d'un indicateur lumineux de l'état de l'appareil. L'appareil est équipé d'un relais électromécanique et prend en charge le protocole Matter .
ATTENTION : La connexion de la prise intelligente au réseau Wi-Fi ne peut pas être garantie dans tous les cas, car elle dépend de nombreuses conditions : la qualité du canal de communication et des équipements réseau intermédiaires, la marque et le modèle de l'appareil mobile, la version du système d'exploitation, etc.
MESURES PRÉVENTIVES
- Lisez attentivement ces instructions.
- Utiliser le produit dans les limites de température et d’humidité spécifiées dans la fiche technique.
- N'installez pas le produit à proximité de sources de chaleur, telles que des radiateurs, etc.
- Ne laissez pas l'appareil tomber ou être soumis à des contraintes mécaniques.
- N'utilisez pas de produits de nettoyage chimiquement actifs ou abrasifs pour nettoyer le produit. Utilisez un chiffon en flanelle humide.
- Ne pas surcharger la capacité spécifiée. Cela pourrait provoquer un court-circuit et une décharge électrique.
- Ne démontez pas le produit vous-même - le diagnostic et la réparation de l'appareil ne doivent être effectués que dans un centre de service agréé.
- Veuillez contacter le vendeur pour un remplacement en cas de dommage causé par le transport.
- Veuillez insérer la fiche dans la prise en bon état et la garder hors de portée des enfants.
- Pour des raisons de sécurité, insérez complètement la fiche dans la prise pendant l'utilisation.
Conception et contrôles
| N° | Nom | description |
| 1 | Bouton | Une courte pression sur le bouton permet d'allumer et d'éteindre l'appareil. |
| 2 | Indicateur | Affiche l'état actuel de l'appareil |
Installation
| Procédure d'installation : | ||
| 1 | Connectez l’interrupteur comme indiqué sur l’un des schémas électriques. |
|
| 2 |
Marquage:
|
|
| 3 | Une fois l'installation terminée, l'appareil est prêt à être utilisé. | |
| Ce qui est important : | Assurez-vous que le réseau Wi-Fi dans l'emplacement d'installation sélectionné est stable et a un niveau suffisant. | |
Connexion
Pour connecter le switch Nous D2T, vous avez besoin d'un smartphone ou d'un PC personnel.
Comment connecter le commutateur à un réseau Wi-Fi :
| 1 | Assurez-vous que la plage de fréquence du réseau auquel l'appareil sera connecté est de 2,4 GHz, sinon le commutateur ne se connectera pas, car l'appareil n'est pas conçu pour fonctionner avec les réseaux Wi-Fi 5 GHz ; | |
| 2 | Connectez l'appareil au réseau. Sur le PC, le point d'accès « tasmota-xxxxxxx » doit apparaître dans la liste des réseaux, si le point d'accès n'est pas détecté, vous devez effectuer un « RESET » selon le point 11 | |
| 3 | Connectez-vous au point d'accès « tasmota-xxxxxxx » | |
| 4 |
Après la connexion au point d'accès, le navigateur s'ouvrira automatiquement et accédera au lien 192.168.4.1, si cette opération n'a pas suivi, vous devez alors ouvrir le navigateur et saisir 192.168.4.1 dans le champ de saisie d'adresse |
|
| 5 |
Sur la page ouverte, vous devez sélectionner votre point d'accès et saisir son mot de passe dans le champ ci-dessous et cliquer sur « Enregistrer » |
|
|
|
|
| 6 | Une fois la connexion établie, une inscription apparaîtra indiquant « Connexion réussie au Wi-Fi » et l'adresse de votre appareil sur le réseau. | |
| 7 | Connectez-vous à votre réseau Wi-Fi et accédez à l'adresse qui a été spécifiée au point 6. | |
| 8 | Vous devrez calibrer l'appareil en fonction de la source d'alimentation. Vous trouverez la procédure à suivre ici : https://tasmota.github.io/docs/Power-Monitoring-Calibration/ | |
| 9 |
L'appareil est prêt à l'emploi. Le modèle et les règles sont déjà activés, mais si vous en avez besoin plus tard, vous pouvez les trouver ci-dessous |
|
|
|
|
| 10 |
{"NAME": "Nous D1T", "GPIO":[32,1,9312,1,1,320,1,1,9313,8160,3200,544,1,1,1,1,0,1,1,1,0,0,1,1,0,0,0,0,1,1,4736,1,1,0,0,1], "FLAG":0, "BASE":1}Le modèle doit être renseigné dans le champ « Modèle », cochez la case « Activer » et enregistrez les modifications :
|
|
| 11 |
Pour réinitialiser l'appareil aux paramètres d'usine, vous devez : Branchez et débranchez l'appareil 6 fois et laissez-le allumé une 7ème fois - la LED doit commencer à clignoter, ce qui signifie qu'il est prêt à être rebranché ; si vous avez accès à l'interface web, tapez " reset 1 " dans la console et appuyez sur " entrée " |
|
| 12 |
Pour connecter l'appareil aux systèmes de maison intelligente à l'aide du protocole Matter , veuillez lire les informations suivantes : |
|
|
Tasmota est un programme hautement extensible et flexible qui peut être intégré à : Alexa, AWS IoT, Domoticz, Home Assistant, Homebridge, HomeSeer, IP Symcon, KNX, NodeRed, nymea, OctoPrint, openHAB, Otto, IOBroker, Mozilla WebThings Adapter, SmartThings, Tasmohab, Homematic ip également. pour plus d'informations, voir ici : https://tasmota.github.io/docs/Integrations/ |
||
BEDIENUNGSANLEITUNG
HINWEIS: Tasmota ist kein kommerzielles Produkt und der Support ist begrenzt. Sie sollten bereit sein, potenzielle Probleme selbst zu untersuchen und zu lösen.
Detaillierte Informationen zum Verbinden, Ändern von Einstellungen und Modifikationen finden Sie auf der Website " https://tasmota.github.io/docs/ "
Beschreibung
Der NOUS D2T Smart Switch mit installierter Open-Source-Software Tasmota (im Folgenden als Switch bezeichnet) dient zum automatischen und manuellen Ausschalten von Elektrogeräten im Raum per Fernzugriff über ein Wi-Fi-Netzwerk, mithilfe eines Smartphones oder von einem PC über die Weboberfläche. Die Kommunikation mit dem Switch wird über ein Wi-Fi-Netzwerk konfiguriert, wofür ein drahtloser Wi-Fi-Adapter verwendet wird. Der Switch ist mit einem mechanischen Knopf und einer Lichtanzeige für den Gerätestatus ausgestattet. Das Gerät ist mit einem elektromechanischen Relais ausgestattet und unterstützt das Matter -Protokoll .
ACHTUNG: Die Verbindung der Smart-Steckdose mit dem WLAN-Netzwerk kann nicht in allen Fällen garantiert werden, da sie von vielen Bedingungen abhängt: der Qualität des Kommunikationskanals und der zwischengeschalteten Netzwerkgeräte, der Marke und dem Modell des Mobilgeräts, der Version des Betriebssystems usw.
VORBEUGENDE MASSNAHMEN
- Lesen Sie diese Anweisungen sorgfältig durch.
- Verwenden Sie das Produkt innerhalb der im technischen Datenblatt angegebenen Temperatur- und Feuchtigkeitsgrenzen.
- Installieren Sie das Produkt nicht in der Nähe von Wärmequellen wie Heizkörpern usw.
- Lassen Sie das Gerät nicht fallen und setzen Sie es keiner mechanischen Belastung aus.
- Verwenden Sie zum Reinigen des Produkts keine chemisch aktiven oder scheuernden Reinigungsmittel. Verwenden Sie ein feuchtes Flanelltuch.
- Überlasten Sie die angegebene Kapazität nicht. Dies kann zu Kurzschlüssen und Stromschlägen führen.
- Zerlegen Sie das Produkt nicht selbst – Diagnose und Reparatur des Geräts sollten nur in einem zertifizierten Servicecenter durchgeführt werden.
- Bei Transportschäden wenden Sie sich bitte für Ersatz an den Verkäufer.
- Bitte stecken Sie den Stecker ordnungsgemäß in die Steckdose und bewahren Sie ihn außerhalb der Reichweite von Kindern auf.
- Aus Sicherheitsgründen muss der Stecker während des Gebrauchs vollständig in die Steckdose eingesteckt werden.
Design und Steuerung
| Nr. | Name | Beschreibung |
| 1 | Taste | Durch kurzes Drücken der Taste wird das Gerät EIN bzw. AUS geschaltet. |
| 2 | Indikator | Zeigt den aktuellen Status des Gerätes an |
Installation
| Installationsverfahren: | ||
| 1 | Schließen Sie den Schalter wie in einem der Schaltpläne gezeigt an. |
|
| 2 |
Markierung:
|
|
| 3 | Wenn die Installation abgeschlossen ist, ist das Gerät einsatzbereit. | |
| Wichtig: | Stellen Sie sicher, dass das WLAN-Netzwerk am gewählten Installationsort stabil ist und über ein ausreichendes Niveau verfügt. | |
Verbindung
Zum Anschließen des Nous D2T-Switches benötigen Sie ein Smartphone oder einen PC.
So verbinden Sie den Switch mit einem WLAN-Netzwerk:
| 1 | Stellen Sie sicher, dass der Frequenzbereich des Netzwerks, an das das Gerät angeschlossen wird, 2,4 GHz beträgt. Andernfalls stellt der Switch keine Verbindung her, da das Gerät nicht für die Verwendung mit 5-GHz-WLAN-Netzwerken ausgelegt ist. | |
| 2 | Verbinden Sie das Gerät mit dem Netzwerk. Auf dem PC sollte in der Liste der Netzwerke der Access Point „tasmota-xxxxxxx“ erscheinen, wird der Access Point nicht erkannt, müssen Sie einen „RESET“ gemäß Punkt 11 durchführen | |
| 3 | Mit dem Zugangspunkt „tasmota-xxxxxxx“ verbinden | |
| 4 |
Nach dem Herstellen einer Verbindung zum Zugangspunkt öffnet sich der Browser automatisch und geht zum Link 192.168.4.1. Wenn dieser Vorgang nicht durchgeführt wurde, müssen Sie den Browser öffnen und 192.168.4.1 in das Adresseingabefeld eingeben |
|
| 5 |
Auf der geöffneten Seite müssen Sie Ihren Zugangspunkt auswählen, sein Passwort in das Feld unten eingeben und auf "Speichern" klicken. |
|
|
|
|
| 6 | Wenn die Verbindung hergestellt ist, erscheint die Meldung „Verbindung zum WLAN erfolgreich hergestellt“ und die Adresse Ihres Geräts im Netzwerk. | |
| 7 | Verbinden Sie sich mit Ihrem WLAN-Netzwerk und gehen Sie zu der Adresse, die unter Punkt 6 angegeben wurde. | |
| 8 | Sie müssen das Gerät für die Stromquelle kalibrieren. Wie das geht, erfahren Sie hier: https://tasmota.github.io/docs/Power-Monitoring-Calibration/ | |
| 9 |
Das Gerät ist einsatzbereit. Die Vorlage und die Regeln sind bereits aktiviert, aber wenn Sie sie später benötigen, finden Sie sie unten |
|
|
|
|
| 10 |
{"NAME":"Unser D1T","GPIO":[32,1,9312,1,1,320,1,1,9313,8160,3200,544,1,1,1,1,0,1,1,1,0,0,1,1,0,0,0,0,1,1,4736,1,1,0,0,1],"FLAG":0,"BASE":1}Im Feld „Vorlage“ muss die Vorlage eingetragen werden, das Kontrollkästchen „Aktivieren“ aktiviert und die Änderungen gespeichert werden:
|
|
| 11 |
Um das Gerät auf die Werkseinstellungen zurückzusetzen, müssen Sie: Stecken Sie das Gerät sechsmal ein und aus und lassen Sie es beim siebten Mal eingeschaltet. Die LED sollte nun blinken, was bedeutet, dass das Gerät zum erneuten Einstecken bereit ist. Wenn Sie Zugriff auf die Weboberfläche haben, geben Sie " reset 1" in die Konsole ein und drücken Sie "Enter". |
|
| 12 |
Um das Gerät über das Matter -Protokoll mit Smart-Home-Systemen zu verbinden, lesen Sie bitte die folgenden Informationen: |
|
|
Tasmota ist ein äußerst erweiterbares und flexibles Programm, das in folgende Programme integriert werden kann: Alexa, AWS IoT, Domoticz, Home Assistant, Homebridge, HomeSeer, IP Symcon, KNX, NodeRed, nymea, OctoPrint, openHAB, Otto, IOBroker, Mozilla WebThings Adapter, SmartThings, Tasmohab, Homematic ip und mehr. Weitere Informationen finden Sie hier: https://tasmota.github.io/docs/Integrations/ |
||
INSTRUKCJA OBSŁUGI
UWAGA: Tasmota nie jest produktem komercyjnym, a wsparcie jest ograniczone. Powinieneś być przygotowany na samodzielne zbadanie i rozwiązanie potencjalnych problemów.
Szczegółowe informacje dotyczące podłączania, zmiany ustawień i modyfikacji znajdują się na stronie internetowej „ https://tasmota.github.io/docs/ ”
opis
Inteligentny przełącznik NOUS D2T z zainstalowanym oprogramowaniem open source Tasmota (zwany dalej przełącznikiem) jest przeznaczony do organizowania automatycznego i ręcznego wyłączania urządzeń elektrycznych w pomieszczeniu, poprzez zdalny dostęp za pośrednictwem sieci Wi-Fi, przy użyciu smartfona lub z komputera osobistego za pośrednictwem interfejsu internetowego. Komunikacja z przełącznikiem jest konfigurowana za pośrednictwem sieci Wi-Fi, do której używany jest bezprzewodowy adapter Wi-Fi. Przełącznik jest wyposażony w przycisk mechaniczny i wskaźnik świetlny stanu urządzenia. Urządzenie jest wyposażone w przekaźnik elektromechaniczny i obsługuje protokół Matter .
UWAGA: Nie możemy zagwarantować prawidłowego połączenia inteligentnego gniazdka z siecią Wi-Fi w każdym przypadku, ponieważ zależy to od wielu warunków: jakości kanału komunikacyjnego i pośredniczącego sprzętu sieciowego, marki i modelu urządzenia mobilnego, wersji systemu operacyjnego itp.
ŚRODKI ZAPOBIEGAWCZE
- Przeczytaj uważnie niniejszą instrukcję.
- Produkt należy stosować w zakresie temperatury i wilgotności określonym w karcie technicznej.
- Nie należy instalować produktu w pobliżu źródeł ciepła, np. grzejników itp.
- Nie dopuść do upadku urządzenia lub narażenia go na naprężenia mechaniczne.
- Nie używaj chemicznie aktywnych lub ściernych środków czyszczących do czyszczenia produktu. Użyj wilgotnej flanelowej ściereczki.
- Nie przeciążaj określonej pojemności. Może to spowodować zwarcie i porażenie prądem.
- Nie rozbieraj produktu samodzielnie – diagnostykę i naprawę urządzenia należy wykonywać wyłącznie w autoryzowanym serwisie.
- Jeśli podczas transportu doszło do uszkodzeń, skontaktuj się ze sprzedawcą w celu wymiany towaru.
- Proszę upewnić się, że wtyczka jest prawidłowo podłączona do gniazdka i że jest przechowywana w miejscu niedostępnym dla dzieci.
- Ze względów bezpieczeństwa podczas użytkowania należy włożyć wtyczkę do gniazdka całkowicie.
Projekt i sterowanie
| Numer | Nazwa | opis |
| 1 | Przycisk | Krótkie naciśnięcie przycisku powoduje włączenie lub wyłączenie urządzenia. |
| 2 | Wskaźnik | Pokazuje aktualny stan urządzenia |
Instalacja
| Procedura instalacji: | ||
| 1 | Podłącz przełącznik tak, jak pokazano na jednym ze schematów elektrycznych. |
|
| 2 |
Cechowanie:
|
|
| 3 | Po zakończeniu instalacji urządzenie jest gotowe do użycia. | |
| Ważne: | Upewnij się, że sieć Wi-Fi w wybranym miejscu instalacji jest stabilna i ma odpowiedni poziom sygnału. | |
Połączenie
Aby podłączyć przełącznik Nous D2T, potrzebny jest smartfon lub komputer osobisty.
Jak podłączyć przełącznik do sieci Wi-Fi:
| 1 | Upewnij się, że zakres częstotliwości sieci, do której będzie podłączone urządzenie, wynosi 2,4 GHz, w przeciwnym razie przełącznik nie nawiąże połączenia, ponieważ urządzenie nie jest przeznaczone do pracy z sieciami Wi-Fi 5 GHz; | |
| 2 | Podłącz urządzenie do sieci. Na komputerze punkt dostępu „tasmota-xxxxxxx” powinien pojawić się na liście sieci, jeśli punkt dostępu nie zostanie wykryty, należy wykonać „RESET” zgodnie z punktem 11 | |
| 3 | Połącz się z punktem dostępowym „tasmota-xxxxxxx” | |
| 4 |
Po połączeniu z punktem dostępowym przeglądarka automatycznie otworzy się i przejdzie do łącza 192.168.4.1. Jeśli ta operacja nie powiodła się, należy otworzyć przeglądarkę i wpisać 192.168.4.1 w polu wprowadzania adresu. |
|
| 5 |
Na otwartej stronie musisz wybrać swój punkt dostępowy i wpisać jego hasło w polu poniżej, a następnie kliknąć „Zapisz” |
|
|
|
|
| 6 | Po nawiązaniu połączenia wyświetli się napis „Pomyślne połączenie z siecią Wi-Fi” wraz z adresem Twojego urządzenia w sieci. | |
| 7 | Połącz się z siecią Wi-Fi i przejdź do adresu podanego w punkcie 6. | |
| 8 | Będziesz musiał skalibrować urządzenie dla źródła zasilania. Możesz dowiedzieć się, jak to zrobić tutaj: https://tasmota.github.io/docs/Power-Monitoring-Calibration/ | |
| 9 |
Urządzenie jest gotowe do użycia. Szablon i reguły są już aktywowane, ale jeśli będziesz ich potrzebować później - znajdziesz je poniżej |
|
|
|
|
| 10 |
{"NAME":"Nous D1T","GPIO":[32,1,9312,1,1,320,1,1,9313,8160,3200,544,1,1,1,1,0,1,1,1,0,0,1,1,0,0,0,0,1,1,4736,1,1,0,0,1],"FLAG":0,"BASE":1}Szablon należy wpisać w pole „Szablon”, zaznaczyć pole „Aktywuj” i zapisać zmiany:
|
|
| 11 |
Aby przywrócić ustawienia fabryczne urządzenia należy: Podłącz i odłącz urządzenie 6 razy i pozostaw je włączone po raz siódmy - dioda LED powinna zacząć migać, co oznacza, że można je ponownie podłączyć; jeśli masz dostęp do interfejsu internetowego, wpisz „ reset 1” w konsoli i naciśnij „enter” |
|
| 12 |
Aby podłączyć urządzenie do systemów inteligentnego domu za pomocą protokołu Matter , należy zapoznać się z poniższymi informacjami: |
|
|
Tasmota to niezwykle rozszerzalny i elastyczny program, który można zintegrować z: Alexa, AWS IoT, Domoticz, Home Assistant, Homebridge, HomeSeer, IP Symcon, KNX, NodeRed, nymea, OctoPrint, openHAB, Otto, IOBroker, Mozilla WebThings Adapter, SmartThings, Tasmohab, Homematic ip i tak dalej. Więcej informacji znajdziesz tutaj: https://tasmota.github.io/docs/Integrations/ |
||
KASUTUSJUHEND
MÄRKUS. Tasmota ei ole kaubanduslik toode ja tugi on piiratud. Peaksite olema valmis võimalikke probleeme iseseisvalt uurima ja lahendama.
Üksikasjalik teave ühendamise, seadete muutmise ja muudatuste kohta on esitatud veebisaidil " https://tasmota.github.io/docs/ "
kirjeldus
Nutilüliti NOUS D2T, millele on installitud Tasmota avatud lähtekoodiga tarkvara (edaspidi lüliti) on mõeldud elektriseadmete automaatse ja käsitsi väljalülitamise korraldamiseks ruumis, kaugjuurdepääsu teel Wi-Fi võrgu kaudu, kasutades nutitelefoni või alates personaalarvutit veebiliidese kaudu. Side lülitiga on konfigureeritud Wi-Fi võrgu kaudu, mille jaoks kasutatakse juhtmevaba Wi-Fi adapterit. Lüliti on varustatud mehaanilise nupu ja seadme oleku valgusindikaatoriga. Seade on varustatud elektromehaanilise releega ja toetab Matter protokolli .
TÄHELEPANU: Nutipesa ühendamist wifi võrku ei saa garanteerida kõikidel juhtudel, kuna see sõltub paljudest tingimustest: sidekanali ja vahevõrgu seadmete kvaliteet, mobiilseadme mark ja mudel, versioon operatsioonisüsteemist jne.
ENNETAVAD MEETMED
- Lugege need juhised hoolikalt läbi.
- Kasutage toodet tehnilistel andmetelehel märgitud temperatuuri ja niiskuse piirides.
- Ärge paigaldage toodet soojusallikate, näiteks radiaatorite jms lähedusse.
- Ärge laske seadmel alla kukkuda ega mehaanilise koormuse alla.
- Ärge kasutage toote puhastamiseks keemiliselt aktiivseid ega abrasiivseid puhastusvahendeid. Kasutage niisket flanelllappi.
- Ärge koormake määratud võimsust üle. See võib põhjustada lühise ja elektrilöögi.
- Ärge võtke toodet ise lahti – seadme diagnostika ja remont tuleks läbi viia ainult sertifitseeritud teeninduskeskuses.
- Transpordist põhjustatud kahjustuste korral võtke asendamiseks ühendust müüjaga.
- Palun sisestage pistik õiges seisukorras pistikupessa ja hoidke seda lastele kättesaamatus kohas.
- Ohutuse tagamiseks sisestage pistik kasutamise ajal täielikult pistikupessa.
Disain ja juhtnupud
| № | Nimi | kirjeldus |
| 1 | Nupp | Lühike nupuvajutus lülitab seadme "SEES" ja "VÄLJAS". |
| 2 | Näitaja | Näitab seadme praegust olekut |
Paigaldamine
| Paigaldusprotseduur: | ||
| 1 | Ühendage lüliti, nagu on näidatud ühel elektriskeemidest. |
|
| 2 |
Märgistus:
|
|
| 3 | Kui installimine on lõppenud, on seade kasutamiseks valmis. | |
| Tähtis: | Veenduge, et valitud paigalduskohas olev WiFi-võrk oleks stabiilne ja piisaval tasemel. | |
Ühendus
Nous D2T lüliti ühendamiseks vajate nutitelefoni või personaalarvutit.
Lüliti ühendamine Wi-Fi-võrguga:
| 1 | Veenduge, et selle võrgu sagedusvahemik, millega seade ühendatakse, on 2,4 GHz, vastasel juhul ei saa lüliti ühendust, kuna seade ei ole loodud töötama 5 GHz Wi-Fi võrkudega; | |
| 2 | Ühendage seade võrku. Arvutis peaks võrkude loendisse ilmuma pääsupunkt "tasmota-xxxxxxx", kui pääsupunkti ei tuvastata, peate vastavalt punktile 11 tegema "RESET" | |
| 3 | Ühendage pääsupunktiga "tasmota-xxxxxxx" | |
| 4 |
Pärast pääsupunktiga ühenduse loomist avaneb brauser automaatselt ja läheb lingile 192.168.4.1, kui seda toimingut ei järgnenud, peate avama brauseri ja sisestama aadressi sisestusväljale 192.168.4.1 |
|
| 5 |
Avanenud lehel peate valima oma pääsupunkti ja sisestama selle parooli allolevale väljale ning klõpsama nuppu "Salvesta". |
|
|
|
|
| 6 | Kui ühendus on lõppenud, kuvatakse silt "Õnnestunud ühendus Wi-Fi-ga" ja teie seadme aadress võrgus. | |
| 7 | Ühendage oma WiFi-võrguga ja minge punktis 6 määratud aadressile. | |
| 8 | Peate seadme toiteallika jaoks kalibreerima. Kuidas seda teha, leiate siit: https://tasmota.github.io/docs/Power-Monitoring-Calibration/ | |
| 9 |
Seade on kasutamiseks valmis. Mall ja reeglid on juba aktiveeritud, kuid kui vajate seda hiljem - leiate selle altpoolt |
|
|
|
|
| 10 |
{"NAME":"Ei ole D1T","GPIO":[32,1,9312,1,1,320,1,1,9313,8160,3200,544,1,1,1,1,0,1,1,1,0,0, 1,1,0,0,0,0,1,1,4736,1,1,0,0,1]"FLAG":0"BAAS":1}Mall tuleb sisestada väljale "Mall", märkida ruut "Aktiveeri" ja salvestada muudatused:
|
|
| 11 |
Seadme tehaseseadetele lähtestamiseks peate tegema järgmist. Ühendage seade 6 korda vooluvõrgust lahti ja eemaldage ning jätke see 7. korda põlema – LED peaks vilkuma, mis tähendab, et seade on uuesti vooluvõrku ühendamiseks valmis; kui teil on juurdepääs veebiliidesele, tippige konsooli " reset 1" ja vajutage "enter" |
|
| 12 |
Seadme ühendamiseks targa kodu süsteemidega Matter protokolli abil lugege palun järgmist teavet: |
|
|
Tasmota on väga laiendatav ja paindlik programm, mida saab integreerida: Alexa, AWS IoT, Domoticz, Home Assistant, Homebridge, HomeSeer, IP Symcon, KNX, NodeRed, nymea, OctoPrint, openHAB, Otto, IOBroker, Mozilla WebThings Adapter, SmartThings, Tasmohab, Homematic ip тощо. lisateabe saamiseks vaadake siit: https://tasmota.github.io/docs/Integrations/ |
||
NÁVOD NA OBSLUHU
POZNÁMKA: Tasmota nie je komerčný produkt a podpora je obmedzená. Mali by ste byť pripravení skúmať a riešiť potenciálne problémy sami.
Podrobné informácie o pripojení, zmene nastavení a úpravách sú uvedené na webovej stránke " https://tasmota.github.io/docs/ "
popis
Inteligentný vypínač NOUS D2T s nainštalovaným open source softvérom Tasmota (ďalej len vypínač) je určený na organizáciu automatického a manuálneho vypínania elektrických spotrebičov v miestnosti, vzdialeným prístupom cez Wi-Fi sieť, pomocou smartfónu alebo z osobný počítač cez webové rozhranie. Komunikácia s prepínačom sa konfiguruje cez Wi-Fi sieť, na čo slúži bezdrôtový Wi-Fi adaptér. Vypínač je vybavený mechanickým tlačidlom a svetelnou signalizáciou stavu zariadenia. Zariadenie je vybavené elektromechanickým relé a podporuje protokol Matter .
POZOR: Pripojenie inteligentnej zásuvky k sieti Wi-Fi nie je možné zaručiť vo všetkých prípadoch, pretože závisí od mnohých podmienok: kvalita komunikačného kanála a medziľahlého sieťového vybavenia, značka a model mobilného zariadenia, verzia operačného systému atď.
PREVENTÍVNE OPATRENIA
- Pozorne si prečítajte tieto pokyny.
- Výrobok používajte v rámci teplotných a vlhkostných limitov uvedených v technickom liste.
- Neinštalujte výrobok v blízkosti zdrojov tepla, ako sú radiátory atď.
- Nedovoľte, aby zariadenie spadlo alebo bolo vystavené mechanickému namáhaniu.
- Na čistenie výrobku nepoužívajte chemicky aktívne alebo abrazívne čistiace prostriedky. Použite vlhkú flanelovú handričku.
- Nepreťažujte uvedenú kapacitu. Môže to spôsobiť skrat a úraz elektrickým prúdom.
- Výrobok sami nerozoberajte - diagnostika a oprava zariadenia by sa mala vykonávať iba v certifikovanom servisnom stredisku.
- V prípade poškodenia spôsobeného prepravou kontaktujte predajcu so žiadosťou o výmenu.
- Zasuňte zástrčku do zásuvky v správnom stave a uchovávajte ju mimo dosahu detí.
- Z bezpečnostných dôvodov počas používania úplne zasuňte zástrčku do zásuvky.
Dizajn a ovládanie
| № | Meno | popis |
| 1 | Tlačidlo | Krátkym stlačením tlačidla sa prístroj prepne do polohy "ON" "OFF". |
| 2 | Indikátor | Zobrazuje aktuálny stav zariadenia |
Inštalácia
| Postup inštalácie: | ||
| 1 | Pripojte spínač tak, ako je znázornené na jednej z elektrických schém. |
|
| 2 |
Značenie:
|
|
| 3 | Po dokončení inštalácie je zariadenie pripravené na použitie. | |
| Dôležité: | Uistite sa, že sieť Wi-Fi vo vybranom mieste inštalácie je stabilná a má dostatočnú úroveň. | |
Pripojenie
Na pripojenie prepínača Nous D2T potrebujete smartfón alebo osobný počítač.
Ako pripojiť prepínač k sieti Wi-Fi:
| 1 | Uistite sa, že frekvenčný rozsah siete, ku ktorej bude zariadenie pripojené, je 2,4 GHz, inak sa prepínač nepripojí, pretože zariadenie nie je určené na prácu s 5 GHz sieťami Wi-Fi; | |
| 2 | Pripojte zariadenie k sieti. Na PC by sa mal v zozname sietí objaviť prístupový bod „tasmota-xxxxxxx“, ak sa prístupový bod nezistí, treba urobiť „RESET“ podľa bodu 11. | |
| 3 | Pripojte sa k prístupovému bodu "tasmota-xxxxxxx" | |
| 4 |
Po pripojení k prístupovému bodu sa prehliadač automaticky otvorí a prejde na odkaz 192.168.4.1, ak táto operácia nenasleduje, musíte otvoriť prehliadač a do poľa na zadanie adresy zadať 192.168.4.1 |
|
| 5 |
Na otvorenej stránke musíte vybrať svoj prístupový bod a zadať jeho heslo do poľa nižšie a kliknúť na „Uložiť“ |
|
|
|
|
| 6 | Po dokončení pripojenia sa zobrazí nápis „Úspešné pripojenie k Wi-Fi“ a adresa vášho zariadenia v sieti. | |
| 7 | Pripojte sa k svojej sieti Wi-Fi a prejdite na adresu, ktorá bola uvedená v bode 6. | |
| 8 | Budete musieť kalibrovať zariadenie pre zdroj napájania. Ako to urobiť, nájdete tu: https://tasmota.github.io/docs/Power-Monitoring-Calibration/ | |
| 9 |
Zariadenie je pripravené na použitie. Šablóna a pravidlá sú už aktivované, ale ak ich budete potrebovať neskôr, nájdete ich nižšie |
|
|
|
|
| 10 |
{"NAME":"No tak D1T","GPIO":[32,1,9312,1,1,320,1,1,9313,8160,3200,544,1,1,1,1,0,1,1,1,0,0, 1,1,0,0,0,0,1,1,4736,1,1,0,0,1],"FLAG":0,"BASE":1}Šablónu je potrebné zadať do poľa „Šablóna“, začiarknite políčko „Aktivovať“ a uložte zmeny:
|
|
| 11 |
Ak chcete obnoviť výrobné nastavenia zariadenia, musíte: Zapojte a odpojte zariadenie 6-krát a nechajte ho zapnuté po siedmykrát - LED by mala začať blikať, čo znamená, že je pripravené na opätovné zapojenie; ak máte prístup k webovému rozhraniu, napíšte do konzoly „ reset 1“ a stlačte „enter“ |
|
| 12 |
Ak chcete pripojiť zariadenie k systémom inteligentnej domácnosti pomocou protokolu Matter , prečítajte si nasledujúce informácie: |
|
|
Tasmota je vysoko rozšíriteľný a flexibilný program, ktorý možno integrovať s: Alexa, AWS IoT, Domoticz, Home Assistant, Homebridge, HomeSeer, IP Symcon, KNX, NodeRed, nymea, OctoPrint, openHAB, Otto, IOBroker, Mozilla WebThings Adapter, SmartThings, Tasmohab, Homematic ip atď. viac informácií nájdete tu: https://tasmota.github.io/docs/Integrations/ |
||
MANUAL DE OPERARE
NOTĂ: Tasmota nu este un produs comercial și suportul este limitat. Ar trebui să fii pregătit să cercetezi și să rezolvi potențialele probleme pe cont propriu.
Informații detaliate despre conectare, modificarea setărilor și modificările sunt prezentate pe site-ul web " https://tasmota.github.io/docs/ "
descriere
Comutatorul inteligent NOUS D2T cu software-ul open source Tasmota instalat (denumit în continuare comutator) este conceput pentru a organiza oprirea automată și manuală a aparatelor electrice din cameră, prin acces de la distanță printr-o rețea Wi-Fi, folosind un smartphone sau de la un computer personal prin interfața Web. Comunicarea cu comutatorul este configurată printr-o rețea Wi-Fi, pentru care se folosește un adaptor Wi-Fi fără fir. Comutatorul este echipat cu un buton mecanic și un indicator luminos al stării dispozitivului. Aparatul este echipat cu un releu electromecanic și acceptă protocolul Matter .
ATENȚIE: Conectarea prizei inteligente la rețeaua Wi-Fi nu poate fi garantată în toate cazurile, deoarece depinde de multe condiții: calitatea canalului de comunicație și a echipamentelor intermediare de rețea, marca și modelul dispozitivului mobil, versiunea a sistemului de operare etc.
MĂSURI PREVENTIVE
- Citiți cu atenție aceste instrucțiuni.
- Utilizați produsul în limitele de temperatură și umiditate specificate în fișa tehnică.
- Nu instalați produsul în apropierea surselor de căldură, cum ar fi calorifere etc.
- Nu lăsați dispozitivul să cadă sau să fie supus la solicitări mecanice.
- Nu utilizați agenți de curățare chimic activi sau abrazivi pentru curățarea produsului. Utilizați o cârpă de flanel umedă.
- Nu supraîncărcați capacitatea specificată. Acest lucru poate cauza un scurtcircuit și șoc electric.
- Nu dezasamblați singur produsul - diagnosticarea și repararea dispozitivului trebuie efectuate numai la un centru de service autorizat.
- Vă rugăm să contactați vânzătorul pentru o înlocuire dacă există daune cauzate de transport.
- Vă rugăm să introduceți ștecherul în priză în stare corespunzătoare și să-l țineți departe de copii.
- Din motive de siguranță, introduceți complet ștecherul în priză în timpul utilizării.
Design și controale
| № | Nume | descriere |
| 1 | Buton | O apăsare scurtă a butonului comută dispozitivul „ON” „OFF”. |
| 2 | Indicator | Afișează starea curentă a dispozitivului |
Instalare
| Procedura de instalare: | ||
| 1 | Conectați întrerupătorul așa cum se arată în una dintre schemele electrice. |
|
| 2 |
Marcare:
|
|
| 3 | Când instalarea este finalizată, dispozitivul este gata de utilizare. | |
| Important: | Asigurați-vă că rețeaua Wi-Fi din locația de instalare selectată este stabilă și are un nivel suficient. | |
Conexiune
Pentru a conecta comutatorul Nous D2T, aveți nevoie de un smartphone sau de un computer personal.
Cum se conectează comutatorul la o rețea Wi-Fi:
| 1 | Asigurați-vă că intervalul de frecvență al rețelei la care dispozitivul va fi conectat este de 2,4 GHz, altfel comutatorul nu se va conecta, deoarece dispozitivul nu este proiectat să funcționeze cu rețele Wi-Fi de 5 GHz; | |
| 2 | Conectați dispozitivul la rețea. Pe PC, punctul de acces „tasmota-xxxxxxx” ar trebui să apară în lista de rețele, dacă punctul de acces nu este detectat, trebuie să faceți o „RESETARE” conform punctului 11 | |
| 3 | Conectați-vă la punctul de acces „tasmota-xxxxxxx” | |
| 4 |
După conectarea la punctul de acces, browserul se va deschide automat și va merge la linkul 192.168.4.1, dacă această operație nu a urmat, atunci trebuie să deschideți browserul și să introduceți 192.168.4.1 în câmpul de introducere a adresei. |
|
| 5 |
Pe pagina deschisă, trebuie să selectați punctul de acces și să introduceți parola acestuia în câmpul de mai jos și să faceți clic pe „Salvați” |
|
|
|
|
| 6 | Când conexiunea este finalizată, va apărea o inscripție care menționează „Conexiune reușită la Wi-Fi” și adresa dispozitivului dvs. în rețea. | |
| 7 | Conectați-vă la rețeaua dvs. Wi-Fi și mergeți la adresa specificată la punctul 6. | |
| 8 | Va trebui să calibrați dispozitivul pentru sursa de alimentare. Puteți găsi cum să faceți acest lucru aici: https://tasmota.github.io/docs/Power-Monitoring-Calibration/ | |
| 9 |
Dispozitivul este gata de utilizare. Șablonul și regulile sunt deja activate, dar dacă aveți nevoie de el mai târziu - îl puteți găsi mai jos |
|
|
|
|
| 10 |
{"NAME":"Noi D1T","GPIO":[32,1,9312,1,1,320,1,1,9313,8160,3200,544,1,1,1,1,0,1,1,1,0,0, 1,1,0,0,0,0,1,1,4736,1,1,0,0,1],"FLAG":0,"BASE":1}Șablonul trebuie introdus în câmpul „Șablon”, bifați caseta „Activare” și salvați modificările:
|
|
| 11 |
Pentru a reseta dispozitivul la setările din fabrică, trebuie să: Conectați și deconectați dispozitivul de 6 ori și lăsați-l pornit pentru a 7-a oară - LED-ul ar trebui să înceapă să clipească, ceea ce înseamnă că este gata să fie conectat din nou; dacă aveți acces la interfața web, tastați „ reset 1” în consolă și apăsați „enter” |
|
| 12 |
Pentru a conecta dispozitivul la sistemele smart home folosind protocolul Matter , vă rugăm să citiți următoarele informații: |
|
|
Tasmota este un program extrem de extensibil și flexibil, care poate fi integrat cu: Alexa, AWS IoT, Domoticz, Home Assistant, Homebridge, HomeSeer, IP Symcon, KNX, NodeRed, nymea, OctoPrint, openHAB, Otto, IOBroker, Mozilla WebThings Adapter, SmartThings, Tasmohab, Homematic ip тощо. pentru mai multe informații vezi aici: https://tasmota.github.io/docs/Integrations/ |
||
NÁVOD K OBSLUZE
POZNÁMKA: Tasmota není komerční produkt a podpora je omezená. Měli byste být připraveni zkoumat a řešit potenciální problémy sami.
Podrobné informace o připojení, změně nastavení a úpravách jsou uvedeny na webu " https://tasmota.github.io/docs/ "
popis
Chytrý vypínač NOUS D2T s nainstalovaným open source softwarem Tasmota (dále jen vypínač) je určen k organizaci automatického a ručního vypínání elektrických spotřebičů v místnosti, vzdáleným přístupem přes Wi-Fi síť, pomocí chytrého telefonu nebo z osobního počítače přes webové rozhraní. Komunikace s přepínačem se konfiguruje přes Wi-Fi síť, k čemuž slouží bezdrátový Wi-Fi adaptér. Vypínač je vybaven mechanickým tlačítkem a světelnou indikací stavu zařízení. Zařízení je vybaveno elektromechanickým relé a podporuje protokol Matter .
POZOR: Připojení chytré zásuvky k síti Wi-Fi nelze zaručit ve všech případech, protože závisí na mnoha podmínkách: kvalita komunikačního kanálu a mezilehlého síťového vybavení, značka a model mobilního zařízení, verze operačního systému atd.
PREVENTIVNÍ OPATŘENÍ
- Přečtěte si pozorně tyto pokyny.
- Výrobek používejte v mezích teploty a vlhkosti uvedených v technickém listu.
- Neinstalujte výrobek v blízkosti zdrojů tepla, jako jsou radiátory atd.
- Nedovolte, aby zařízení spadlo nebo bylo vystaveno mechanickému namáhání.
- K čištění výrobku nepoužívejte chemicky aktivní nebo abrazivní čisticí prostředky. Použijte vlhký flanelový hadřík.
- Nepřetěžujte uvedenou kapacitu. Mohlo by dojít ke zkratu a úrazu elektrickým proudem.
- Výrobek sami nerozebírejte - diagnostiku a opravu zařízení provádějte pouze v certifikovaném servisním středisku.
- Pokud dojde k poškození způsobenému přepravou, kontaktujte prodejce s žádostí o výměnu.
- Zasuňte prosím zástrčku do zásuvky ve správném stavu a uchovávejte ji mimo dosah dětí.
- Z bezpečnostních důvodů během používání zcela zasuňte zástrčku do zásuvky.
Design a ovládání
| № | Jméno | popis |
| 1 | Tlačítko | Krátkým stisknutím tlačítka se zařízení "ON" "OFF". |
| 2 | Indikátor | Zobrazuje aktuální stav zařízení |
Instalace
| Postup instalace: | ||
| 1 | Připojte spínač podle jednoho z elektrických schémat. |
|
| 2 |
Označení:
|
|
| 3 | Po dokončení instalace je zařízení připraveno k použití. | |
| Důležité: | Ujistěte se, že Wi-Fi síť ve vybraném místě instalace je stabilní a má dostatečnou úroveň. | |
Spojení
Pro připojení přepínače Nous D2T potřebujete chytrý telefon nebo osobní počítač.
Jak připojit přepínač k síti Wi-Fi:
| 1 | Ujistěte se, že frekvenční rozsah sítě, ke které bude zařízení připojeno, je 2,4 GHz, jinak se přepínač nepřipojí, protože zařízení není navrženo pro práci s 5 GHz sítěmi Wi-Fi; | |
| 2 | Připojte zařízení k síti. Na PC by se měl v seznamu sítí objevit přístupový bod "tasmota-xxxxxxx", pokud přístupový bod není detekován, je třeba provést "RESET" podle bodu 11. | |
| 3 | Připojte se k přístupovému bodu "tasmota-xxxxxxx" | |
| 4 |
Po připojení k přístupovému bodu se prohlížeč automaticky otevře a přejde na odkaz 192.168.4.1, pokud tato operace neproběhla, musíte otevřít prohlížeč a do pole pro zadání adresy zadat 192.168.4.1 |
|
| 5 |
Na otevřené stránce musíte vybrat svůj přístupový bod a zadat jeho heslo do pole níže a kliknout na "Uložit" |
|
|
|
|
| 6 | Po dokončení připojení se zobrazí nápis „Úspěšné připojení k Wi-Fi“ a adresa vašeho zařízení v síti. | |
| 7 | Připojte se k síti Wi-Fi a přejděte na adresu, která byla zadána v bodě 6. | |
| 8 | Budete muset zkalibrovat zařízení pro zdroj napájení. Jak to udělat, najdete zde: https://tasmota.github.io/docs/Power-Monitoring-Calibration/ | |
| 9 |
Zařízení je připraveno k použití. Šablona a pravidla jsou již aktivovány, ale pokud je budete potřebovat později – najdete je níže |
|
|
|
|
| 10 |
{"JMÉNO":"Nous D1T","GPIO":[32,1,9312,1,1,320,1,1,9313,8160,3200,544,1,1,1,1,0,1,1,1,0,0, 1,1,0,0,0,0,1,1,4736,1,1,0,0,1],"FLAG":0,"BASE":1}Šablonu je třeba zadat do pole "Šablona", zaškrtněte políčko "Aktivovat" a uložte změny:
|
|
| 11 |
Chcete-li obnovit tovární nastavení zařízení, musíte: Zapojte a odpojte zařízení 6krát a nechte jej zapnuté po sedmé - LED by měla začít blikat, což znamená, že je připraveno k opětovnému zapojení; pokud máte přístup k webovému rozhraní, napište do konzole „ reset 1“ a stiskněte „enter“ |
|
| 12 |
Chcete-li připojit zařízení k systémům chytré domácnosti pomocí protokolu Matter , přečtěte si prosím následující informace: |
|
|
Tasmota je vysoce rozšiřitelný a flexibilní program, který lze integrovat s: Alexa, AWS IoT, Domoticz, Home Assistant, Homebridge, HomeSeer, IP Symcon, KNX, NodeRed, nymea, OctoPrint, openHAB, Otto, IOBroker, Mozilla WebThings Adapter, SmartThings, Tasmohab, Homematic ip atd. více informací naleznete zde: https://tasmota.github.io/docs/Integrations/ |
||