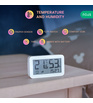


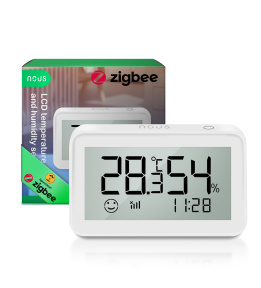

If you are looking for a smart sensor that can monitor and control the temperature and humidity of your home, you should check out the NOUS E6 LCD ZigBee Smart Temperature and Humidity Sensor. This is an advanced device that can measure the room climate with high accuracy and display it on a 2.7" LCD screen. You can also connect it to your phone or voice assistant via the NOUS E1 or NOUS E7 gateway and get alerts or activate automation based on the sensor data.
The NOUS E6 sensor works with NOUS Smart app and Tuya Smart Life app, as well as with Google Home and Alexa. You can also use it with Home Assistant via zigbee2mqtt and enjoy the benefits of a cloudless smart home.

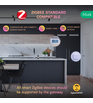
The NOUS E6 sensor is small and lightweight, and has a magnet back side that allows you to place it on any metal surface without any glue. It runs on 2* AAA batteries that can last up to 12 months. It is compatible with ZigBee protocol, which means it can communicate with other smart devices in your home and create a mesh network for better performance.
Zigbee is a wireless smart home technology that allows devices to communicate with each other in a mesh network. Zigbee is one of the best protocols for smart home because it has several advantages over Wi-Fi or Bluetooth. Some of these advantages are:


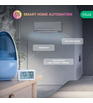
The NOUS E6 sensor is one of the best smart home devices you can find on the market. It is a smart gadget that can make your home more comfortable and efficient. It is a smart device that can work with your existing smart home solutions and technologies. It is a smart home for Alexa and Google Home users. It is a smart house technology that can enhance your lifestyle.

We offer free shipping and 2 year warranty for the NOUS E6 sensor. Order yours today and enjoy the benefits of a smart home temperature sensor.
| Main settings | |
|---|---|
| Brand | Nous |
| Material | ABS |
| Certificate | CE, RoHS |
| Compatibility | ZigBee gateway E1 is required |
| Special features | LCD Screen 2.7" |
| Specifications | |
| Device dimensions | 75*17*45mm |
| Battery type | 3V (2* AAA batteries) |
| Operating temperature | -10℃+55℃ |
| Device weight | 75g |
| Network | |
| Communication standard | IEEE 802.15.4 |
| Protocol | Zigbee 3.0 |
| System requirements | Android 4.0 or higher, IOS 8.0 or higher |
| Control from a smartphone | App: Nous Smart Home |
| Compatibility with voice assistants | Alexa, Google Assistant |
INSTRUCTION MANUAL
Smart ZigBee LCD Temperature and Humidity Sensor E6
You will need Nous Smart Home App. Scan the QR code or download it from direct link

PRECAUTIONS
- Read this manual carefully.
- Use the product within the temperature and humidity limits specified in the technical data sheet.
- Do not install the product near heat sources, such as radiators, etc.
- Do not allow the device to fall and be subject to mechanical loads.
- Do not use chemically active and abrasive detergents to clean the product. Use a damp flannel cloth for this.
- Do not disassemble the product yourself - diagnostics and repair of the device must be carried out only in a certified service center.
Register with your mobile number/E-mail then login
ZigBee Hub/Gateway E1 is required
Know about the sensor

Button
- Enter configuration mode: Press and hold the button for 5 seconds until the screen blinks, the device will enter configuration mode
- Shift C/F: Double-click to cycle switching between °С and °F temperature unit
- Trigger to report: Single-click to report its current status to cloud server

Screen

On the back

Quick Installation Guide
Note: the smart gateway must be added first before adding the sub-device.
1.Power on the sensor
1).Open the battery cover

2).Insert the battery into the battery compartment
(please note battery positive and negative)

3).Close the battery cover

2.You will need Nous ZigBee GateWay/Hub. Open “Nous Smart Home” app, Enter the gateway homepage and click “Add subdevice”

3.Press the reset button for 5 seconds, till the screen blink, then click the confirm button which shows and "LED already blink" follow the in-app instructions to connect the sensor to your gateway.


4.Waiting for a few seconds, This device is added successfully and you may rename it. Click “Done” to finish the setting.

5.Put it where you need it.
6.Nous Smart Home app settings:
1).The temperature unit setting


2).The temperature update sensitivity setting


3).Limits setting of Low temperature alarm and High temperature alarm.


4).Enable/disable alarm setting


INSTRUKCJA OBSŁUGI
Inteligentny czujnik temperatury i wilgotności LCD ZigBee E6
Będziesz potrzebować aplikacji Nous Smart Home. Zeskanuj kod QR lub pobierz go z bezpośredniego linku
ŚRODKI OSTROŻNOŚCI
- Przeczytaj uważnie niniejszą instrukcję.
- Używaj produktu w zakresie temperatur i wilgotności podanych w karcie technicznej.
- Nie instaluj produktu w pobliżu źródeł ciepła, takich jak grzejniki itp.
- Nie dopuścić do upadku urządzenia i narażania go na obciążenia mechaniczne.
- Do czyszczenia produktu nie należy używać chemicznie aktywnych i ściernych detergentów. Użyj do tego wilgotnej szmatki flanelowej.
- Nie demontuj produktu samodzielnie – diagnostykę i naprawę urządzenia należy przeprowadzać wyłącznie w certyfikowanym serwisie.
Zarejestruj się, podając swój numer telefonu komórkowego/e-mail, a następnie zaloguj się
Wymagany jest koncentrator/bramka ZigBee E1
Wiedz o czujniku
Przycisk
- Wejście do trybu konfiguracji: Naciśnij i przytrzymaj przycisk przez 5 sekund, aż ekran zacznie migać, urządzenie przejdzie do trybu konfiguracji
- Shift C/F: Kliknij dwukrotnie, aby przełączać pomiędzy jednostkami temperatury °С i °F
- Wyzwalacz do raportu: Jedno kliknięcie, aby zgłosić bieżący stan do serwera w chmurze
Ekran
Z tyłu
przewodnik szybkiej instalacji
Uwaga: przed dodaniem urządzenia podrzędnego należy najpierw dodać inteligentną bramkę.
1. Włącz czujnik
1). Otwórz pokrywę baterii
2). Włóż baterię do komory baterii
(zwróć uwagę na dodatni i ujemny akumulator)
3). Zamknij pokrywę baterii
2. Będziesz potrzebował Nous ZigBee GateWay/Hub. Otwórz aplikację „Nous Smart Home”, wejdź na stronę główną bramy i kliknij „Dodaj urządzenie podrzędne”
3. Naciśnij przycisk resetowania na 5 sekund, aż ekran zacznie migać, a następnie kliknij przycisk potwierdzenia, na którym pojawi się komunikat „LED już miga”. Postępuj zgodnie z instrukcjami w aplikacji, aby podłączyć czujnik do bramki.
4. Poczekaj kilka sekund. To urządzenie zostało pomyślnie dodane i możesz zmienić jego nazwę. Kliknij „Gotowe”, aby zakończyć ustawienie.
5. Umieść go tam, gdzie go potrzebujesz.
6. Ustawienia aplikacji Nous Smart Home:
1).Ustawienie jednostki temperatury
2). Ustawienie czułości aktualizacji temperatury
3). Ogranicza ustawienie alarmu niskiej temperatury i alarmu wysokiej temperatury.
4). Włącz/wyłącz ustawienie alarmu
ІНСТРУКЦІЯ З ЕКСПЛУАТАЦІЇ
Smart ZigBee LCD датчик температури та вологості E6
Вам знадобиться додаток Nous Smart Home. Відскануйте QR-код або завантажте його за прямим посиланням
ЗАПОБІЖНІ ЗАХОДИ
- Уважно прочитайте цей посібник.
- Використовуйте продукт у межах температури та вологості, зазначених у технічному паспорті.
- Не встановлюйте виріб поблизу джерел тепла, таких як радіатори тощо.
- Не допускайте падіння пристрою та механічних навантажень.
- Не використовуйте для чищення виробу хімічно активні та абразивні миючі засоби. Використовуйте для цього вологу фланелеву серветку.
- Не розбирайте виріб самостійно - діагностику і ремонт пристрою необхідно проводити тільки в сертифікованому сервісному центрі.
Зареєструйтеся за допомогою свого номера мобільного телефону/електронної пошти, а потім увійдіть
Потрібен ZigBee Hub/Gateway E1
Дізнайтеся про датчик
Кнопка
- Увійти в режим конфігурації: натисніть і утримуйте кнопку протягом 5 секунд, поки екран не почне блимати, пристрій увійде в режим конфігурації
- Зсув C/F: двічі клацніть для циклічного перемикання між одиницями температури °С і °F
- Тригер для звітування: натисніть один раз, щоб повідомити про поточний стан на хмарний сервер
Екран
На спині
Посібник із швидкого встановлення
Примітка: інтелектуальний шлюз потрібно додати спочатку перед додаванням підпристрою.
1. Увімкніть датчик
1). Відкрийте кришку акумулятора
2). Вставте батарею у відсік для батареї
(зверніть увагу на позитивний і негативний полюси батареї)
3).Закрийте кришку акумулятора
2. Вам знадобиться Nous ZigBee GateWay/Hub. Відкрийте програму «Nous Smart Home», увійдіть на домашню сторінку шлюзу та натисніть «Додати підпристрій»
3.Натисніть кнопку скидання протягом 5 секунд, доки екран не почне блимати, потім натисніть кнопку підтвердження, на якій з’явиться напис «Світлодіод уже блимає», дотримуйтесь інструкцій у додатку, щоб під’єднати датчик до шлюзу.
4. Зачекайте кілька секунд, цей пристрій успішно додано, і ви можете перейменувати його. Натисніть «Готово», щоб завершити налаштування.
5. Покладіть його там, де вам це потрібно.
6. Налаштування програми Nous Smart Home:
1). Налаштування одиниці вимірювання температури
2). Налаштування чутливості оновлення температури
3).Обмежує налаштування сигналізації низької температури та сигналізації високої температури.
4).Увімкнути/вимкнути налаштування будильника
BEDIENUNGSANLEITUNG
Smart ZigBee LCD Temperatur- und Feuchtigkeitssensor E6
Sie benötigen die Nous Smart Home App. Scannen Sie den QR-Code oder laden Sie ihn über den Direktlink herunter
VORSICHTSMASSNAHMEN
- Lesen Sie dieses Handbuch sorgfältig durch.
- Verwenden Sie das Produkt innerhalb der im technischen Datenblatt angegebenen Temperatur- und Feuchtigkeitsgrenzen.
- Installieren Sie das Produkt nicht in der Nähe von Wärmequellen wie Heizkörpern usw.
- Lassen Sie das Gerät nicht fallen und setzen Sie es keinen mechanischen Belastungen aus.
- Verwenden Sie zum Reinigen des Produkts keine chemisch aktiven und scheuernden Reinigungsmittel. Verwenden Sie hierfür ein feuchtes Flanelltuch.
- Zerlegen Sie das Produkt nicht selbst – Diagnose und Reparatur des Geräts dürfen nur in einem zertifizierten Servicecenter durchgeführt werden.
Registrieren Sie sich mit Ihrer Handynummer/E-Mail und melden Sie sich dann an
ZigBee Hub/Gateway E1 ist erforderlich
Wissenswertes zum Sensor
Taste
- Konfigurationsmodus aktivieren: Halten Sie die Taste 5 Sekunden lang gedrückt, bis der Bildschirm blinkt. Das Gerät wechselt dann in den Konfigurationsmodus.
- Umschaltzeit C/F: Doppelklicken Sie, um zwischen den Temperatureinheiten °С und °F umzuschalten.
- Auslöser zum Melden: Mit einem Klick wird der aktuelle Status an den Cloud-Server gemeldet.
Bildschirm
Auf dem Rücken
Schnellinstallationsanleitung
Hinweis: Vor dem Hinzufügen des Untergeräts muss zuerst das Smart Gateway hinzugefügt werden.
1.Schalten Sie den Sensor ein
1).Öffnen Sie die Batterieabdeckung
2).Legen Sie die Batterie in das Batteriefach ein
(bitte beachten Sie den Plus- und Minuspol der Batterie).
3).Schließen Sie die Batterieabdeckung
2. Sie benötigen Nous ZigBee GateWay/Hub. Öffnen Sie die App „Nous Smart Home“, rufen Sie die Gateway-Homepage auf und klicken Sie auf „Subgerät hinzufügen“.
3. Drücken Sie die Reset-Taste 5 Sekunden lang, bis der Bildschirm blinkt, und klicken Sie dann auf die Bestätigungsschaltfläche, die „LED blinkt bereits“ anzeigt. Folgen Sie den Anweisungen in der App, um den Sensor mit Ihrem Gateway zu verbinden.
4. Warten Sie einige Sekunden. Das Gerät wurde erfolgreich hinzugefügt und Sie können es umbenennen. Klicken Sie auf „Fertig“, um die Einstellung abzuschließen.
5. Platzieren Sie es dort, wo Sie es brauchen.
6. Unsere Smart Home-App-Einstellungen:
1).Die Temperatureinheitseinstellung
2).Die Temperatur-Update-Empfindlichkeitseinstellung
3).Grenzwerte für die Einstellung des Niedrigtemperaturalarms und des Hochtemperaturalarms.
4).Alarmeinstellung aktivieren/deaktivieren
MANUEL D'INSTRUCTIONS
Capteur de température et d'humidité LCD intelligent ZigBee E6
Vous aurez besoin de l’application Nous Smart Home. Scannez le code QR ou téléchargez-le à partir du lien direct
PRÉCAUTIONS
- Lisez attentivement ce manuel.
- Utiliser le produit dans les limites de température et d'humidité spécifiées dans la fiche technique.
- N'installez pas le produit à proximité de sources de chaleur, telles que des radiateurs, etc.
- Ne laissez pas l'appareil tomber et être soumis à des charges mécaniques.
- N'utilisez pas de détergents chimiquement actifs et abrasifs pour nettoyer le produit. Utilisez pour cela un chiffon de flanelle humide.
- Ne démontez pas le produit vous-même - le diagnostic et la réparation de l'appareil doivent être effectués uniquement dans un centre de service certifié.
Inscrivez-vous avec votre numéro de portable/E-mail puis connectez-vous
ZigBee Hub/Gateway E1 est requis
Connaître le capteur
Bouton
- Entrez en mode de configuration : appuyez et maintenez le bouton enfoncé pendant 5 secondes jusqu'à ce que l'écran clignote, l'appareil entrera en mode de configuration
- Shift C/F : double-cliquez pour basculer entre les unités de température °С et °F.
- Déclencheur de rapport : un simple clic pour signaler son état actuel au serveur cloud
Écran
Sur le dos
Guide d'installation rapide
Remarque : la passerelle intelligente doit d'abord être ajoutée avant d'ajouter le sous-appareil.
1. Allumez le capteur
1).Ouvrez le couvercle de la batterie
2).Insérez la batterie dans le compartiment de la batterie
(veuillez noter le positif et le négatif de la batterie).
3).Fermez le couvercle de la batterie
2.Vous aurez besoin de Nous ZigBee GateWay/Hub. Ouvrez l'application « Nous Smart Home », entrez dans la page d'accueil de la passerelle et cliquez sur « Ajouter un sous-appareil ».
3. Appuyez sur le bouton de réinitialisation pendant 5 secondes, jusqu'à ce que l'écran clignote, puis cliquez sur le bouton de confirmation qui s'affiche et « La LED clignote déjà », suivez les instructions dans l'application pour connecter le capteur à votre passerelle.
4.En attendant quelques secondes, cet appareil est ajouté avec succès et vous pouvez le renommer. Cliquez sur « Terminé » pour terminer le réglage.
5. Placez-le là où vous en avez besoin.
6.Paramètres de l'application Nous Smart Home :
1).Le réglage de l’unité de température
2).Le réglage de la sensibilité de mise à jour de la température
3) .Limites de réglage de l’alarme basse température et de l’alarme haute température.
4).Activer/désactiver le réglage de l'alarme
MANUALE DI ISTRUZIONI
Sensore di temperatura e umidità Smart ZigBee LCD E6 Sensore di temperatura e umidità Smart ZigBee LCD E6
Avrai bisogno dell'app Nous Smart Home. Scansiona il codice QR o scaricalo dal collegamento diretto
PRECAUZIONI
- Leggere attentamente questo manuale.
- Utilizzare il prodotto entro i limiti di temperatura e umidità specificati nella scheda tecnica.
- Non installare il prodotto vicino a fonti di calore, come radiatori, ecc.
- Non permettere che il dispositivo cada e sia soggetto a carichi meccanici.
- Non utilizzare detergenti chimicamente attivi e abrasivi per pulire il prodotto. A questo scopo utilizzare un panno di flanella umido.
- Non smontare il prodotto da soli: la diagnostica e la riparazione del dispositivo devono essere eseguite solo presso un centro di assistenza certificato.
Registrati con il tuo numero di cellulare/e-mail quindi effettua il login
È richiesto l'hub/gateway E1 ZigBee
Conoscere il sensore
Pulsante
- Accedere alla modalità di configurazione: tenere premuto il pulsante per 5 secondi finché lo schermo non lampeggia, il dispositivo entrerà in modalità di configurazione
- Shift C/F: fare doppio clic per passare ciclicamente dall'unità di temperatura °С a °F
- Trigger per segnalare: fare clic con un solo clic per segnalare il suo stato corrente al server cloud
Schermo
Sul retro
Guida all'installazione rapida
Nota: è necessario aggiungere lo smart gateway prima di aggiungere il sottodispositivo.
1.Accendere il sensore
1).Aprire il coperchio della batteria
2).Inserire la batteria nel vano batteria
(notare il positivo e il negativo della batteria)
3).Chiudere il coperchio della batteria
2.Avrai bisogno di Nous ZigBee GateWay/Hub. Apri l'app "Nous Smart Home", accedi alla home page del gateway e fai clic su "Aggiungi sottodispositivo"
3.Premere il pulsante di ripristino per 5 secondi, finché lo schermo non lampeggia, quindi fare clic sul pulsante di conferma che mostra e "LED già lampeggiante" seguire le istruzioni in-app per connettere il sensore al gateway.
4.Attendendo alcuni secondi, questo dispositivo viene aggiunto correttamente e puoi rinominarlo. Fare clic su "Fine" per completare l'impostazione.
5. Mettilo dove ti serve.
6.Impostazioni dell'app Nous Smart Home:
1).L'impostazione dell'unità di temperatura
2).L'impostazione della sensibilità dell'aggiornamento della temperatura
3).Impostazione dei limiti dell'allarme di bassa temperatura e dell'allarme di alta temperatura.
4).Abilitare/disabilitare l'impostazione dell'allarme
MANUAL DE INSTRUCCIONES
Sensor de temperatura y humedad Smart ZigBee LCD E6
Necesitará la aplicación Nous Smart Home. Escanea el código QR o descárgalo desde enlace directo
PRECAUCIONES
- Lea atentamente este manual.
- Utilice el producto dentro de los límites de temperatura y humedad especificados en la ficha técnica.
- No instale el producto cerca de fuentes de calor, como radiadores, etc.
- No permita que el dispositivo se caiga y esté sujeto a cargas mecánicas.
- No utilice detergentes químicamente activos y abrasivos para limpiar el producto. Utilice para ello un paño de franela húmedo.
- No desmonte el producto usted mismo: el diagnóstico y la reparación del dispositivo deben realizarse únicamente en un centro de servicio certificado.
Regístrese con su número de móvil/correo electrónico y luego inicie sesión
Se requiere ZigBee Hub/Gateway E1
Saber sobre el sensor
Botón
- Ingrese al modo de configuración: Mantenga presionado el botón durante 5 segundos hasta que la pantalla parpadee, el dispositivo ingresará al modo de configuración
- Shift C/F: haga doble clic para alternar entre la unidad de temperatura °С y °F
- Activador para informar: un solo clic para informar su estado actual al servidor en la nube
Pantalla
En la espalda
Guía de Instalación Rápida
Nota: primero se debe agregar la puerta de enlace inteligente antes de agregar el subdispositivo.
1.Encienda el sensor
1).Abra la tapa de la batería.
2). Inserte la batería en el compartimiento de la batería
(tenga en cuenta el positivo y el negativo de la batería).
3).Cierre la tapa de la batería.
2.Necesitará Nous ZigBee GateWay/Hub. Abra la aplicación "Nous Smart Home", ingrese a la página de inicio de la puerta de enlace y haga clic en "Agregar subdispositivo".
3. Presione el botón de reinicio durante 5 segundos, hasta que la pantalla parpadee, luego haga clic en el botón de confirmación que muestra "El LED ya parpadea" y siga las instrucciones de la aplicación para conectar el sensor a su puerta de enlace.
4.Esperando unos segundos, este dispositivo se agregó correctamente y puede cambiarle el nombre. Haga clic en "Listo" para finalizar la configuración.
5. Ponlo donde lo necesites.
6.Configuración de la aplicación Nous Smart Home:
1).El ajuste de la unidad de temperatura.
2).La configuración de sensibilidad de actualización de temperatura
3).Límites de configuración de alarma de baja temperatura y alarma de alta temperatura.
4).Activar/desactivar la configuración de alarma
MANUAL DE INSTRUCTIUNI
Smart ZigBee LCD senzor de temperatură și umiditate Smart ZigBee LCD E6
Veți avea nevoie de aplicația Nous Smart Home. Scanați codul QR sau descărcați-l de pe linkul direct
PRECAUȚII
- Citiți cu atenție acest manual.
- Utilizați produsul în limitele de temperatură și umiditate specificate în fișa tehnică.
- Nu instalați produsul în apropierea surselor de căldură, cum ar fi calorifere etc.
- Nu lăsați dispozitivul să cadă și să fie supus sarcinilor mecanice.
- Nu utilizați detergenți activi chimic și abrazivi pentru curățarea produsului. Utilizați o cârpă umedă de flanel pentru aceasta.
- Nu dezasamblați singur produsul - diagnosticarea și repararea dispozitivului trebuie efectuate numai într-un centru de service autorizat.
Înregistrează-te cu numărul tău de mobil/e-mail, apoi autentifică-te
ZigBee Hub/Gateway E1 este necesar
Aflați despre senzor
Buton
- Intrați în modul de configurare: apăsați și mențineți apăsat butonul timp de 5 secunde până când ecranul clipește, dispozitivul va intra în modul de configurare
- Shift C/F: Faceți dublu clic pentru a comuta între unitatea de temperatură °С și °F
- Declanșare pentru raportare: faceți un singur clic pentru a raporta starea sa actuală către serverul cloud
Ecran
Pe partea din spate
Ghid de Instalare Rapida
Notă: gateway-ul inteligent trebuie adăugat mai întâi înainte de adăugarea sub-dispozitivului.
1. Porniți senzorul
1).Deschideți capacul bateriei
2). Introduceți bateria în compartimentul bateriei
(vă rugăm să rețineți bateria pozitivă și negativă)
3). Închideți capacul bateriei
2.Veți avea nevoie de Nous ZigBee GateWay/Hub. Deschideți aplicația „Nous Smart Home”, intrați pe pagina de pornire a porții și faceți clic pe „Adăugați subdispozitiv”
3. Apăsați butonul de resetare timp de 5 secunde, până când ecranul clipește, apoi faceți clic pe butonul de confirmare care se afișează și „LED-ul clipește deja” urmați instrucțiunile din aplicație pentru a conecta senzorul la gateway.
4.Așteptând câteva secunde, acest dispozitiv este adăugat cu succes și îl puteți redenumi. Faceți clic pe „Terminat” pentru a finaliza setarea.
5.Pune-l acolo unde ai nevoie.
6. Noi setări ale aplicației Smart Home:
1).Setarea unității de temperatură
2).Setarea sensibilității de actualizare a temperaturii
3). Limitează setarea alarmei de temperatură scăzută și alarmă de temperatură ridicată.
4).Activați/dezactivați setarea alarmei
NÁVOD NA POUŽITIE
Smart ZigBee LCD snímač teploty a vlhkosti E6 Smart ZigBee LCD snímač teploty a vlhkosti E6
Budete potrebovať aplikáciu Nous Smart Home. Naskenujte QR kód alebo si ho stiahnite z priameho odkazu
PREVENCIA
- Pozorne si prečítajte tento návod.
- Výrobok používajte v rámci teplotných a vlhkostných limitov uvedených v technickom liste.
- Neinštalujte výrobok v blízkosti zdrojov tepla, ako sú radiátory atď.
- Nedovoľte, aby zariadenie spadlo a nebolo vystavené mechanickému zaťaženiu.
- Na čistenie výrobku nepoužívajte chemicky aktívne a abrazívne čistiace prostriedky. Použite na to vlhkú flanelovú handričku.
- Výrobok sami nerozoberajte - diagnostika a oprava zariadenia sa musí vykonávať iba v certifikovanom servisnom stredisku.
Zaregistrujte sa pomocou svojho mobilného čísla / e-mailu a potom sa prihláste
Vyžaduje sa ZigBee Hub/Gateway E1
Vedieť o senzore
Tlačidlo
- Vstup do konfiguračného režimu: Stlačte a podržte tlačidlo na 5 sekúnd, kým obrazovka nezačne blikať, zariadenie prejde do konfiguračného režimu
- Shift C/F: Dvojitým kliknutím prepínate medzi jednotkami teploty °С a °F
- Spustenie hlásenia: Jedným kliknutím nahlásite svoj aktuálny stav cloudovému serveru
Obrazovka
Na zadnej strane
Sprievodca rýchlou inštaláciou
Poznámka: Pred pridaním podzariadenia je potrebné najskôr pridať inteligentnú bránu.
1. Zapnite snímač
1).Otvorte kryt batérie
2. Vložte batériu do priehradky na batérie
(zaznamenajte kladný a záporný pól batérie)
3).Zatvorte kryt batérie
2. Budete potrebovať Nous ZigBee GateWay/Hub. Otvorte aplikáciu „Nous Smart Home“, prejdite na domovskú stránku brány a kliknite na „Pridať podzariadenie“
3. Stlačte tlačidlo reset na 5 sekúnd, kým obrazovka nezačne blikať, potom kliknite na tlačidlo potvrdenia, ktoré sa zobrazí a „LED už bliká“, postupujte podľa pokynov v aplikácii na pripojenie snímača k vašej bráne.
4. Počkajte niekoľko sekúnd, toto zariadenie sa úspešne pridalo a môžete ho premenovať. Kliknutím na „Hotovo“ dokončite nastavenie.
5. Umiestnite ho tam, kde ho potrebujete.
6. Nastavenia aplikácie Nous Smart Home:
1). Nastavenie jednotky teploty
2). Nastavenie citlivosti aktualizácie teploty
3). Obmedzuje nastavenie alarmu nízkej teploty a alarmu vysokej teploty.
4).Povoliť/zakázať nastavenie budíka
NÁVOD K POUŽITÍ
Smart ZigBee LCD snímač teploty a vlhkosti E6 Smart ZigBee LCD snímač teploty a vlhkosti E6
Budete potřebovat aplikaci Nous Smart Home. Naskenujte QR kód nebo si jej stáhněte z přímého odkazu
OPATŘENÍ
- Přečtěte si pozorně tento návod.
- Výrobek používejte v mezích teploty a vlhkosti uvedených v technickém listu.
- Neinstalujte výrobek v blízkosti zdrojů tepla, jako jsou radiátory atd.
- Nedovolte, aby zařízení spadlo a bylo vystaveno mechanickému zatížení.
- K čištění výrobku nepoužívejte chemicky aktivní a abrazivní čisticí prostředky. Použijte k tomu vlhký flanelový hadřík.
- Výrobek sami nerozebírejte - diagnostika a opravy zařízení musí být prováděny pouze v certifikovaném servisním středisku.
Zaregistrujte se pomocí svého mobilního čísla/e-mailu a poté se přihlaste
Je vyžadován ZigBee Hub/Gateway E1
Vědět o senzoru
Knoflík
- Vstup do konfiguračního režimu: Stiskněte a podržte tlačítko po dobu 5 sekund, dokud obrazovka nezačne blikat, zařízení přejde do konfiguračního režimu
- Shift C/F: Dvojitým kliknutím přepínáte mezi jednotkami teploty °С a °F
- Spustit hlášení: Jediným kliknutím nahlásíte aktuální stav cloudovému serveru
Obrazovka
Na zádech
Průvodce rychlou instalací
Poznámka: Před přidáním dílčího zařízení je třeba nejprve přidat inteligentní bránu.
1.Zapněte snímač
1).Otevřete kryt baterie
2. Vložte baterii do přihrádky na baterie
(poznamenejte si prosím kladný a záporný pól baterie)
3).Zavřete kryt baterie
2. Budete potřebovat Nous ZigBee GateWay/Hub. Otevřete aplikaci „Nous Smart Home“, přejděte na domovskou stránku brány a klikněte na „Přidat podzařízení“
3. Stiskněte tlačítko reset na 5 sekund, dokud obrazovka nezačne blikat, poté klikněte na potvrzovací tlačítko, které se zobrazí a „LED již bliká“, postupujte podle pokynů v aplikaci a připojte senzor k bráně.
4. Počkejte několik sekund, toto zařízení bylo úspěšně přidáno a můžete jej přejmenovat. Klikněte na „Hotovo“ pro dokončení nastavení.
5. Umístěte jej tam, kam potřebujete.
6. Nastavení aplikace Nous Smart Home:
1). Nastavení jednotky teploty
2) Nastavení citlivosti aktualizace teploty
3). Omezuje nastavení alarmu nízké teploty a alarmu vysoké teploty.
4). Povolit/zakázat nastavení budíku